
User guide
ClientBriefAI guide
Diagnose. Scope. Deliver. Measure.
Everything in ClientBriefAI: the AI Readiness Assessment, the SEO Audit, Data Cleanup, Implementation Scope, the AI Opportunity Assessment, the Business Case, the AI Policy Pack, the Client Portal, Impact Tracker, your workspace, BriefPilot, saving your work, HubSpot and your account.
Start here
Open ClientBriefAI and set up a client
ClientBriefAI takes one client from a readiness check to a scoped plan, a client-facing assessment and tracked results. Everything you do for one client is kept in that client's file in your clients folder.
-
Open it from the Command Center
Sign in at the Command Center and click Launch ClientBriefAI. It opens in its own tab, already signed in.
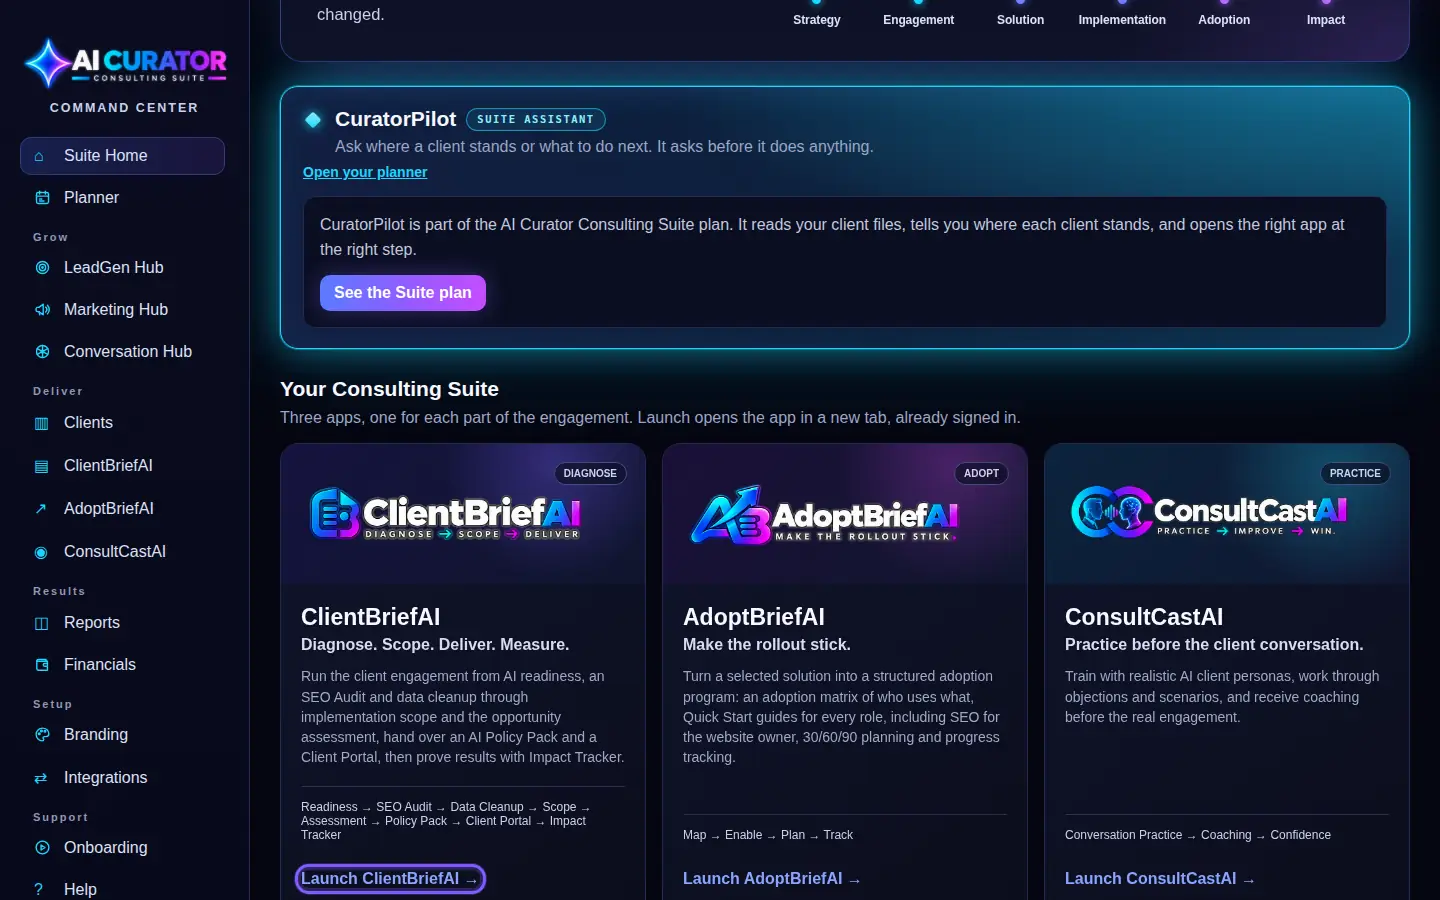
Launch opens ClientBriefAI in its own tab, already signed in. -
Find your way around the sidebar
Dashboard and Clients sit at the top. Diagnose holds Discovery Kits, AI Readiness Assessment and SEO Audit. Scope holds Implementation Scope, AI Opportunity Assessment and Business Case. Deliver holds Data Cleanup, AI Policy Pack, Automations (Full Practice and Full Plus) and Client Portal. Measure holds Impact Tracker (Full Plus only) and Reports. Resources holds AI Tool Library and Help & Guide, and Support holds Privacy Notice and Send Feedback. The phase line above each working page shows the same four phases: Diagnose, Scope, Deliver and Measure.
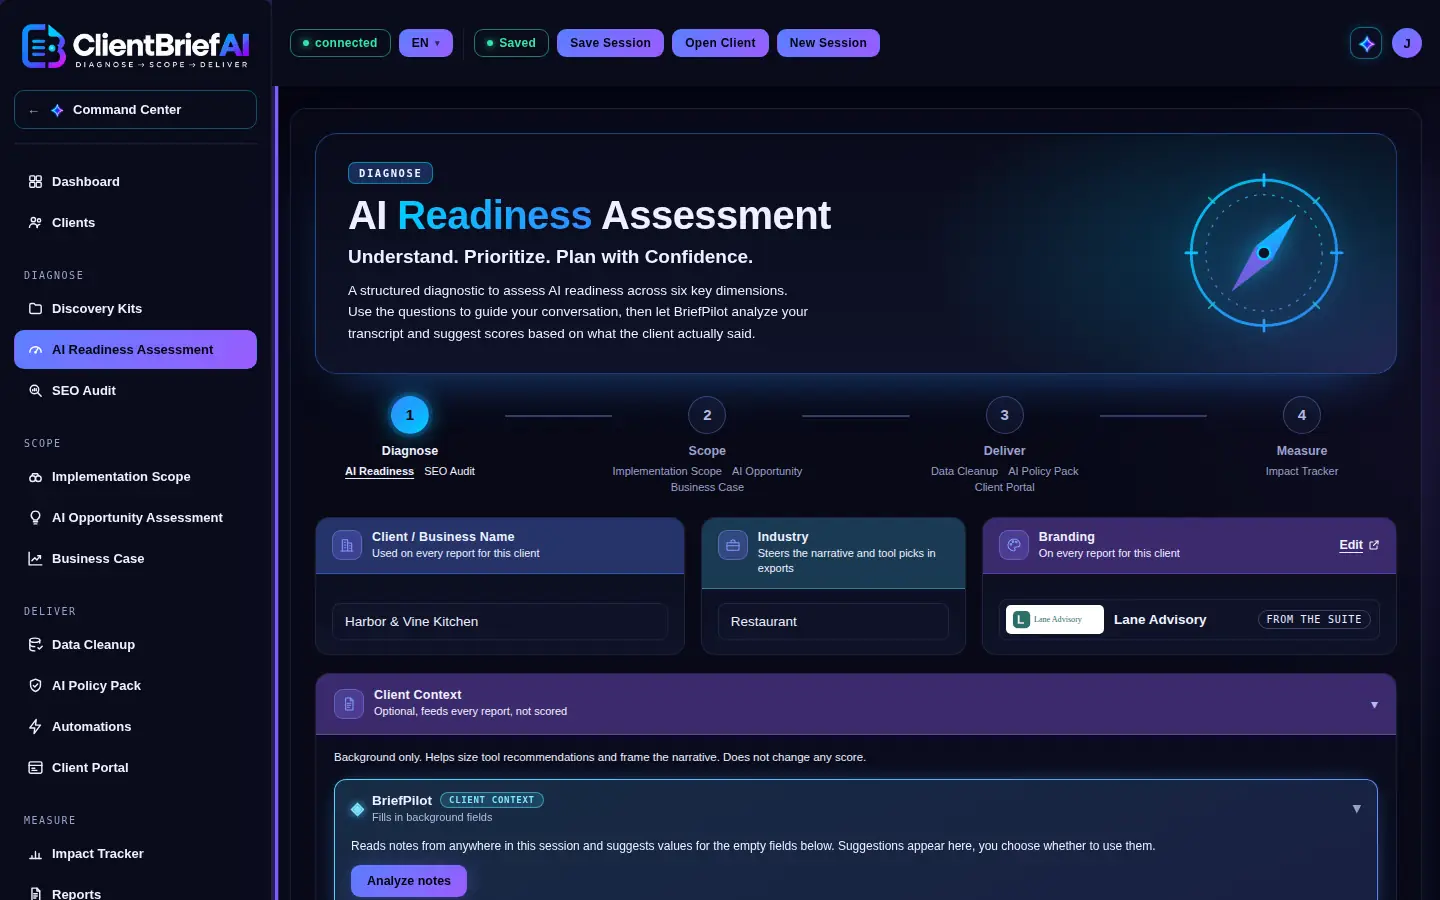
Every tool is one click away in the sidebar. -
Read the header
The header shows connected, the language button, whether your work is Saved or Unsaved, and Save Session, Open Client and New Session. At the right are the AI Curator apps button and your account button.
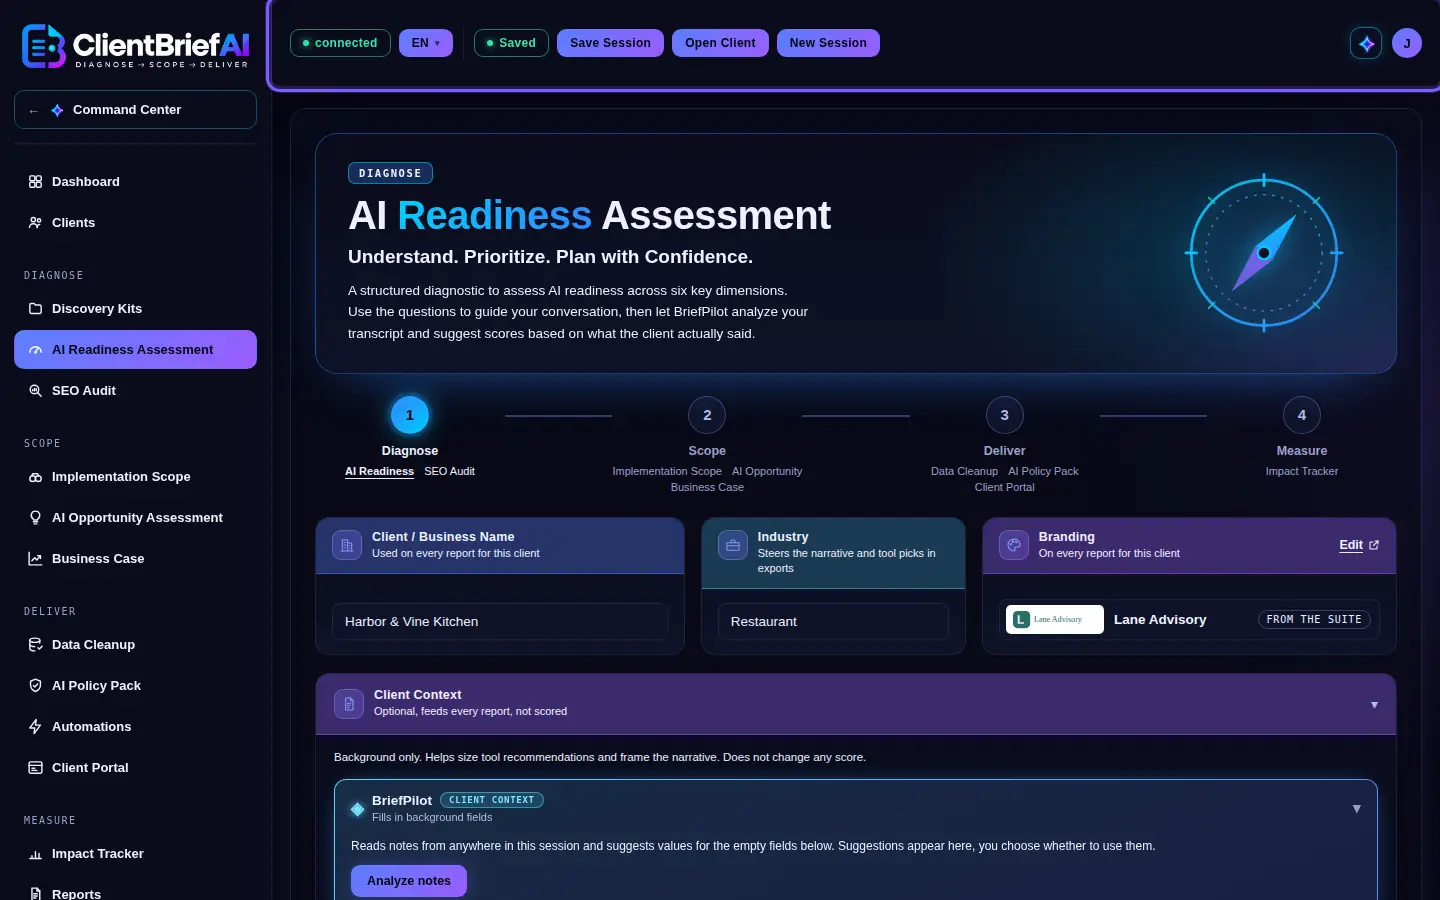
Saved tells you the client file is up to date. -
Enter the client name, industry and your logo
Type the client under Client / Business Name. It is used on every report and names the client's file. Pick the closest Industry. The Branding card beside them shows your logo and name from the suite, on every report; Edit changes them on the suite's Branding page.
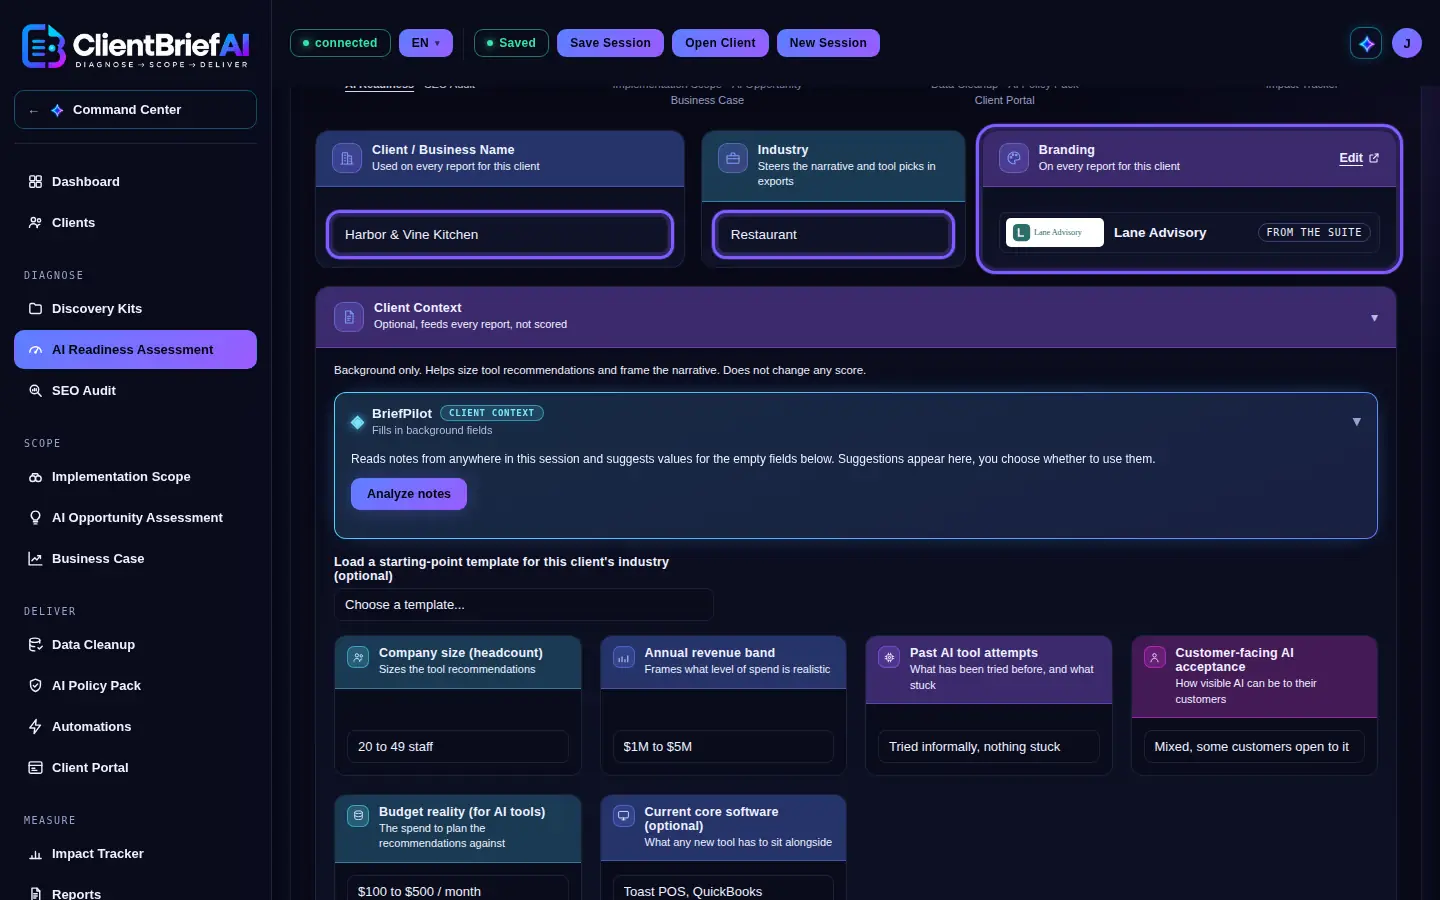
The client name names the client's file and every report. -
Add the Client Context
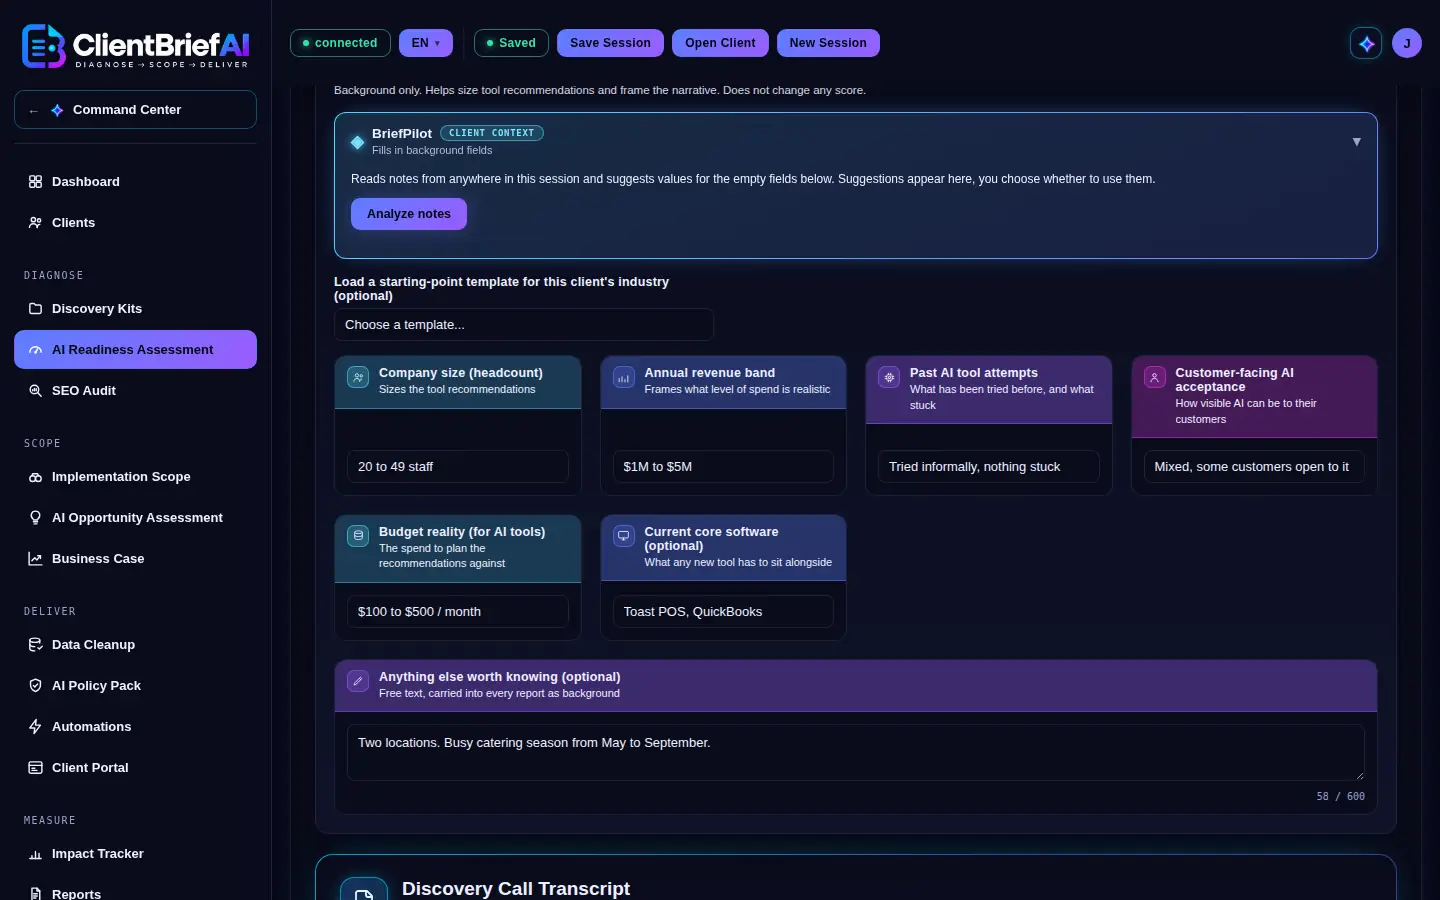
Open Client Context to set company size, revenue band, past AI tool attempts, customer-facing AI acceptance, budget and current software, with up to 600 characters of anything else worth knowing. It feeds every report and does not change any score.
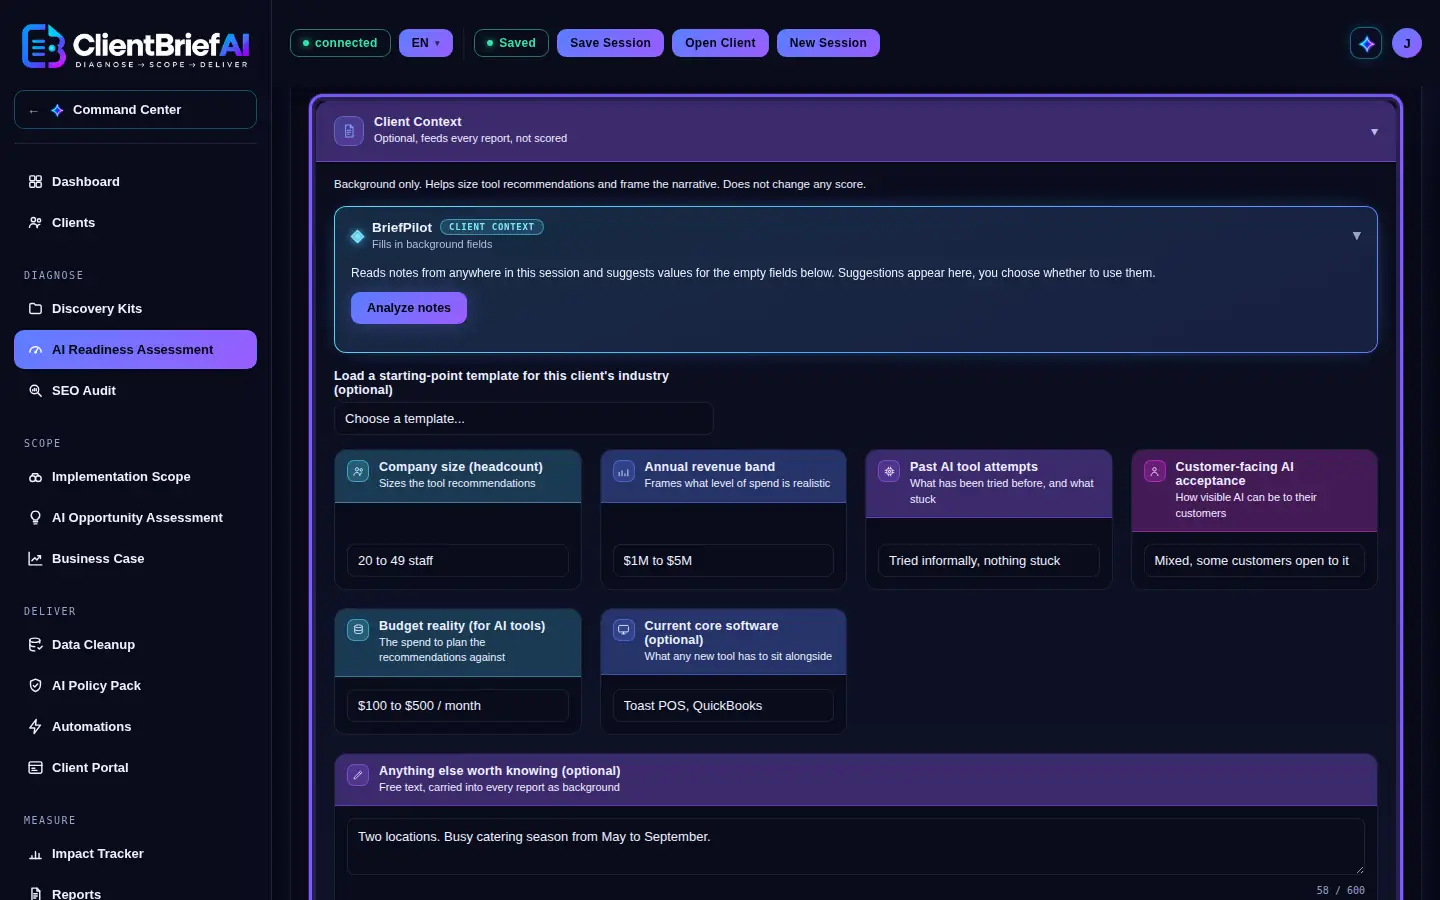
Background only: it shapes the reports, never the scores. -
Choose your language
Click EN to switch the app between English, Español, Français and Português.
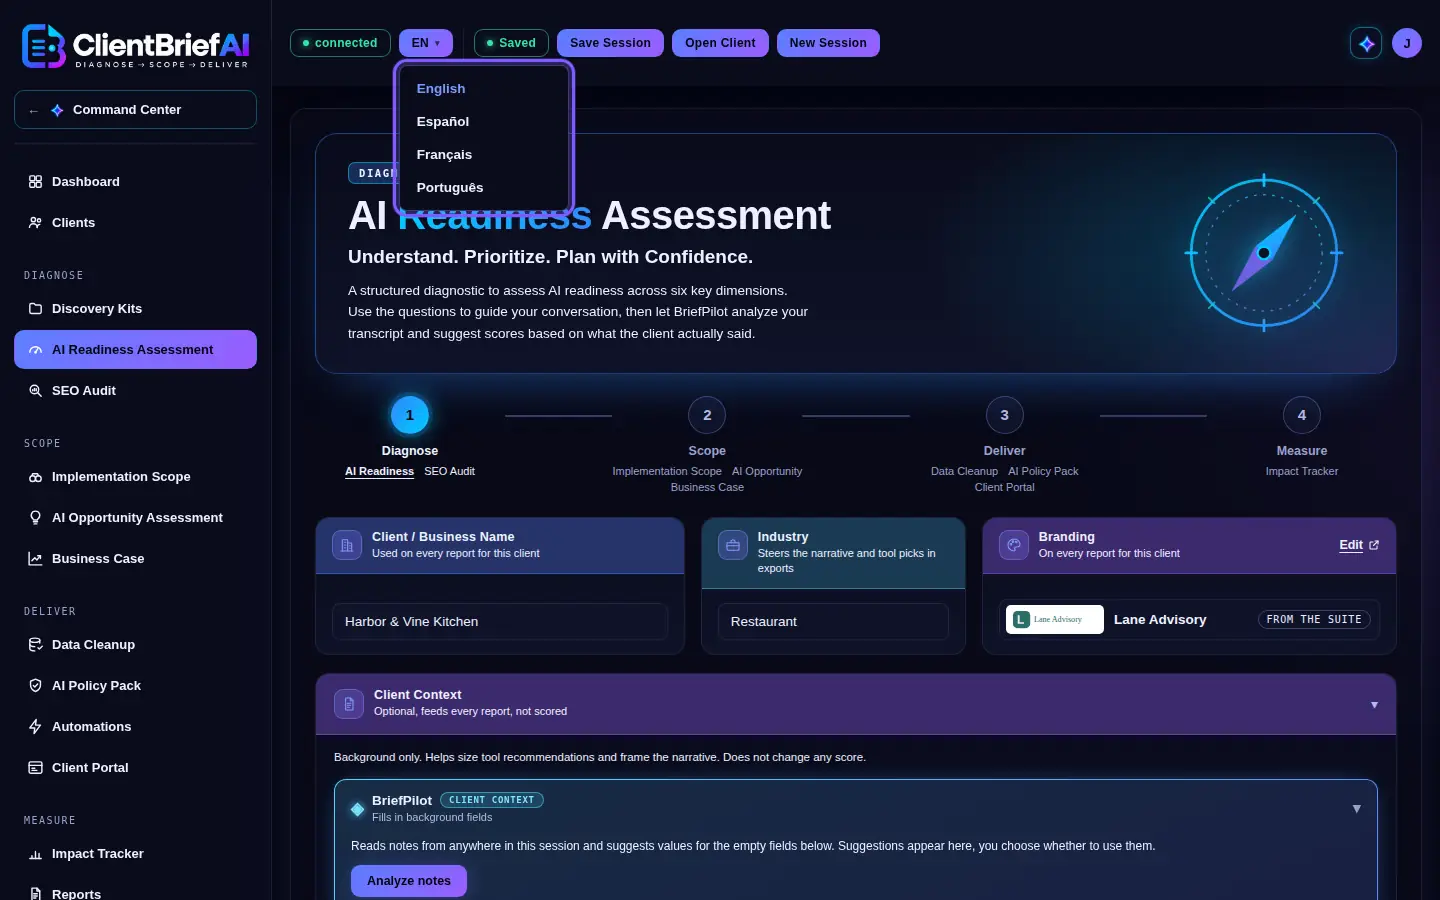
The app and its screens switch language at once. -
Use the account menu
Click the round button with your initial for Profile, Upgrade plan or Manage billing when they apply to you, and Log out.
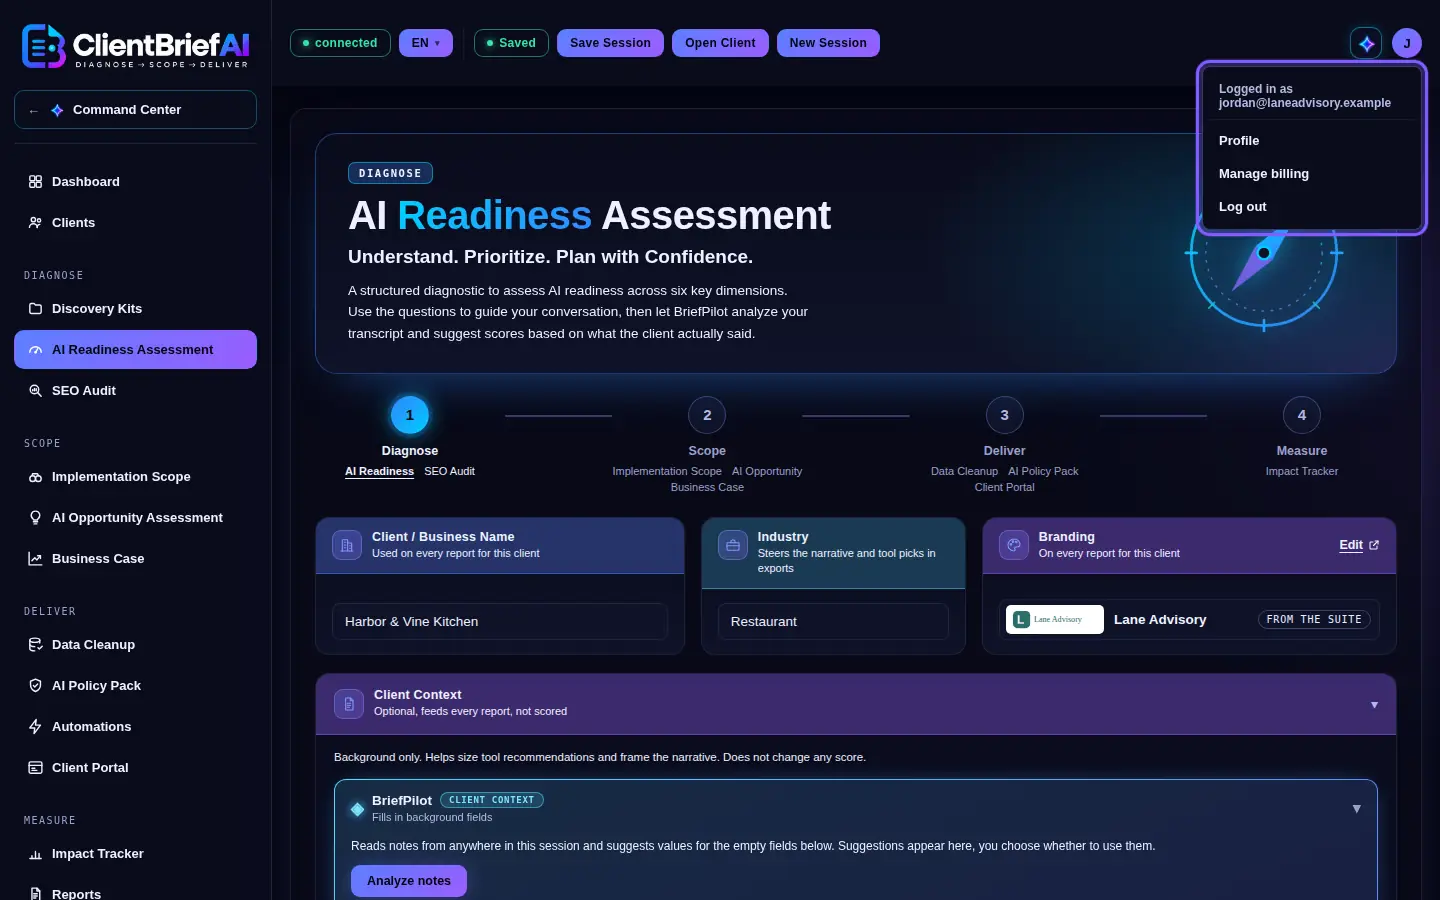
Profile and billing live in the account menu.
Good to know
- To start faster, choose an industry under Load a starting-point template for this client's industry. It asks first if fields are already filled.
- All Client Context fields are optional. A report needs only the client name.
Home
Dashboard
Your AI Consulting Portfolio reads the client files on your own computer. Nothing is uploaded.
-
Point it at your clients folder
Under Your Saved Client Sessions, click Select Folder and choose your clients folder, or Select Files to pick files. Chrome and Edge can remember the folder: Reconnect last folder brings it back next time. Old session files are read too.
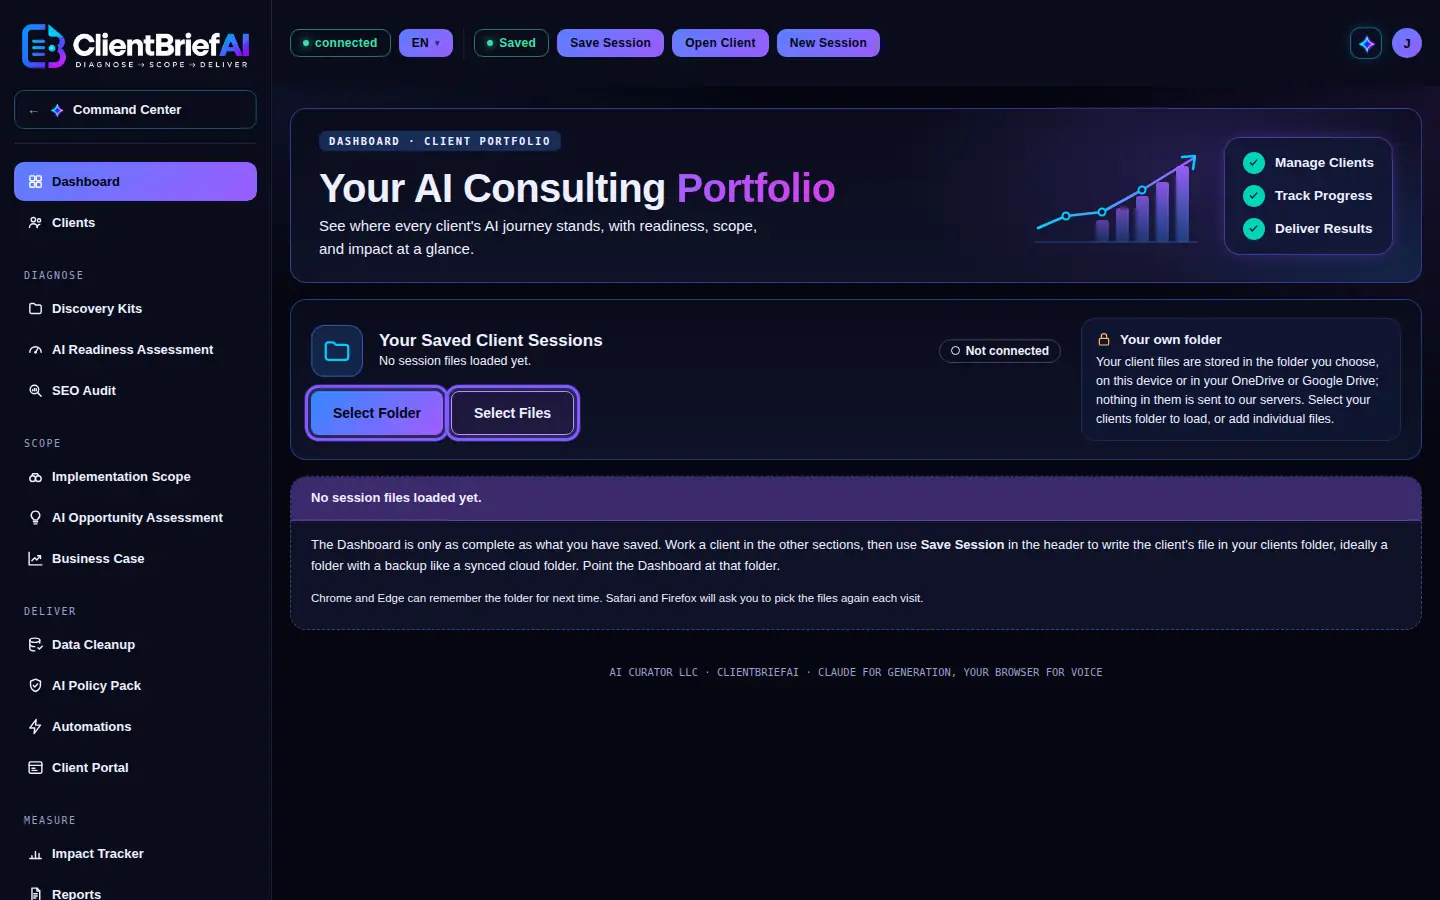
Point the Dashboard at your clients folder once. -
Review your clients
The tiles count Total Clients, Active Assessments, Completed Assessments and Saved Sessions. Under Client Portfolio, search, filter by Industry, Stage or Status, sort, and switch between Cards and List. Each client shows the industry, last saved date, stage, score and which parts are complete. View Client opens that client's newest session. A client with a Client Portal shows a Portal badge with the date it was last generated; it turns amber after 45 days, as a reminder to regenerate it. Re-audits due lists SEO Audit re-audits scheduled in the next 14 days, or overdue, with Open session.
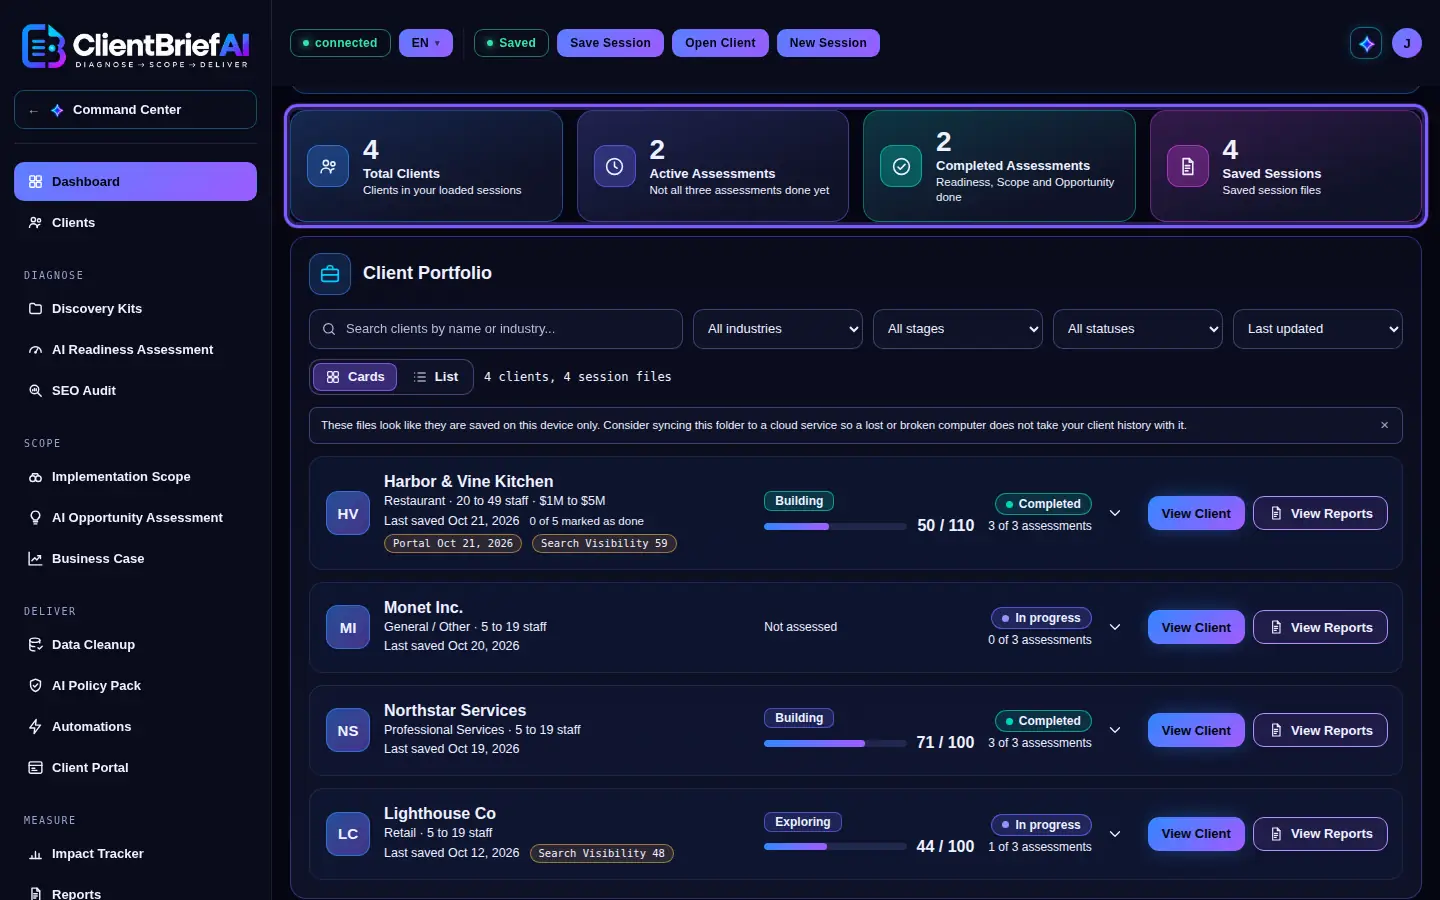
The tiles count clients, assessments and saved sessions.
Good to know
- The Dashboard is only as complete as the client files you have saved.
- Reassessments are grouped by the exact client name.
Home
Clients
The Client Workspace keeps your client roster in this browser.
-
Add a client
Click Add client. Enter the Client name and Status (Lead, Active, Follow-up needed or Closed), and a phone, email and notes if you want. Remind me to reassess sends a reminder email to you on the date you pick, never to the client.
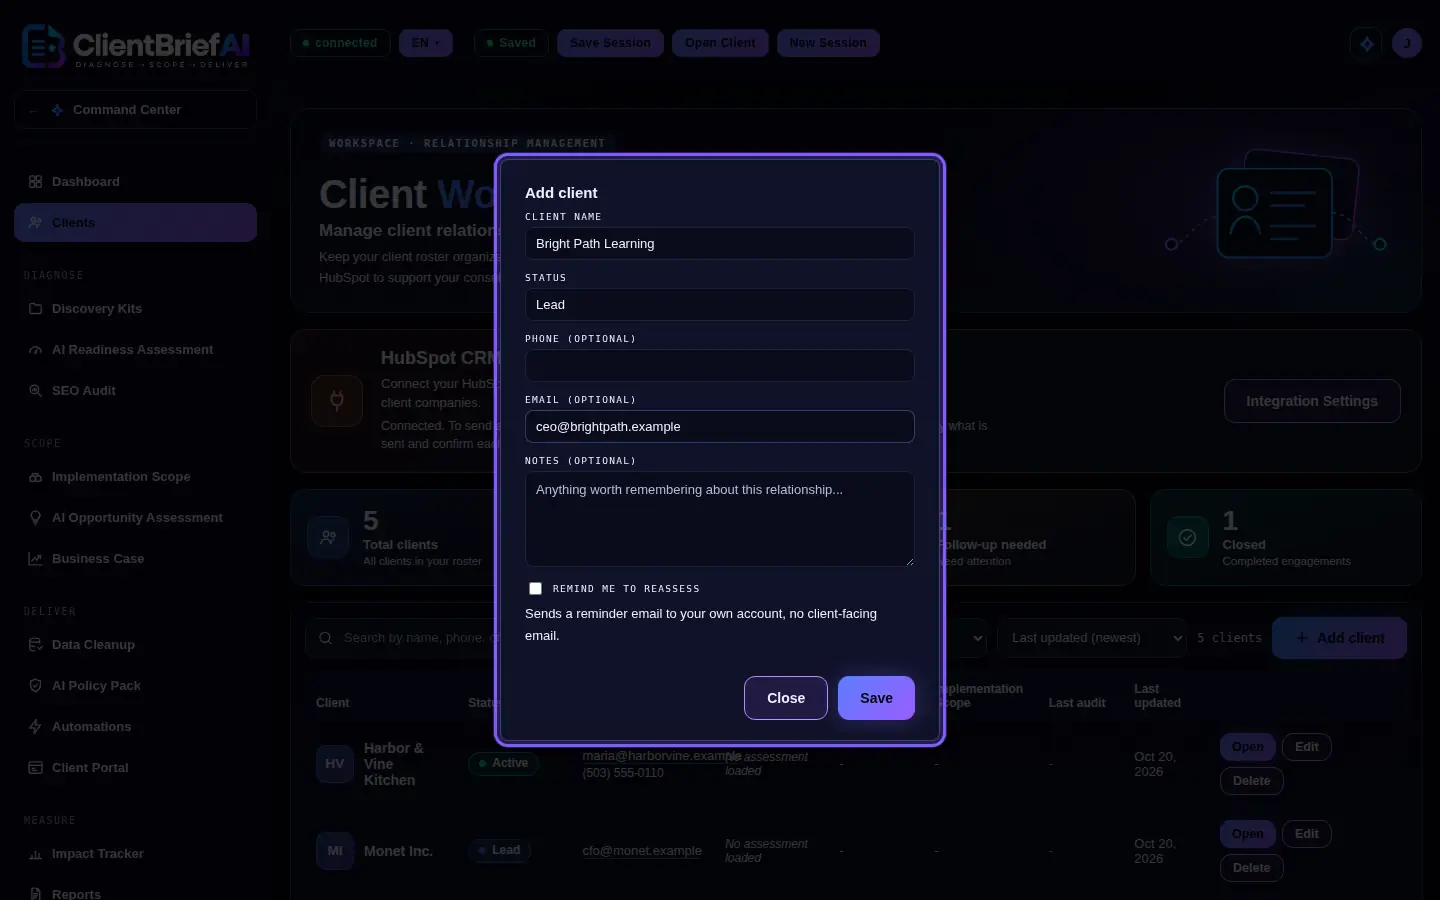
The roster keeps contacts and a reminder to reassess. -
Find and manage clients
Search by name, phone or email, filter by status and sort the list. Edit or delete a client from its row.
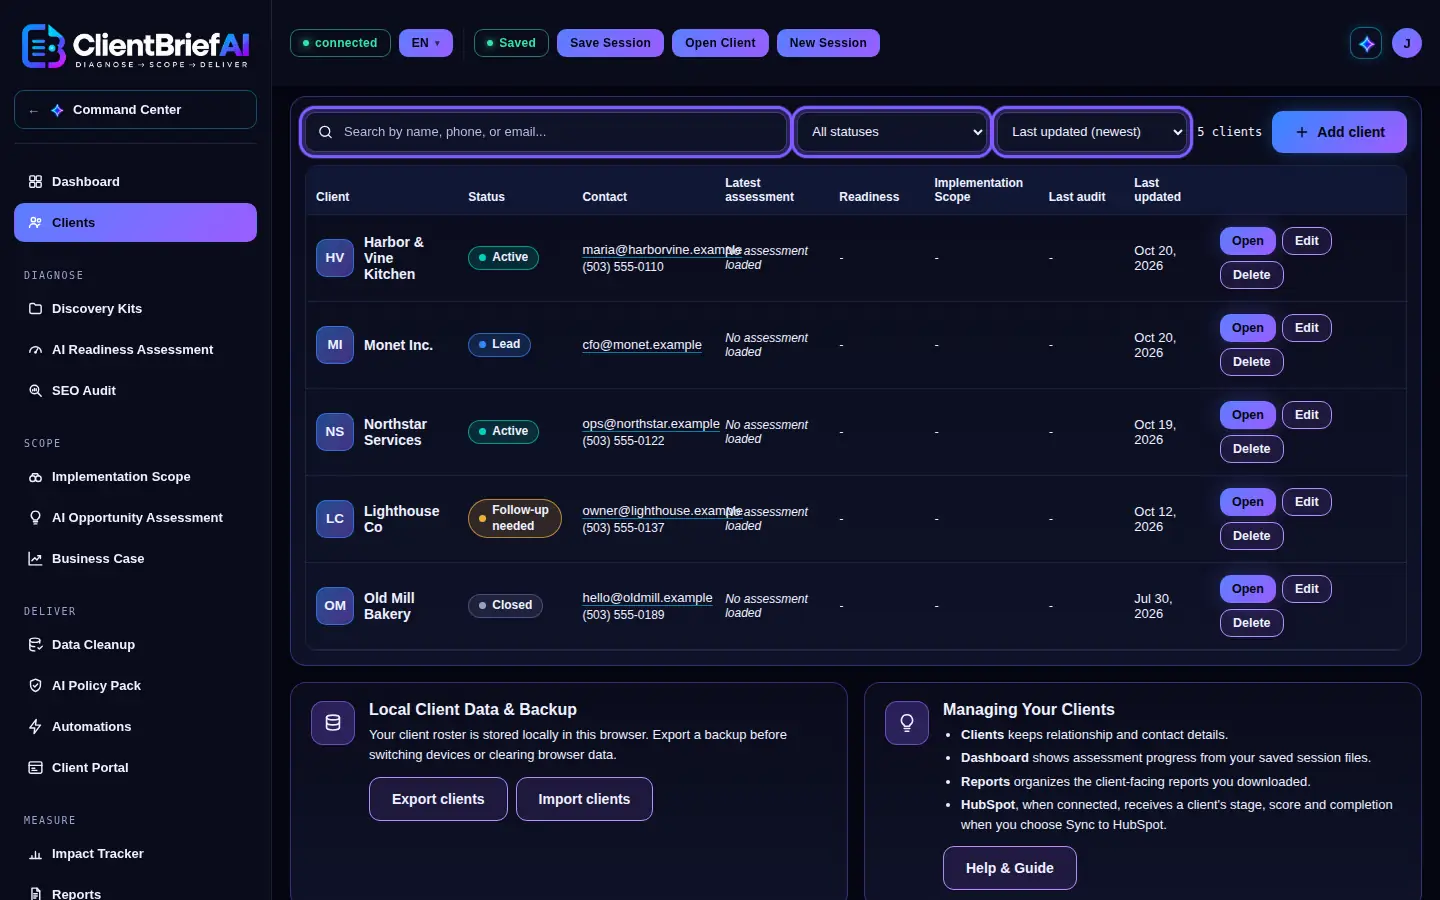
Search, filter by status and sort the list. -
Back up your roster
The roster lives only in this browser. Click Export clients before you switch devices or clear browser data, and Import clients to bring it back.
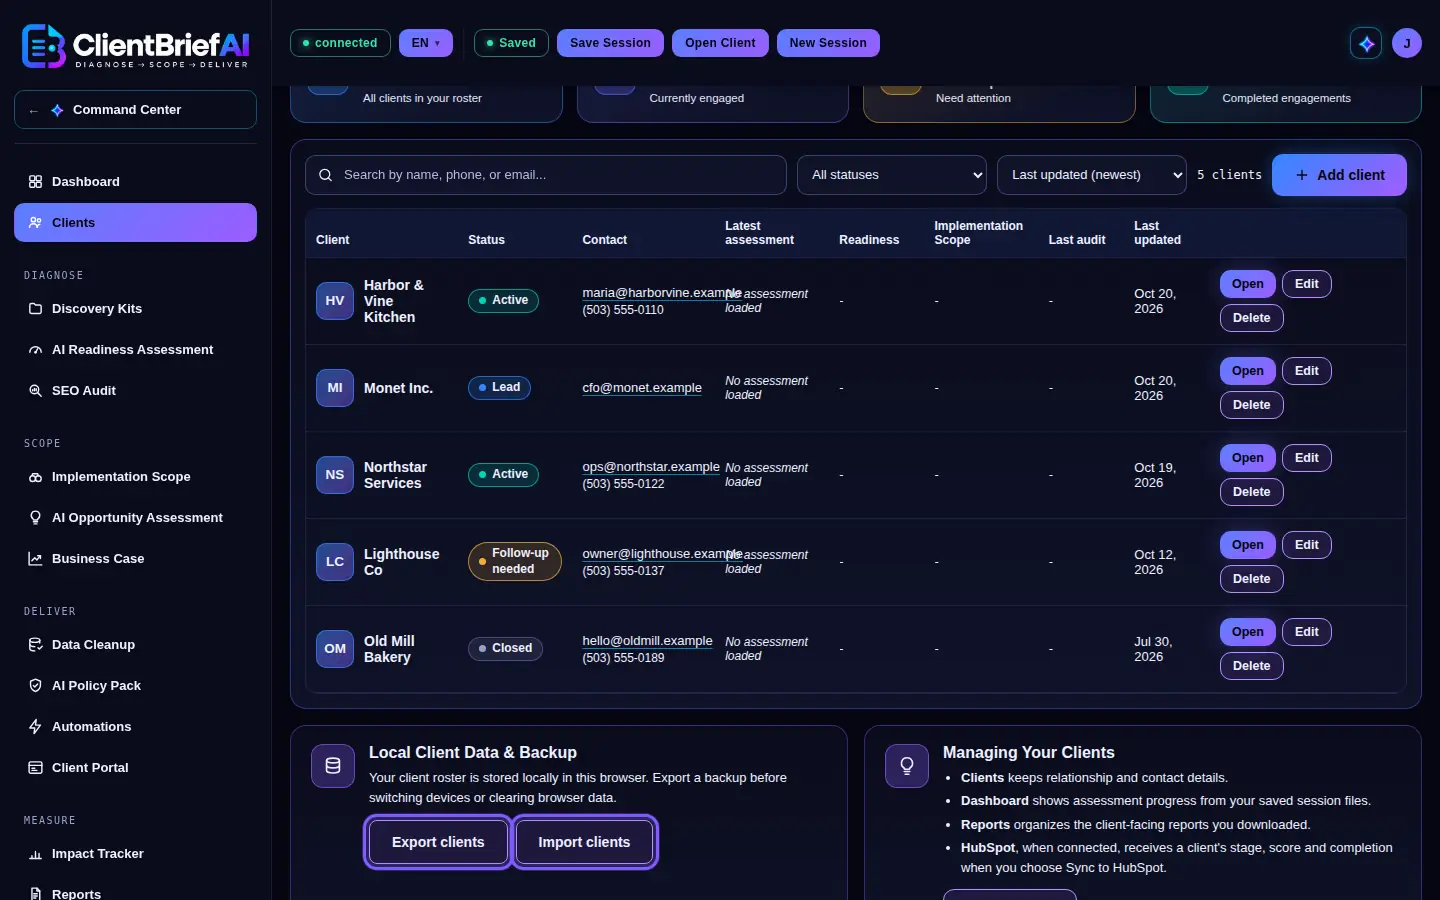
Export before switching devices; the roster lives in this browser.
Diagnose
Discovery Kits
Discovery Kits gives you structured questions for the client calls. They are reference only: nothing is generated and no client data is involved.
-
Pick the call
Choose 01 AI Readiness for the first call with the client: their current state, goals and challenges across the six dimensions. Choose 02 Implementation Scope for the second call, usually after Readiness is scored: department by department across all 22 categories. Choose 03 Data Cleanup for the planning session with the owner before the Data Cleanup Playbook, and 04 AI Policy before drafting the AI Policy Pack. Choose 05 Business Case before building the Business Case for an opportunity, and 06 Impact Check-in for the monthly check-in on the Impact Tracker.
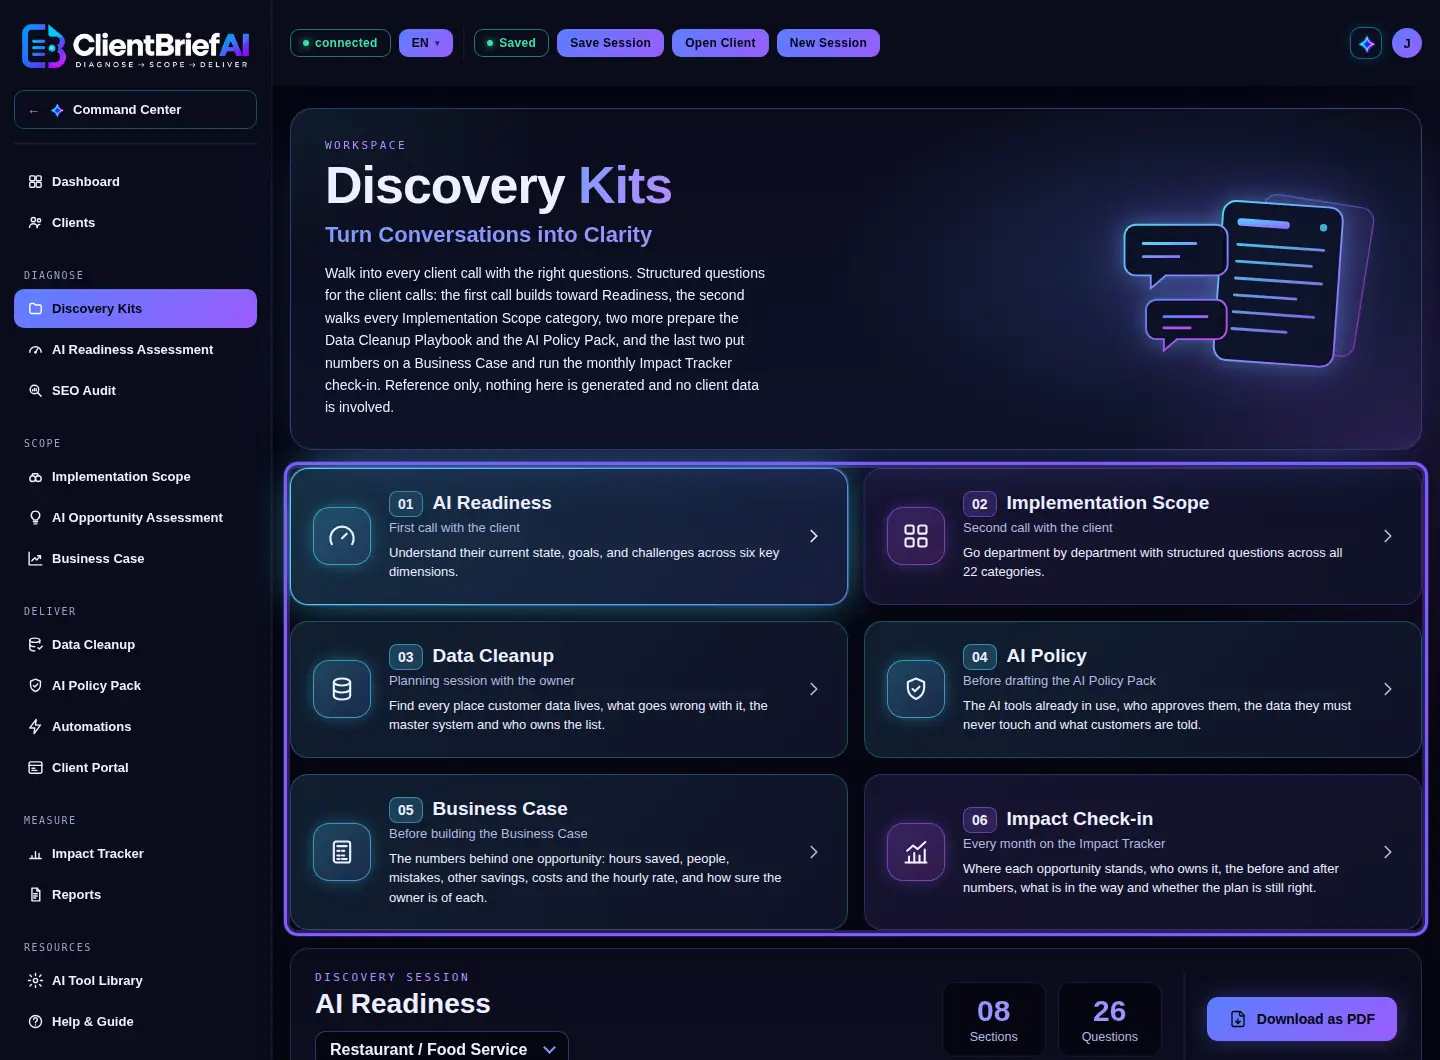
Six kits: pick the one for the conversation you are about to have. -
Use the AI Readiness script
Pick the client's industry. The script runs from Opening through the six dimensions to Closing, with the session objective at the top.
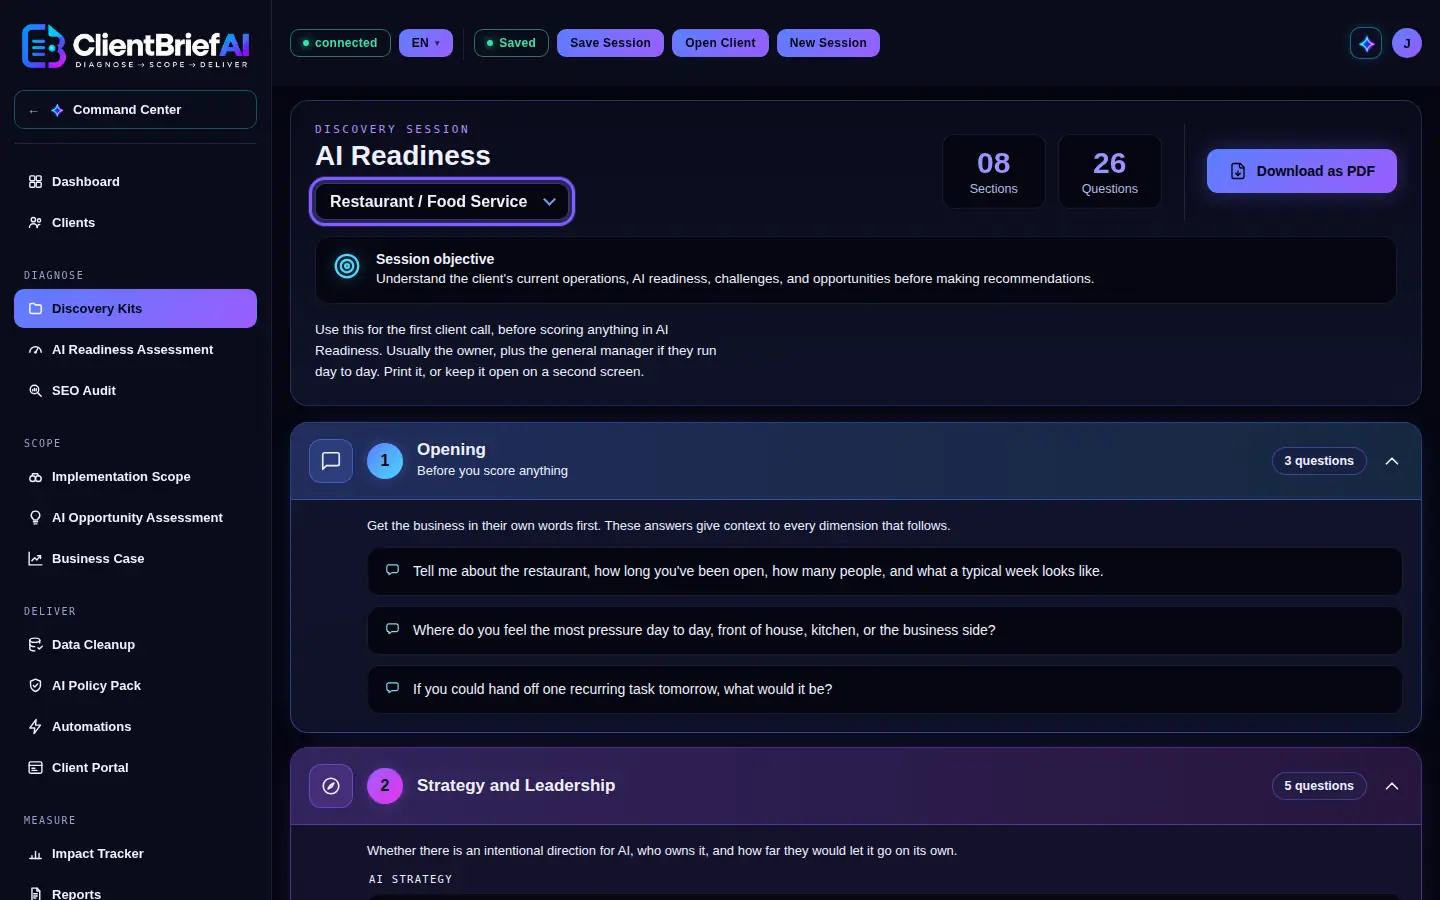
Pick the client's industry; the script follows the six dimensions. -
Use the Implementation Scope script
The second script runs from Opening through Foundation, Bridge, Application and Advanced to Closing. Click Download as PDF to print it or keep it open on a second screen.
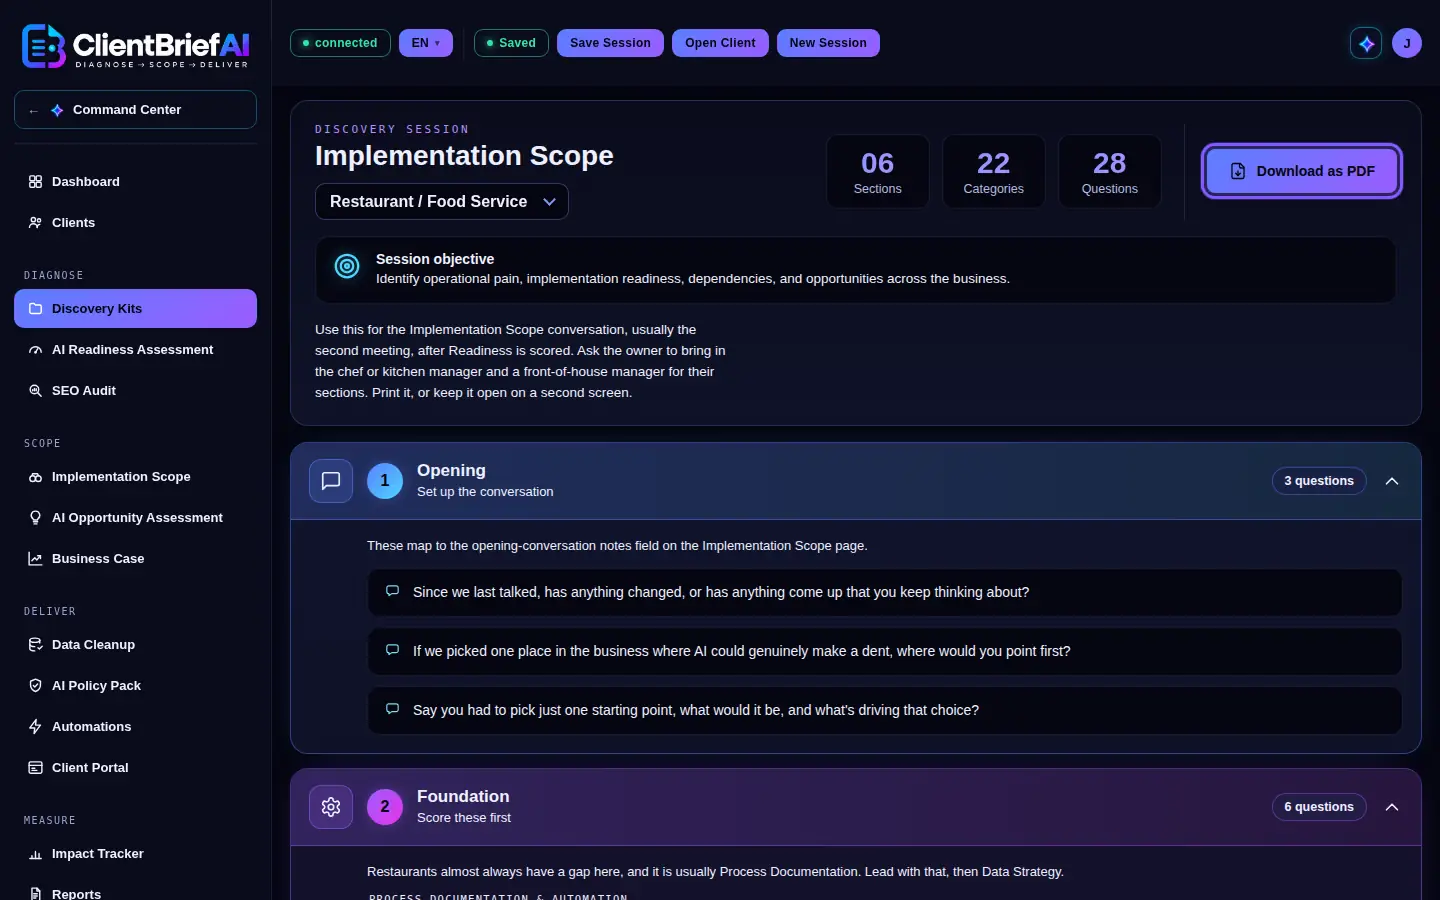
Download as PDF to print it, or keep it open on a second screen. -
Use the Data Cleanup and AI Policy kits
The Data Cleanup kit runs from Opening through Where It Lives, Known Problems, Master and Owner and Tools to Closing; each question sits under the field of the Data Cleanup interview it fills in. The AI Policy kit runs from Opening through Tools in Use, Approval, Customer Data, Customers and AI, Where You Operate, Governance and Rollout to Closing; each question sits under the part of the AI Policy Pack setup it fills in. Governance asks how often the policy should be reviewed and which data the business handles that has its own rules, such as card details or health records; the answers go into the AI Governance Framework on Full Plus and into the policy's review line on other plans. The two kits often happen in the same meeting.
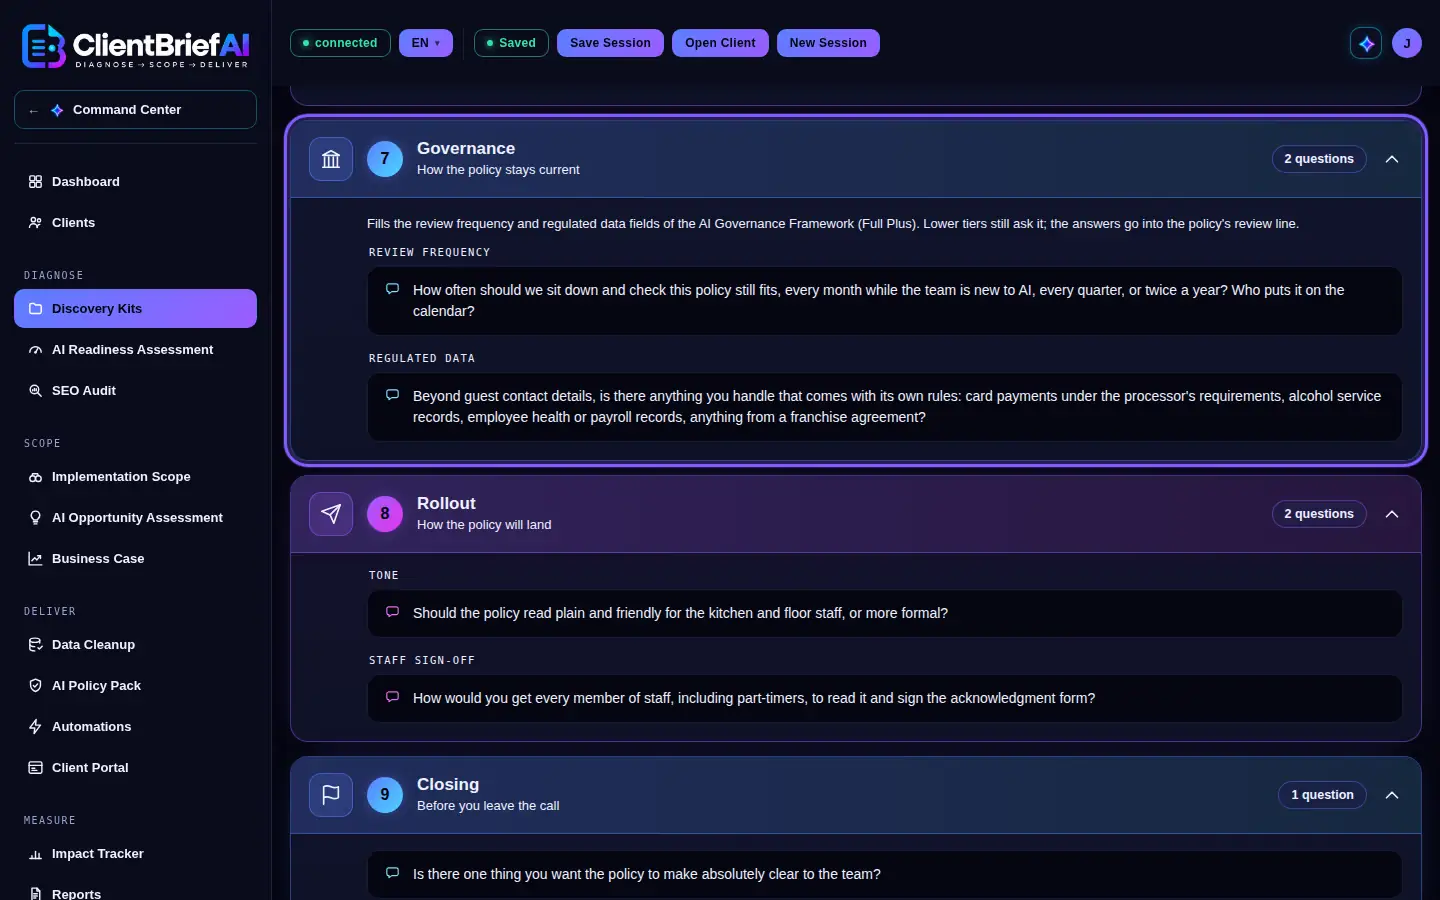
Governance: how often the policy is reviewed, and which data has its own rules. -
Use the Business Case and Impact Check-in kits
The Business Case kit runs from Opening through Time Saved, People, Errors, Other Benefit, Costs, Rate and Confidence to Closing, 22 questions in all. Run it with the owner, plus whoever holds the numbers, after Implementation Scope has ranked the opportunities: each question sits under the Business Case input it fills in, so you leave with an owner-confirmed number for every one, and how sure the owner is of each. The Impact Check-in kit runs from Opening through Status, Measurement, Blockers, Next Month and Reassess to Closing, 18 questions in all. Use it every month: where each opportunity stands and who owns it, the before and after numbers for the Impact Tracker, what is in the way, next month's commitment and whether the plan still fits. Click Download as PDF to print either one.
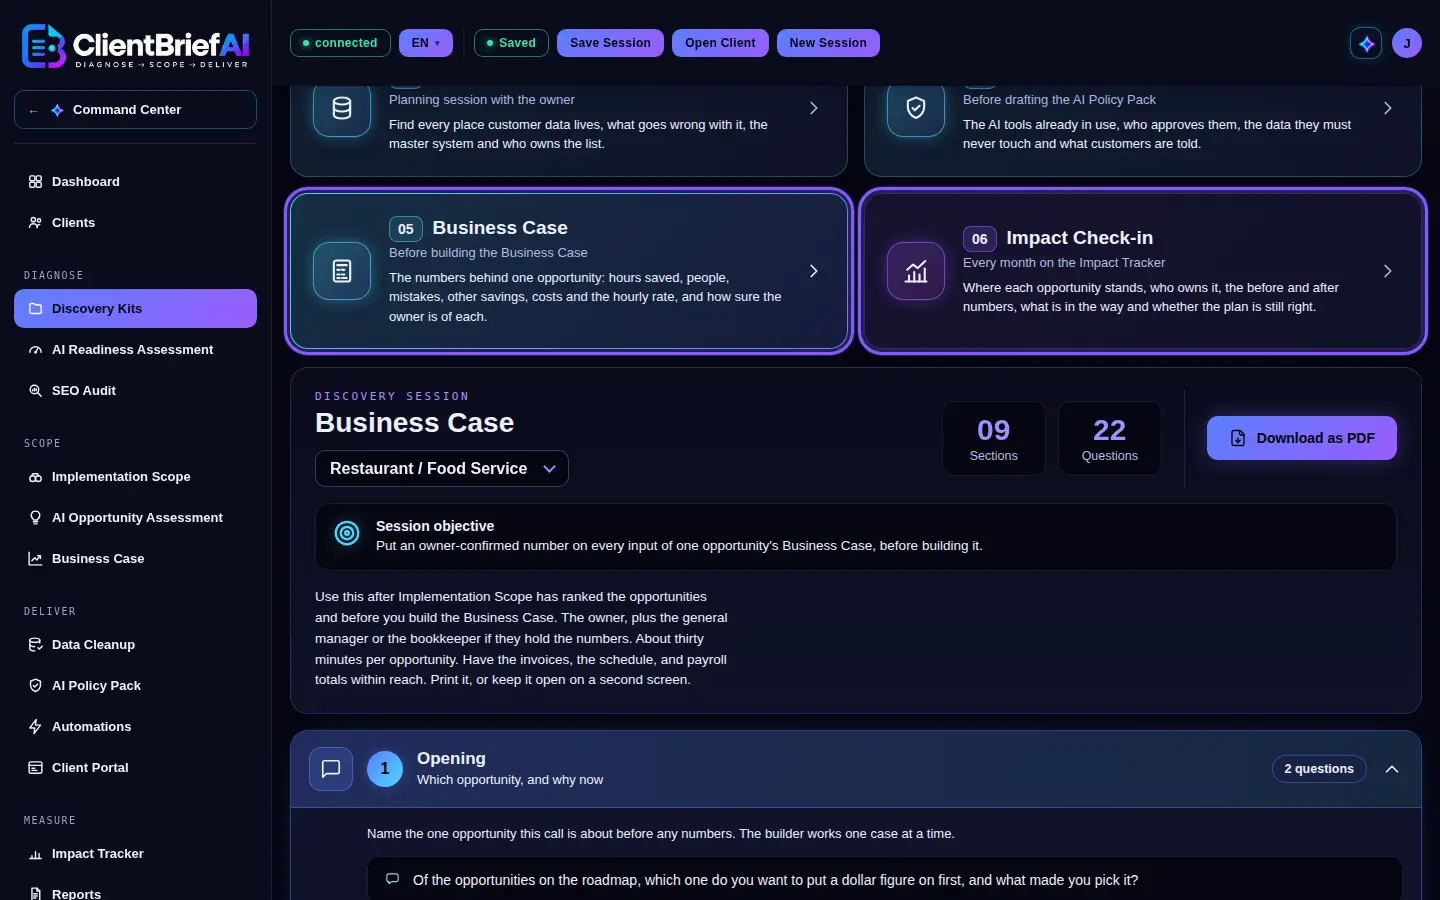
Business Case before you build it; Impact Check-in every month. -
Back up your Discovery Kits
Discovery Kits live only in this browser. Use Export Discovery Kits and Import Discovery Kits to move them to another device. The backup includes all six kits, and backups saved before still import.
Discovery Kits live in this browser; export them to move them.
Good to know
- All six kits come for five industries: Restaurant / Food Service, Professional Services, Retail / E-commerce, Healthcare Practice and Trades / Manufacturing. The industry you pick stays selected when you switch kits.
- Every kit is on every plan. The Impact Check-in kit is there even though the Impact Tracker itself comes with Full Plus.
- If you saved a copy of the AI Policy kit before the Governance section was added, and never edited it, it updates on its own. An edited copy stays as you left it.
Diagnose
AI Readiness Assessment
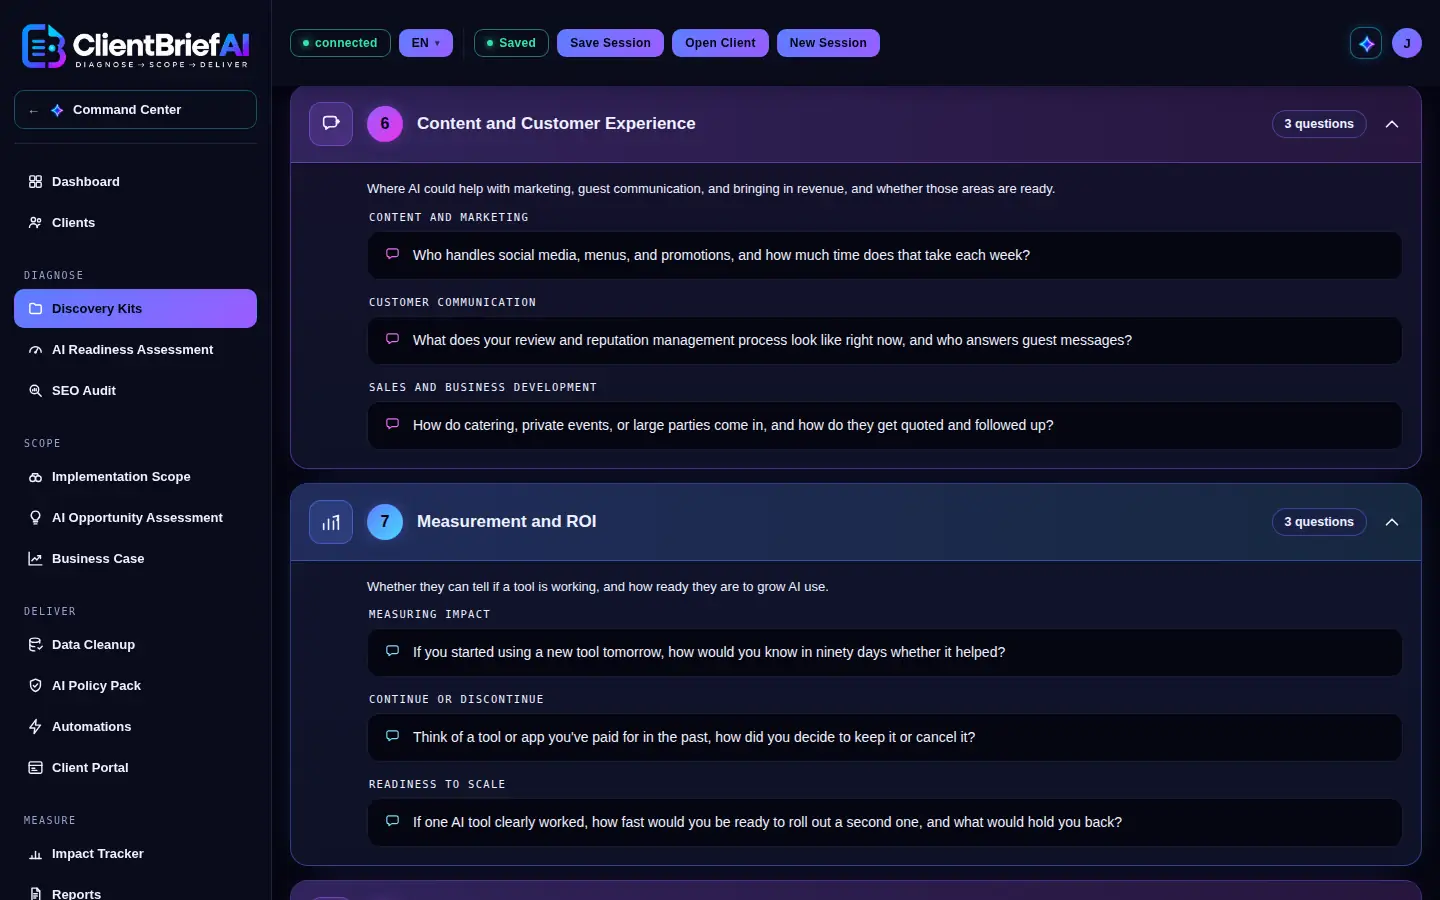
Run this on your first scoring call. There are 22 questions across six dimensions, worth 110 points in total: Strategy and Leadership (5 questions, 25 points), Workflow and Operations (4, 20), Data and Infrastructure (4, 20), Team and Skills (3, 15), Content and Customer Experience (3, 15) and Measurement and ROI (3, 15).
-
Paste the Discovery Call Transcript
Paste your transcript or type your meeting notes in Discovery Call Transcript, or click Dictate notes and speak. This is what BriefPilot reads. BriefPilot never automatically applies scores.
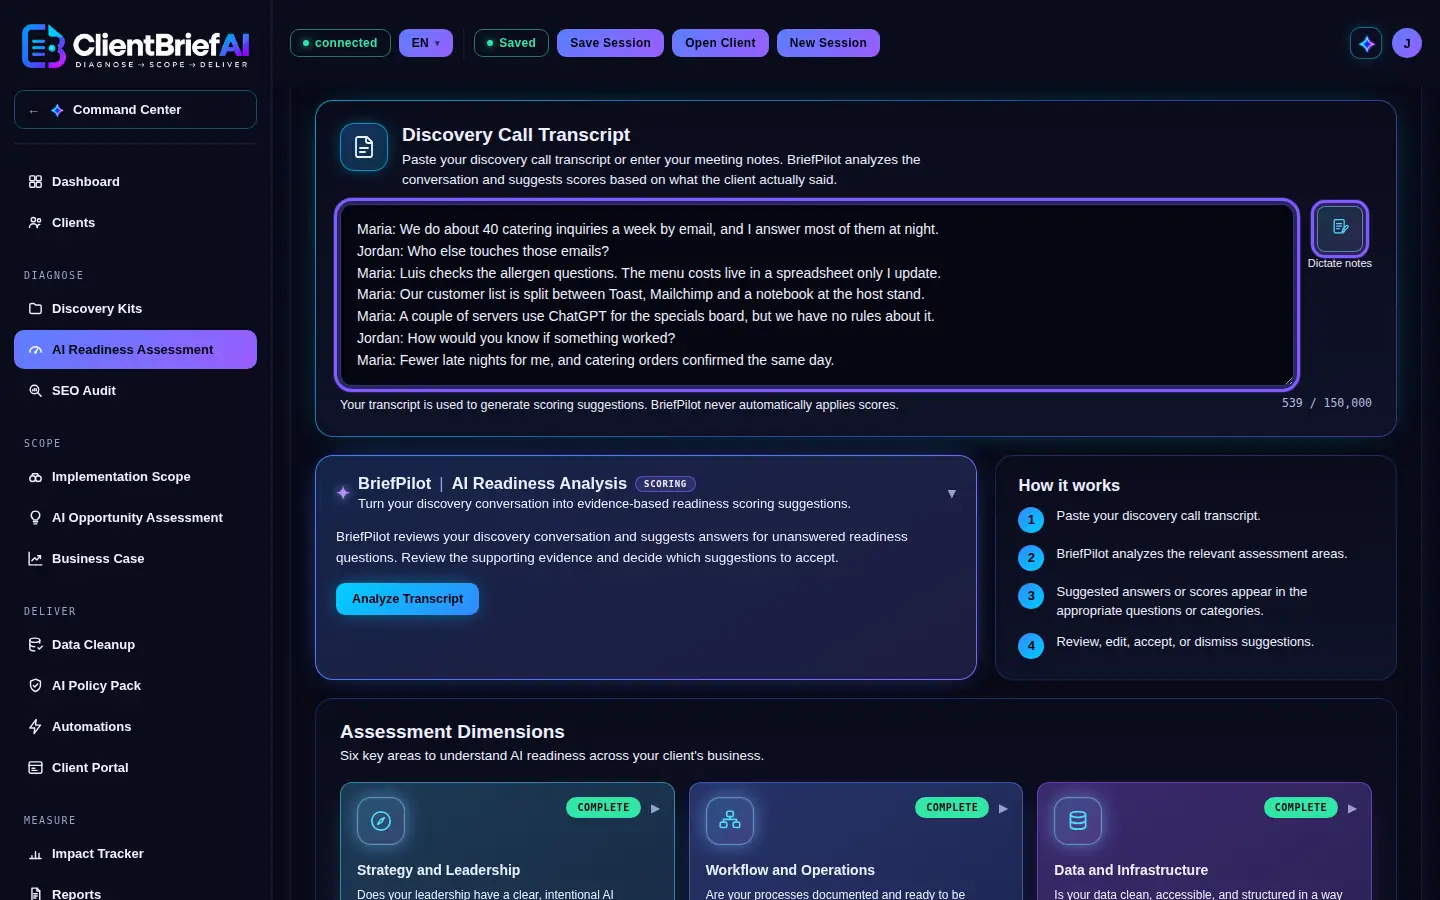
Paste or dictate the conversation; BriefPilot reads it. -
Answer the questions in each dimension
Open a dimension under Assessment Dimensions and pick the answer that fits for every question. Each question has six answers, worth 0 to 5 points. The badge on each tile counts answered questions and shows Complete when all are done.
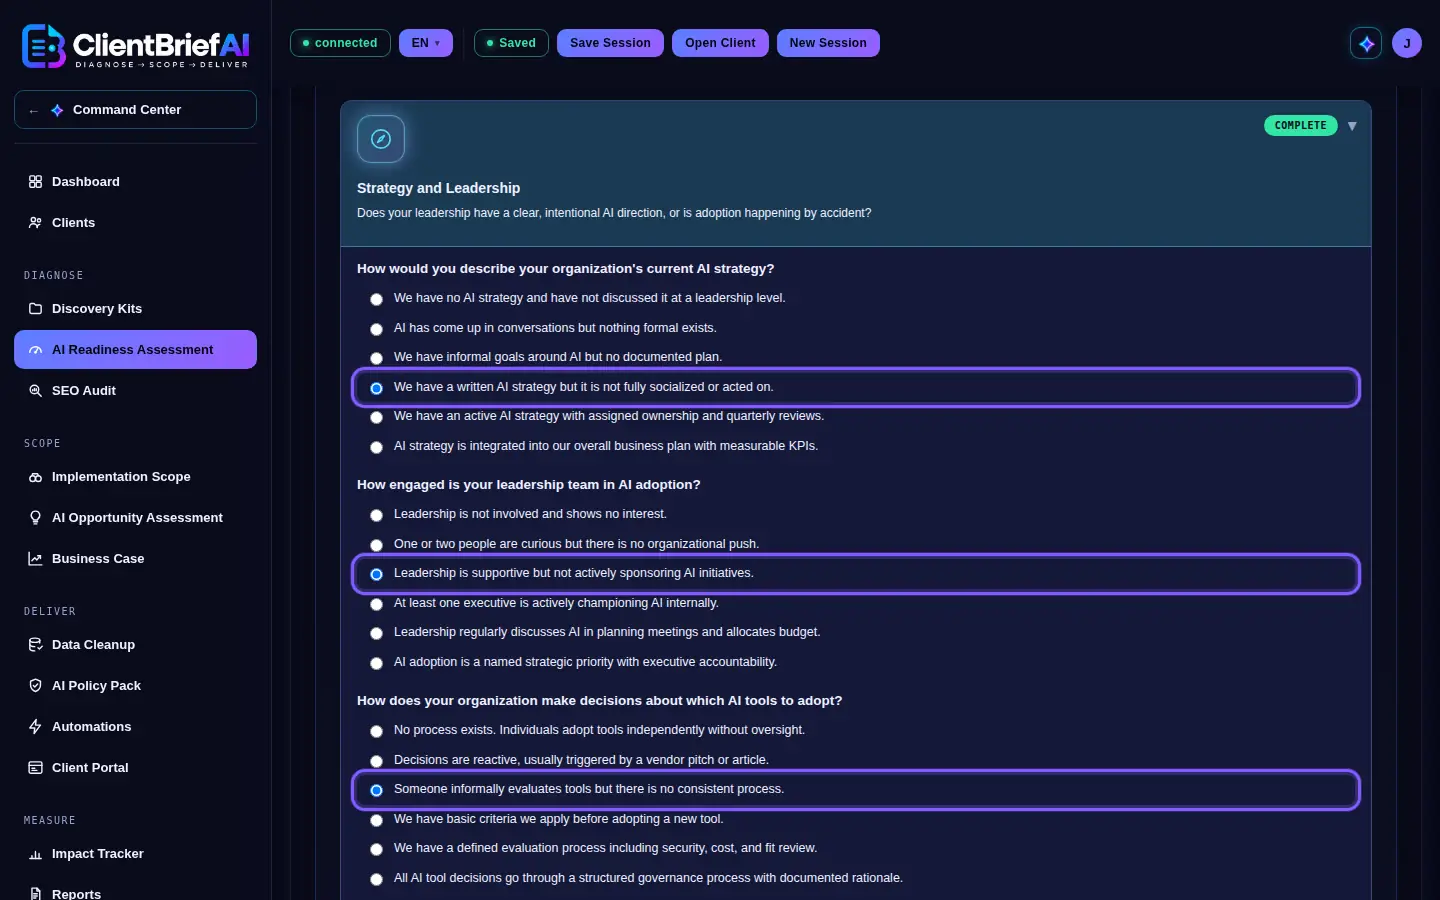
Each question has six answers worth 0 to 5 points. -
Ask BriefPilot for scoring suggestions
Click Analyze Transcript in the BriefPilot AI Readiness Analysis panel. BriefPilot reads the transcript and suggests answers for questions you have not answered yet. How it works, beside the panel, lists the four steps.
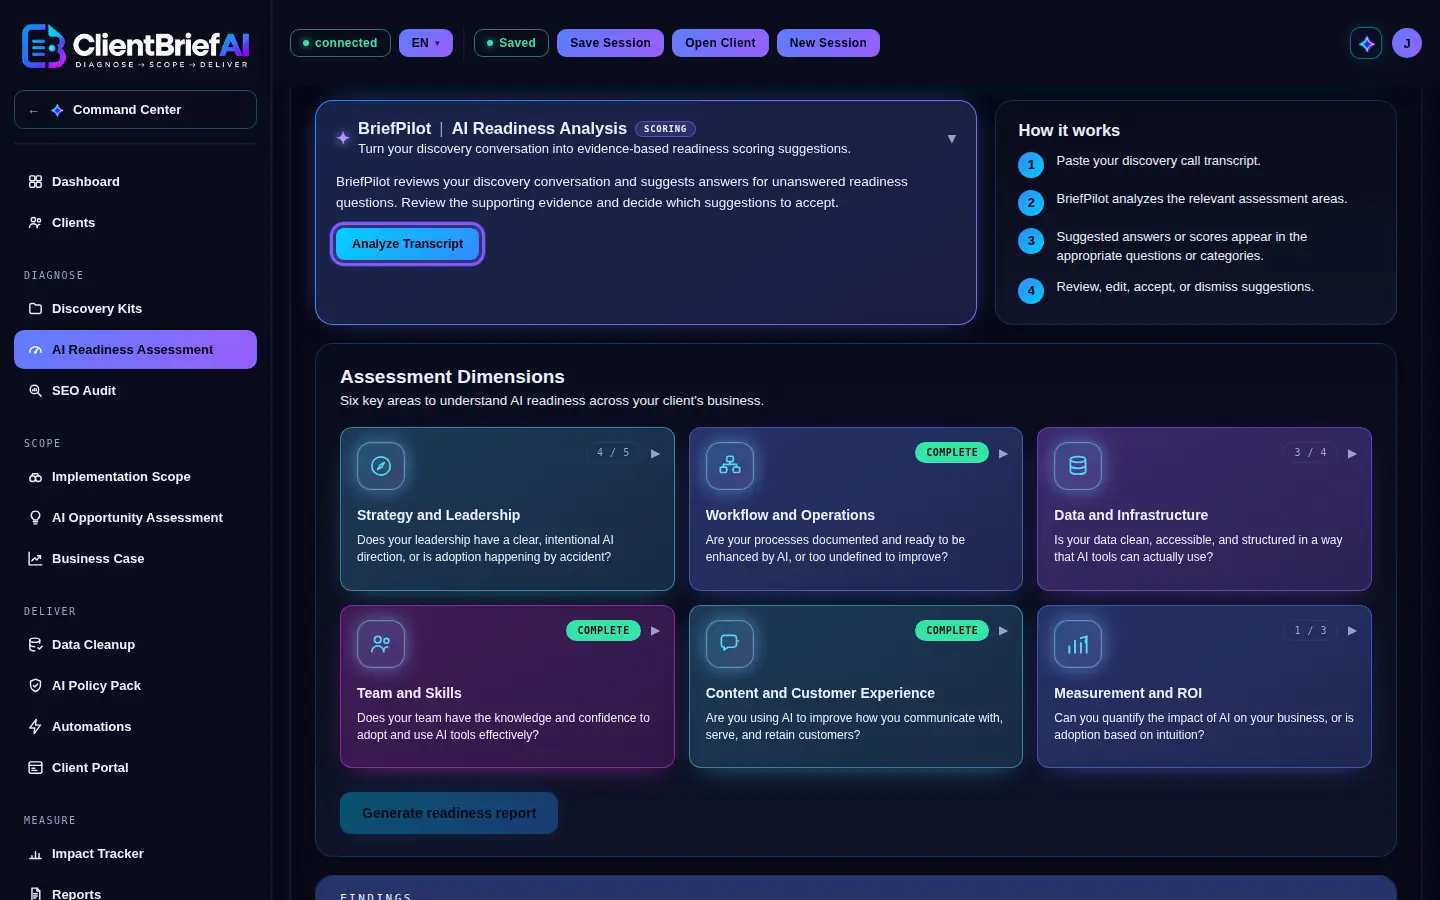
BriefPilot suggests answers only for questions still open. -
Accept, edit or dismiss each suggestion
A suggestion appears inside its question as Suggests, with a short reason. Accept fills in that answer. Edit takes you to the question and leaves the suggestion as a reference. Dismiss removes it. When the transcript says nothing about a question, you see BriefPilot: nothing in the notes about this question, and the status line counts how many had nothing in the notes.
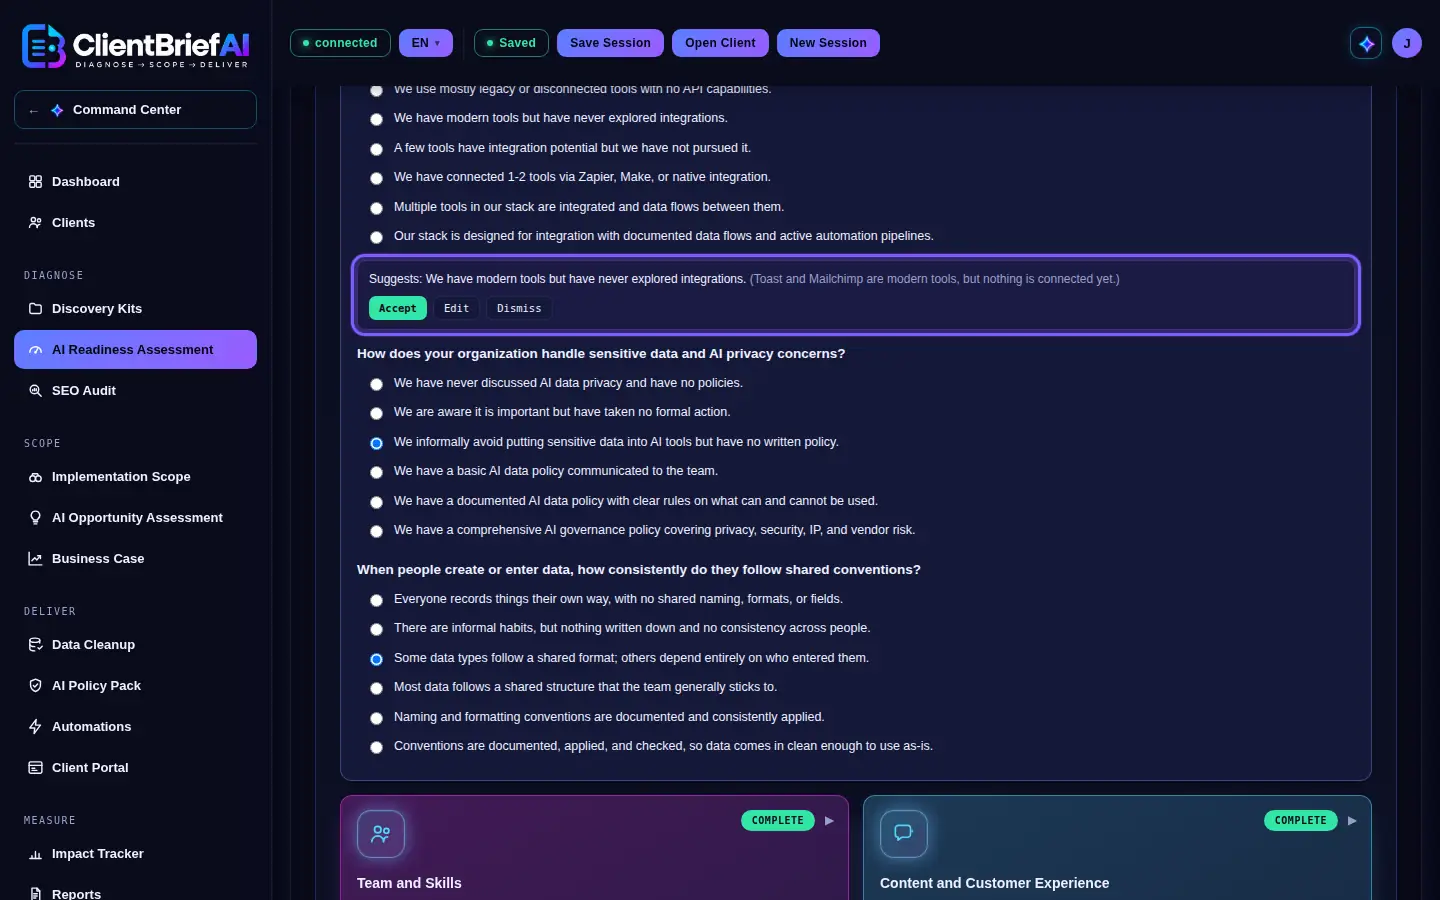
Accept fills the answer; Dismiss leaves the question as it is. -
Generate the readiness report
When all 22 questions have an answer, click Generate readiness report. The button stays off until then.
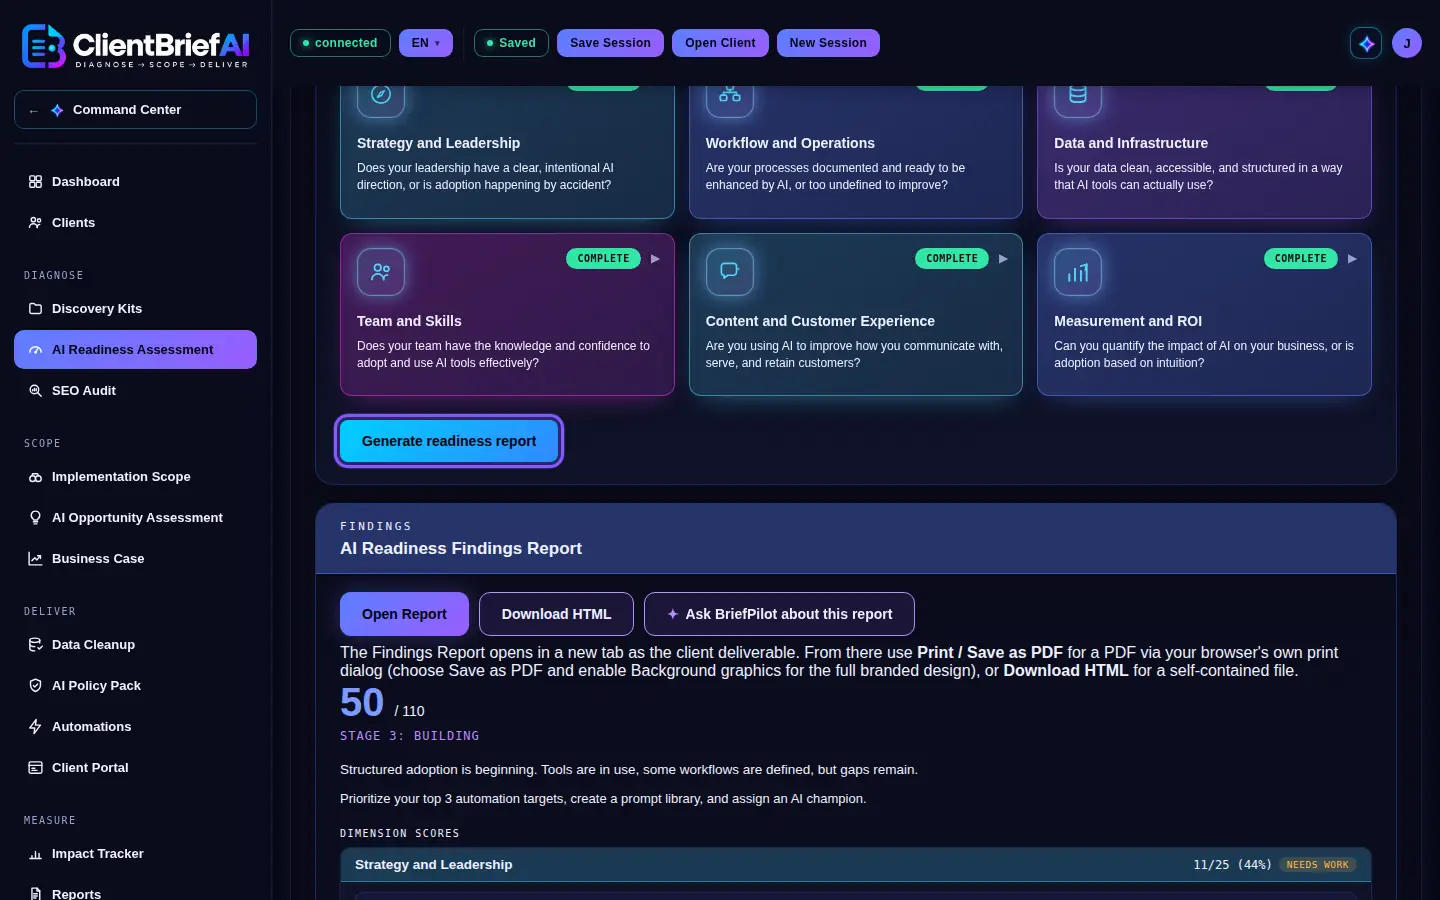
The button turns on once all 22 questions are answered. -
Read the score and the stage
The AI Readiness Findings Report shows the total out of 110 and the stage: Stage 1 Unaware (0 to 21), Stage 2 Exploring (22 to 44), Stage 3 Building (45 to 66), Stage 4 Scaling (67 to 88) or Stage 5 Leading (89 to 110). Below are the Dimension scores, rated Strength, Developing, Needs Work or Critical Gap, the Priority gaps, your internal Consultant notes and the Stage guidance.
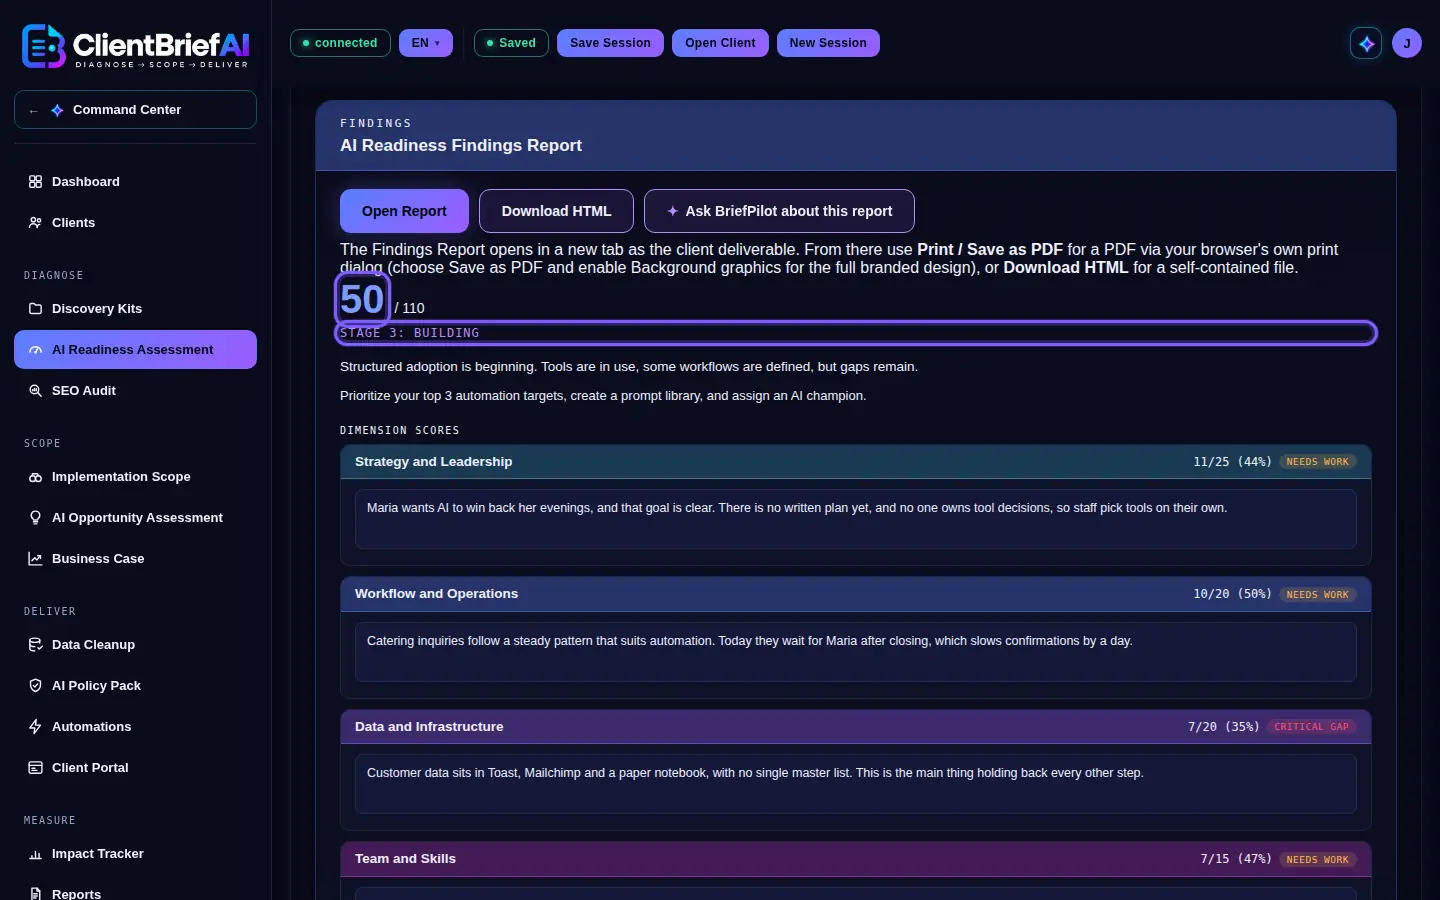
Each dimension shows its score, a rating and what it means. -
Open and export the report
Click Open Report to see the designed report in a new tab. Print / Save as PDF makes a PDF, and Download HTML saves one file you can send.
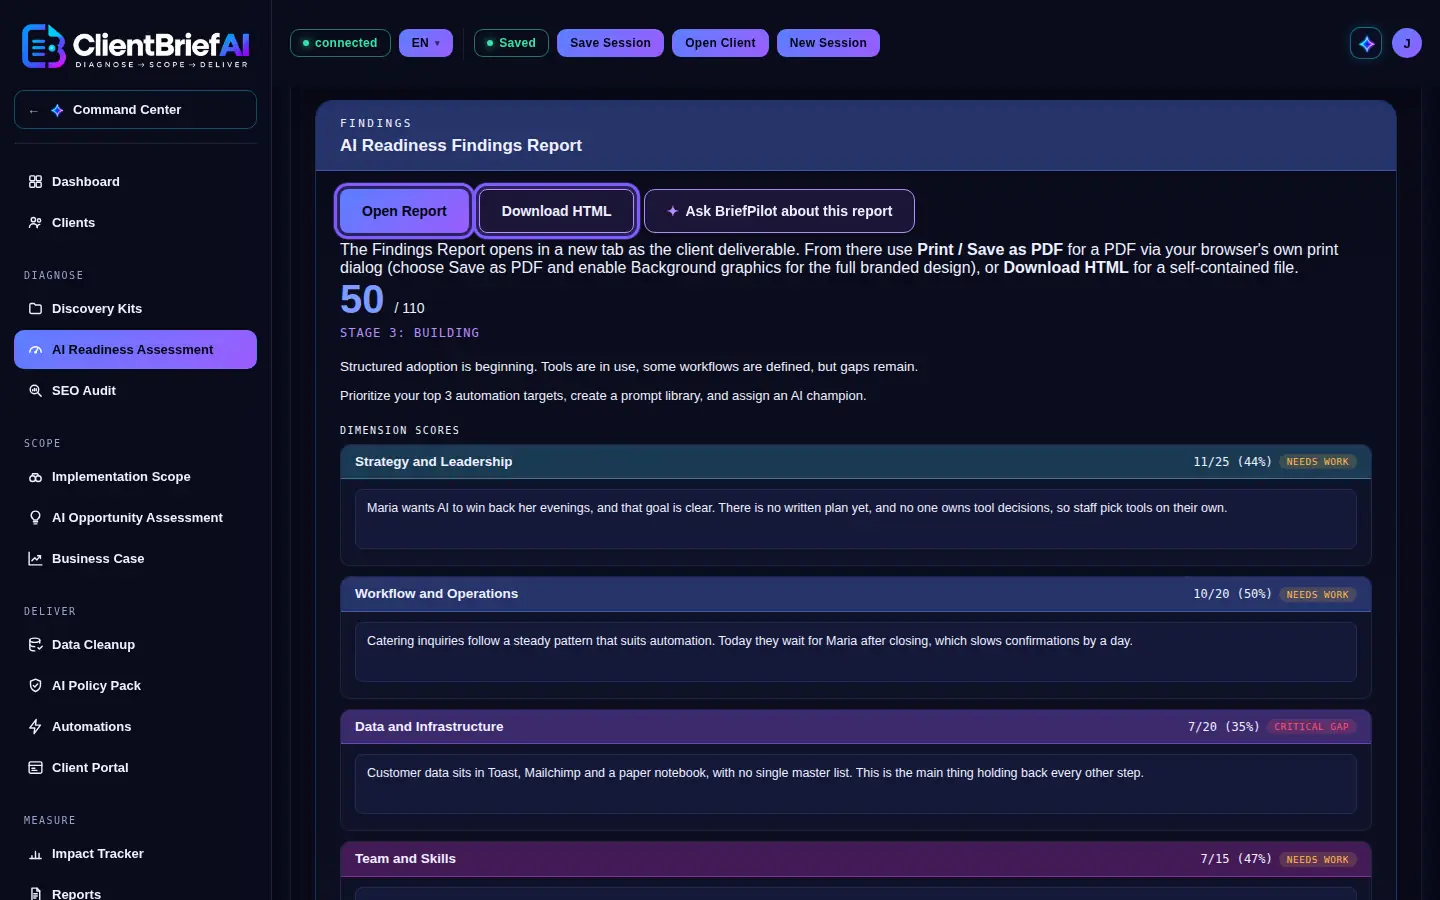
Open Report shows the designed report in a new tab.
Good to know
- Any text in the result can be edited before you share it. Generating again replaces your edits, and the app asks first.
- When you save as PDF, switch on Background graphics in the print window to keep the full design.
Diagnose
SEO Audit
The SEO Audit checks the client's search and AI visibility from their website. It scans the site, scores it from 0 to 100 across five checks, and ranks every fix by impact and effort. It is in the Diagnose group, right after AI Readiness Assessment, on the trial, Full, Full Plus and owner plans (not Starter).
-
Enter the client's website
Open SEO Audit under Diagnose and type the Website address. The rest is optional but makes the AI check sharper: Primary service (for example, seafood restaurant), Primary city or region, and up to 5 questions a customer would type into ChatGPT or Google to find a business like this, one per line.
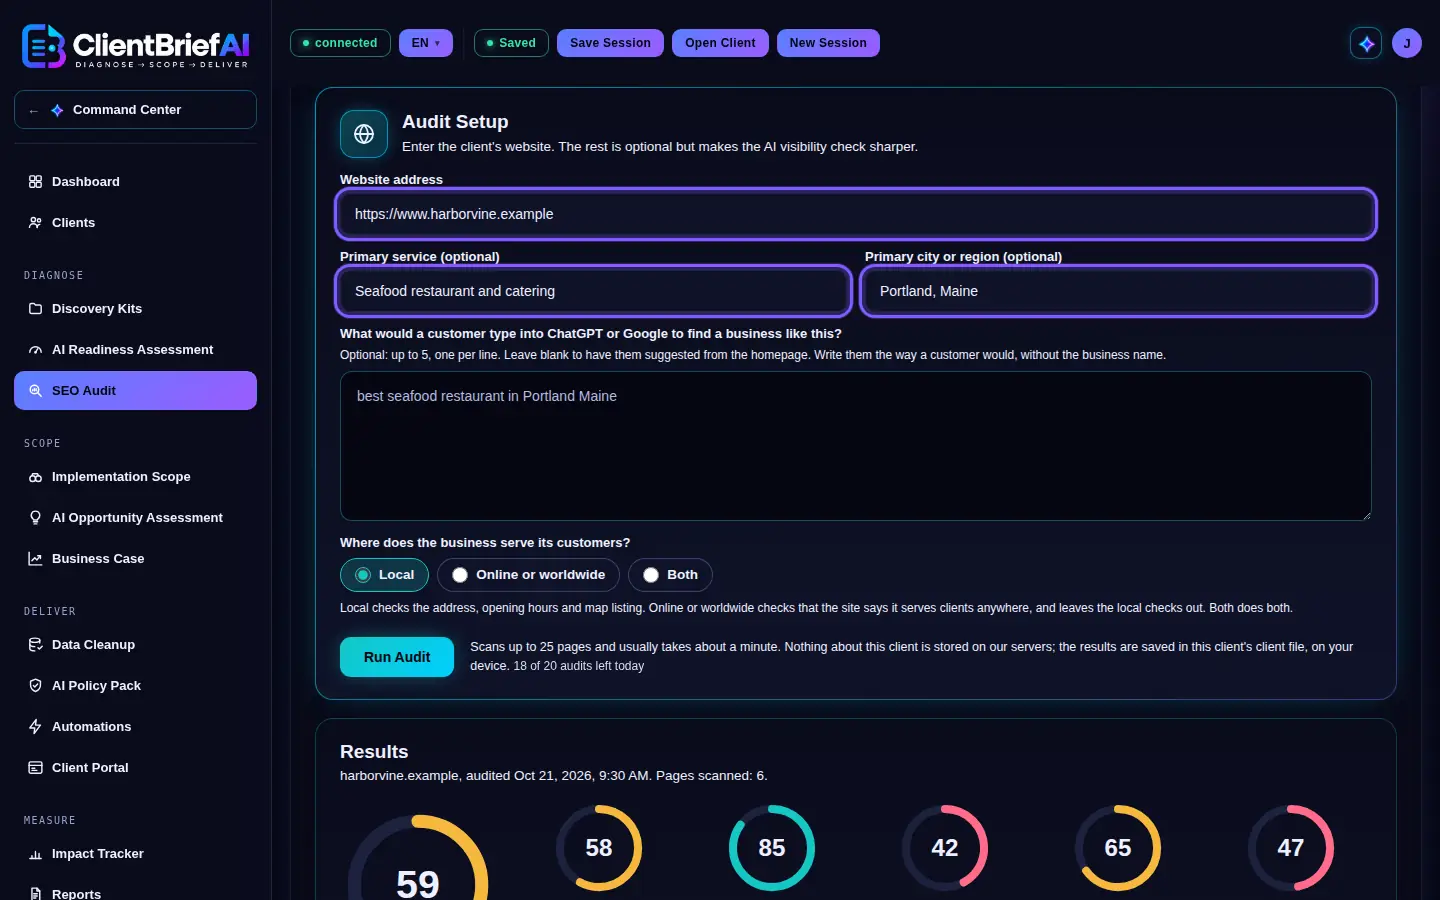
Only the website is needed; the rest sharpens the AI check. -
Choose where the business serves its customers
Pick Local, Online or worldwide, or Both. Local checks the address, phone, opening hours and map listing. Online or worldwide leaves local presence out and shares its weight among the other checks; the homepage should say the business serves clients remotely or worldwide. Both runs the local checks and looks for that statement too. The page suggests a choice from the client's industry and from the site itself, and your choice always wins.
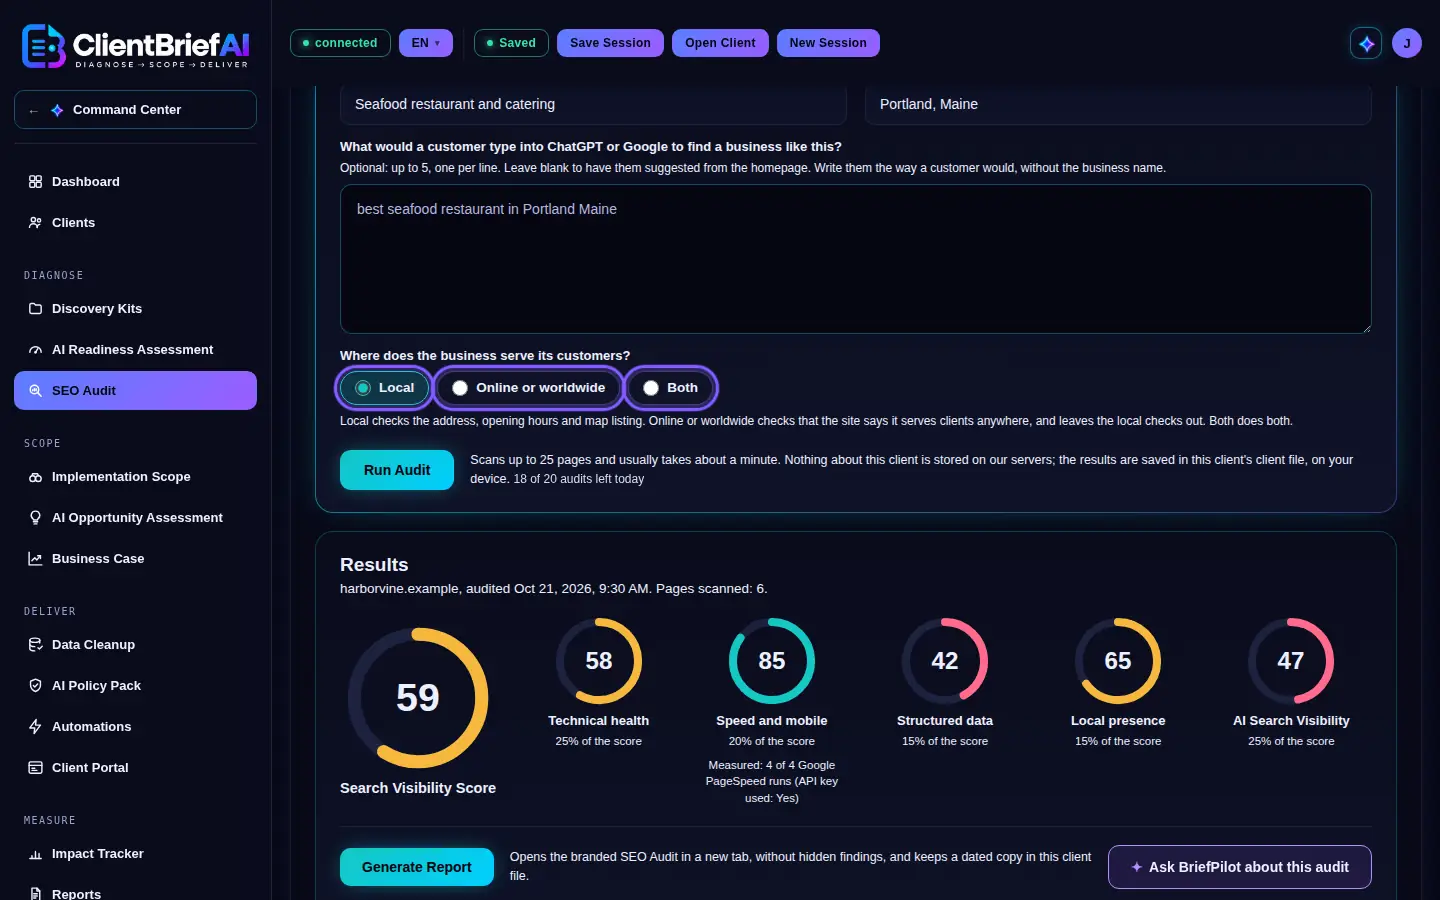
Local adds address, hours and map listing checks. -
Run the audit
Click Run Audit. It scans the homepage and up to 25 more pages, checks speed on a phone with Google PageSpeed, and runs the AI check. It usually takes about a minute, and the page shows each part as it finishes. Each account can run 20 audits a day; the page shows how many are left today. Nothing about the client is stored on our servers: the results go into this client's session file. With this polite pace (two pages at a time with a short pause between them) the whole audit takes about a minute and a half. A line under Pages scanned says why the scan stopped where it did, for example the 25 page limit, the time limit (with how many pages were read) or the site refusing requests. If the site starts refusing requests partway through, the audit slows down, tries that page once more and, if it is still refused, stops and says how many pages it read.
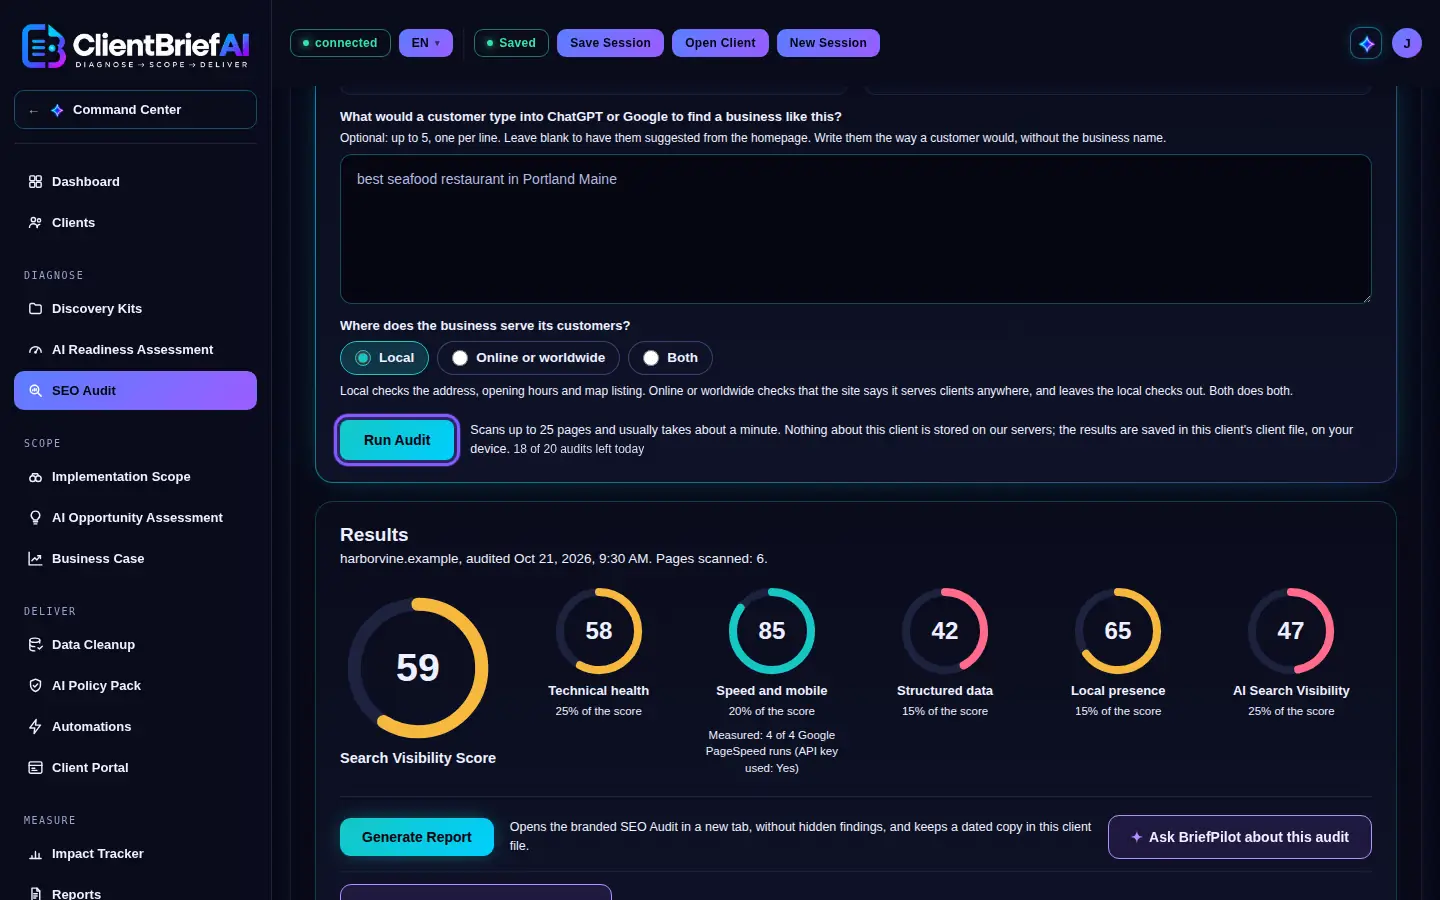
It scans the site, checks speed and runs the AI check. -
If the site has bot protection
Some sites, often behind Cloudflare, answer automated visitors with a "checking your browser" page instead of the website. The findings then start with Bot protection blocked this audit, with the exact user agent to send the client: ask them to allow it in Cloudflare (or their firewall), or to lower the security level for a while, then run the audit again. If Google PageSpeed could read the homepage, Technical health is scored from Google's checks on that page and Pages scanned shows 1 (read via Google PageSpeed); structured data and local presence are not measured. The AI Search Visibility check still runs (see the next step).
-
Read the score and the five checks
The Search Visibility Score is out of 100. It is made of five checks: Technical health (25%: pages, robots.txt, sitemap, broken links, https), Speed and mobile (20%), Structured data (15%: the code that tells search engines and AI what the business is), Local presence (15%) and AI Search Visibility (25%). A check that could not be measured, or does not apply, is left out and its weight shared among the others. As a rough guide, 80 and above is strong, 50 to 79 has clear gaps, and under 50 needs work first.
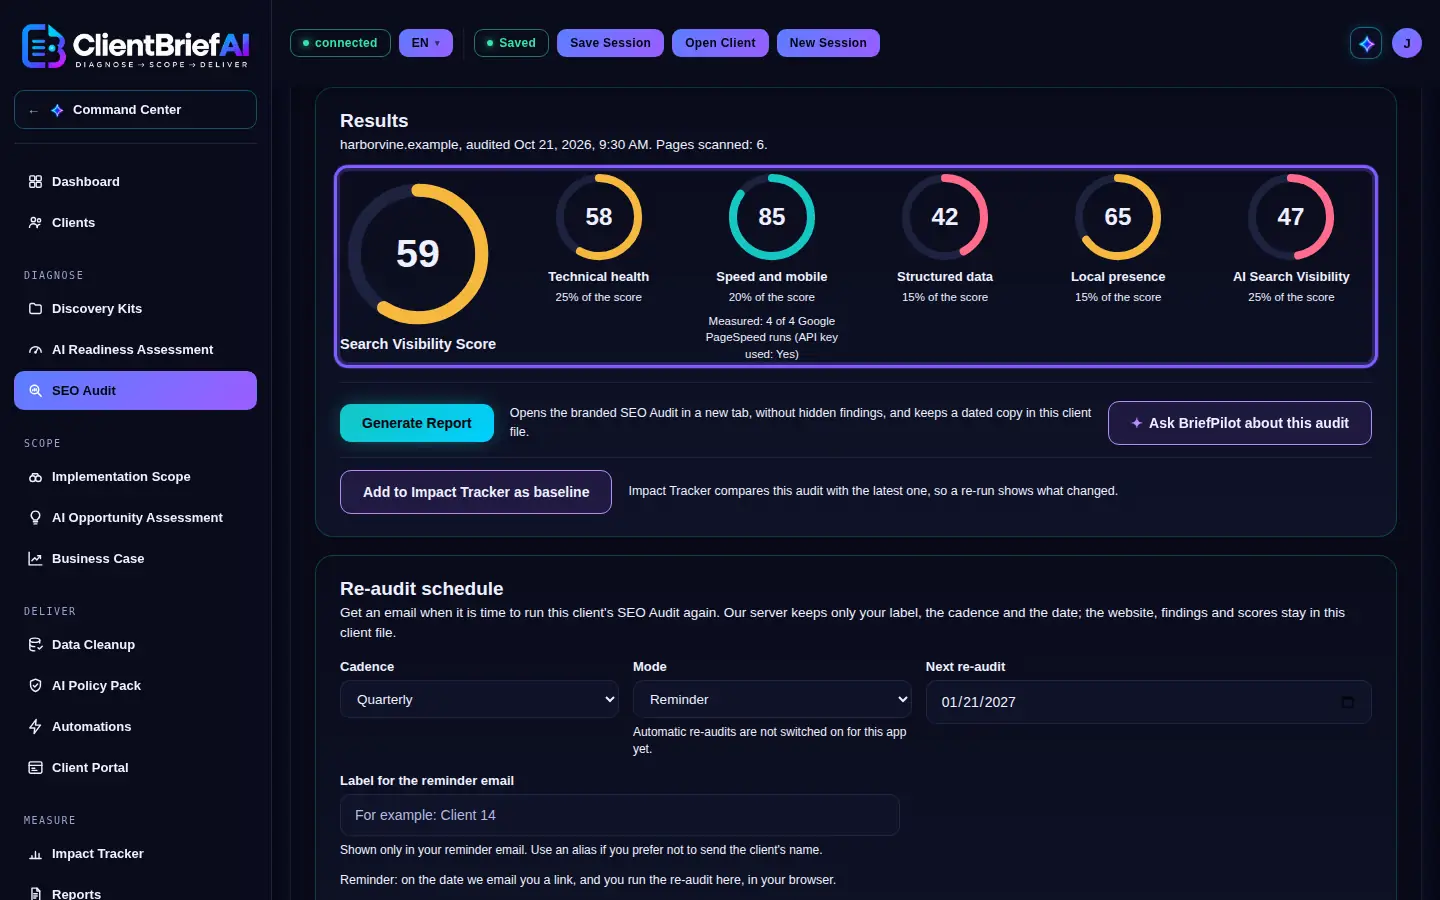
Each check shows its share of the overall score. -
Read the AI Search Visibility check
For each customer question, Claude answers with web search without being told the client's name, then the answers are checked for whether the business was mentioned and described accurately. You see Mentioned in n of n answers, what each answer said, and its sources. It is a simulation at a point in time, not what ChatGPT, Google or Perplexity say, and AI answers change; the result shows the date it was checked. If the homepage cannot be read and you left the customer questions empty, the questions are written from the client's name, industry, primary service and city or region instead. Fill in at least one of them: with all four empty the check cannot run, and the line under the AI gauge says so.
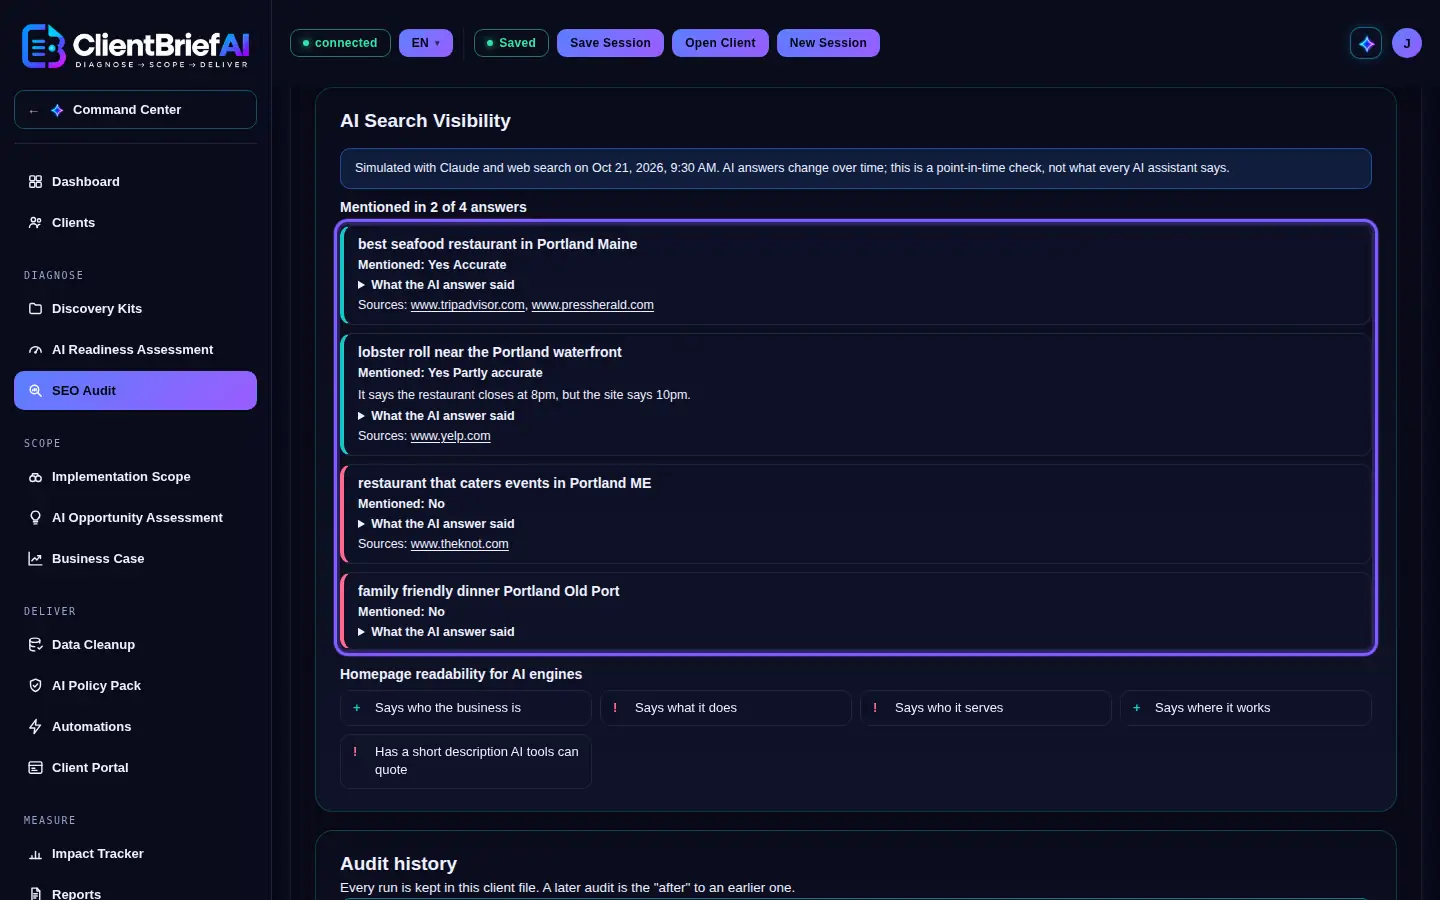
See which questions AI answers name the business in. -
Work through the findings
Every problem is listed with why it matters and what to do, ranked by impact (high, medium, low) and then by effort (quick, moderate, project), so the biggest quick wins come first. Use Show findings for to look at one check at a time. Below them are the Executive summary for the business owner, which you can edit, and a Recommended positioning statement for the homepage. Broken links, pages that share a title and pages with no description list every one: each broken link with its status and every page it is on, each shared title with the pages that use it, and each page that has no description. The report lists them too.
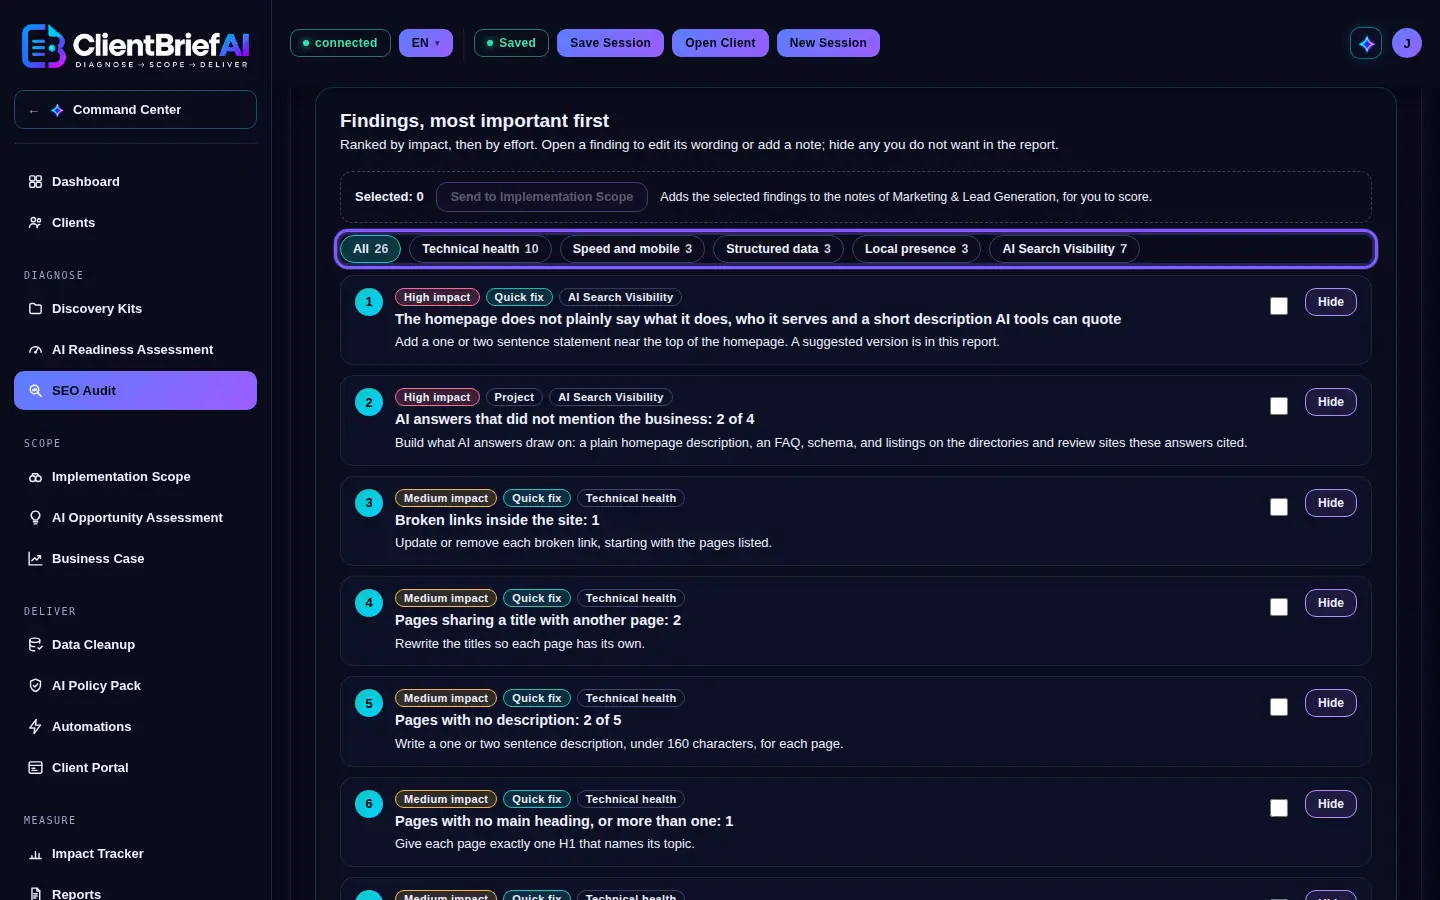
Quick, high impact fixes come first. -
Generate the branded report
Click Generate Report for an SEO Audit report with your logo and name, ready to hand the client. Print / Save as PDF and Download HTML work as for the other reports, and the report appears on the Reports page.
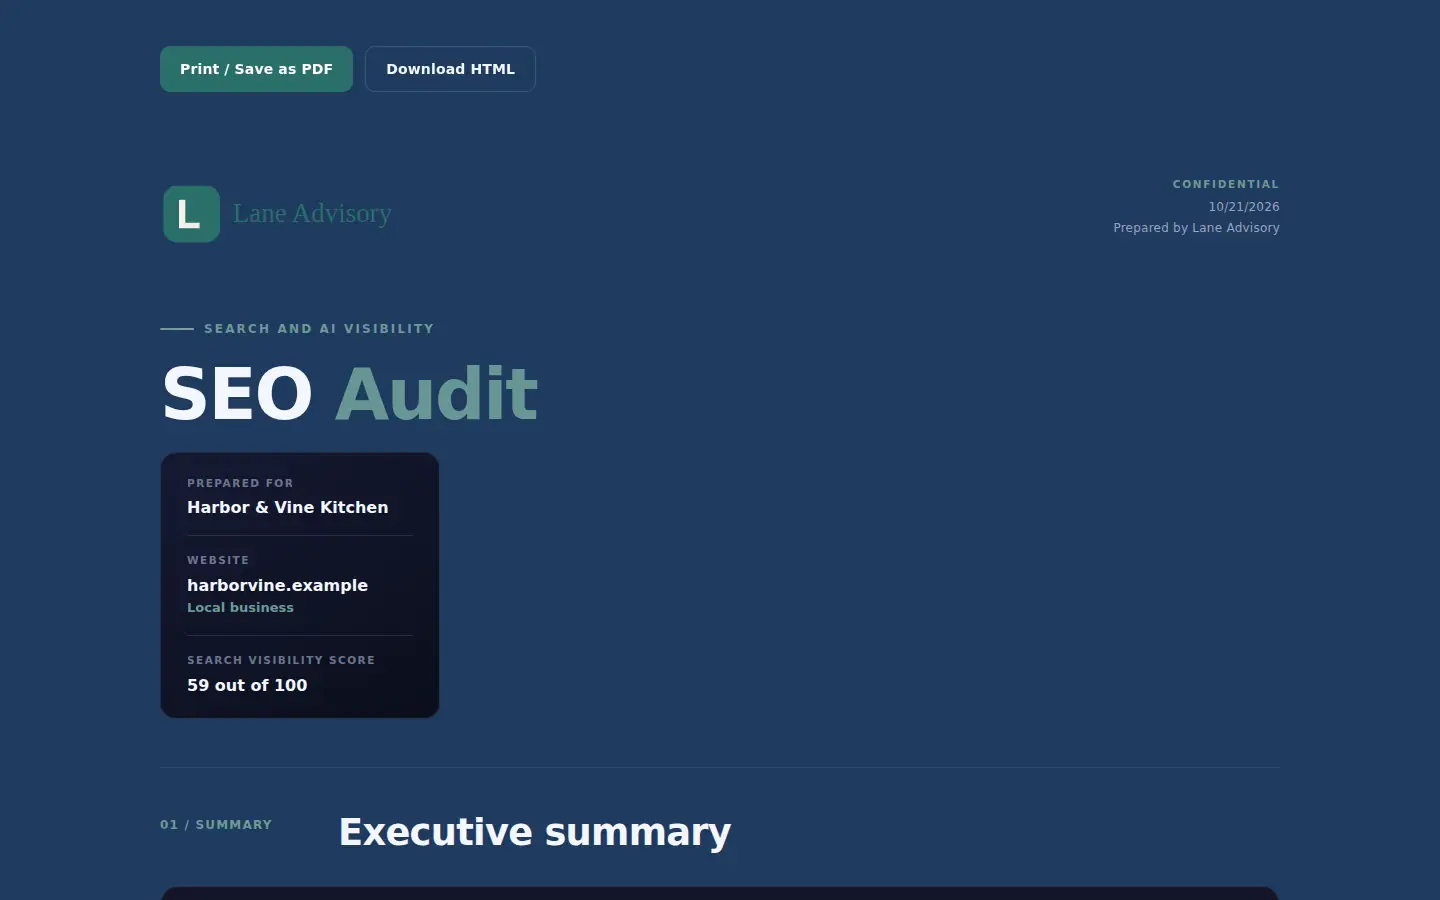
The report carries your logo and name, ready to hand over. -
Send findings to Implementation Scope
Tick Select for Implementation Scope on the findings you want to act on, then click Send to Implementation Scope. They are added to the notes of Marketing & Lead Generation for you to score; nothing is scored for you.
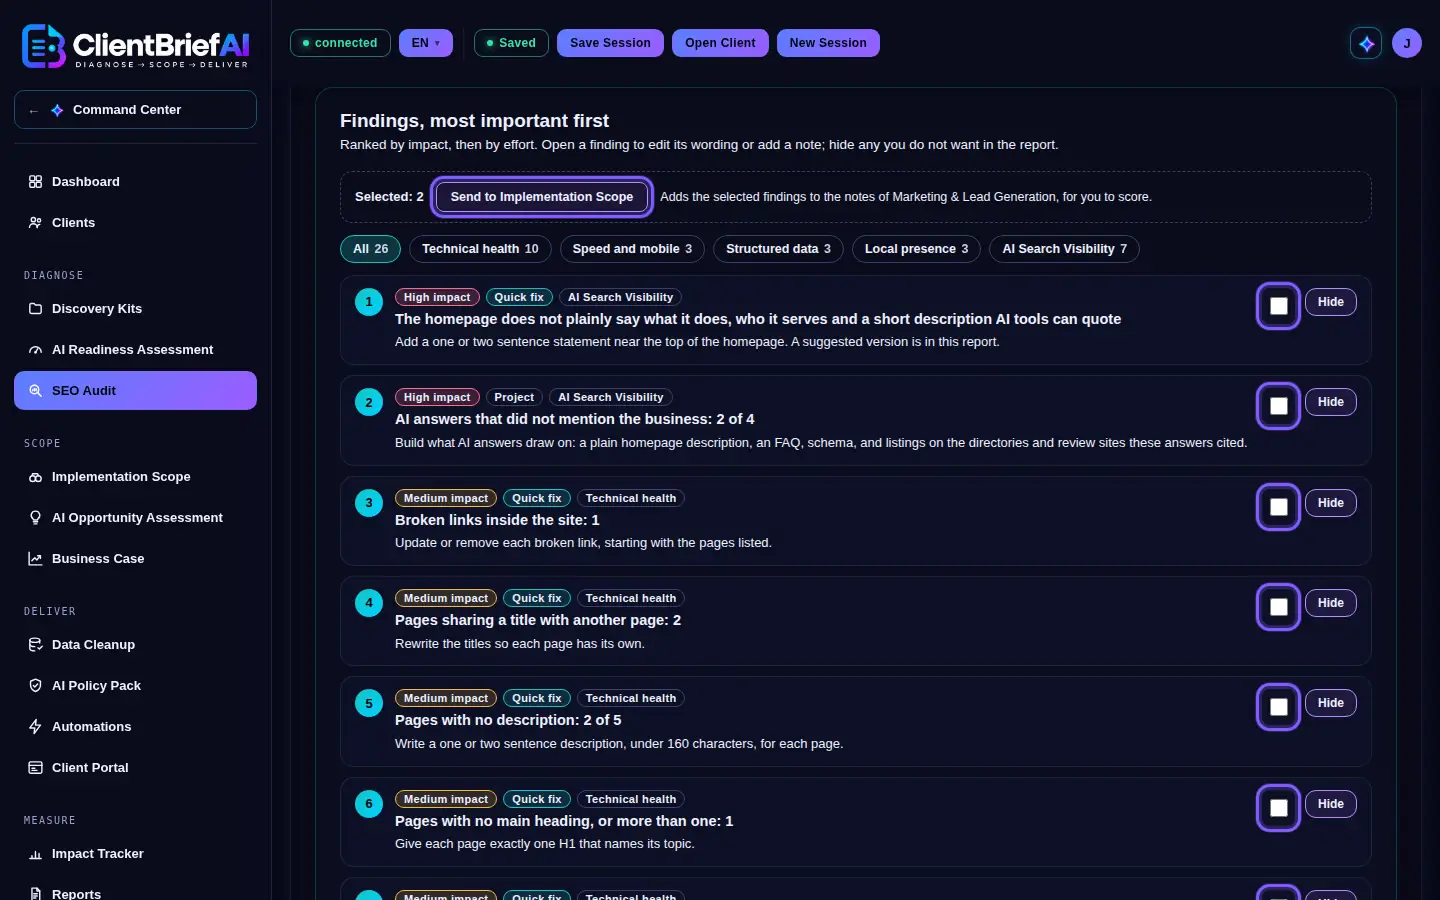
Picked findings go into Implementation Scope's notes. -
Track search visibility in Impact Tracker
On Full Plus, click Add to Impact Tracker as baseline. Impact Tracker then shows a Search Visibility card: the baseline audit against the latest one, with the score, Google PageSpeed on mobile, AI answers mentioning the business, and Pages indexed, which you enter by hand from Google Search Console or a site: search. The Impact Report includes the before and after.
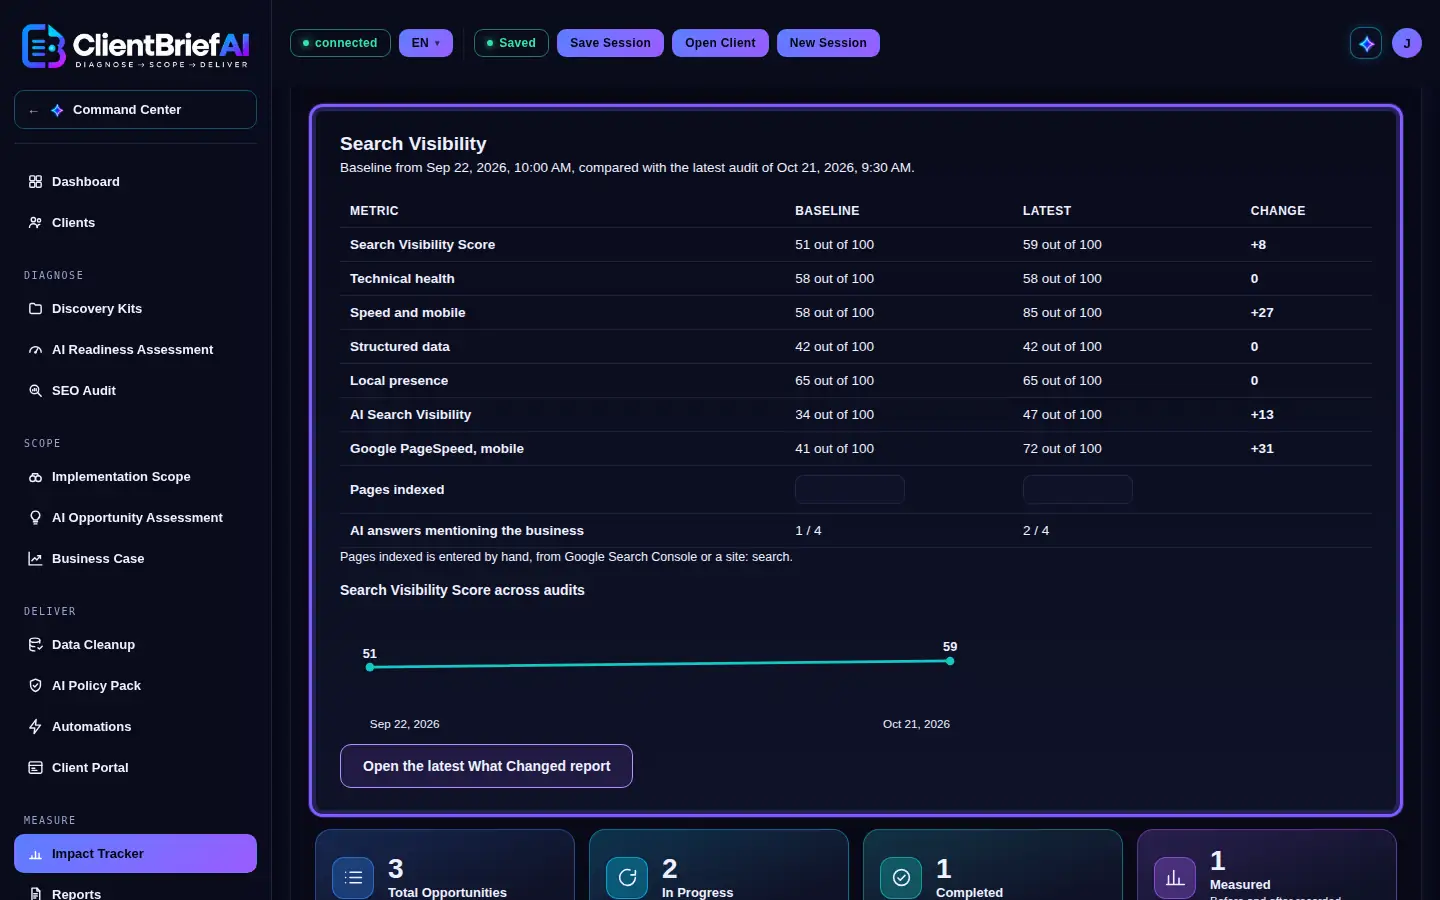
The baseline against the latest audit, score by score. -
Run it again and compare
Every run is saved, dated, in Audit history. Run the audit again after changes are made, then use Before and after to compare any two audits: what was resolved, what is new and what is still open. If the business type changed between the two audits (Local, Online or worldwide, Both), findings from a check that no longer applies are listed as No longer checked (business type changed) instead of resolved, and a note says so at the top. Save the session so the audits stay in the client's file.
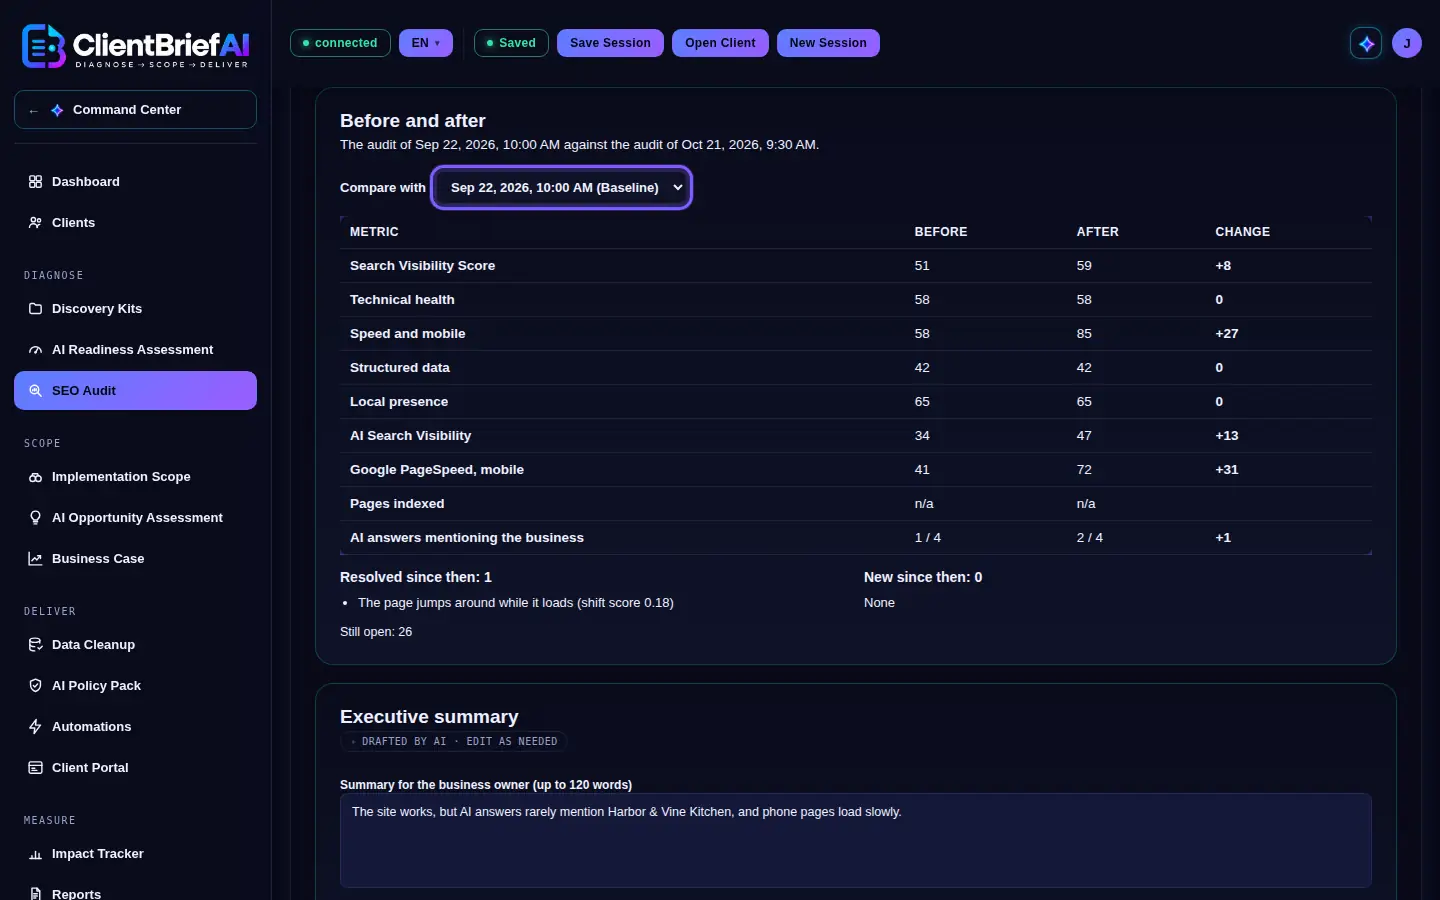
Pick any two audits to see what changed. -
Schedule re-audits
Under Re-audit schedule, pick a Cadence (Monthly, Quarterly or Every 6 months) and check the Next re-audit date. With Reminder, we email you a link on the date and you run the re-audit here, in your browser, with Run re-audit now. Type a Label for the reminder email; it is shown only in that email, so use an alias if you prefer not to send the client's name. Our server keeps only the label, the cadence and the date. With Automatic (Full Practice, Full Plus), our server runs the audit for you on the date and emails you when the result is ready. Before it is turned on, the page lists exactly what will be stored for this client (the website, business type, service and region, your customer questions, the schedule) and what is never stored (the client's name, your notes, answers, scores or reports); tick the box to agree. The result comes into this client file the next time you open it and is then deleted from our server; unclaimed results are deleted after 60 days. After three failed runs in a row the client goes back to Reminder. Delete server data for this client removes everything at once.
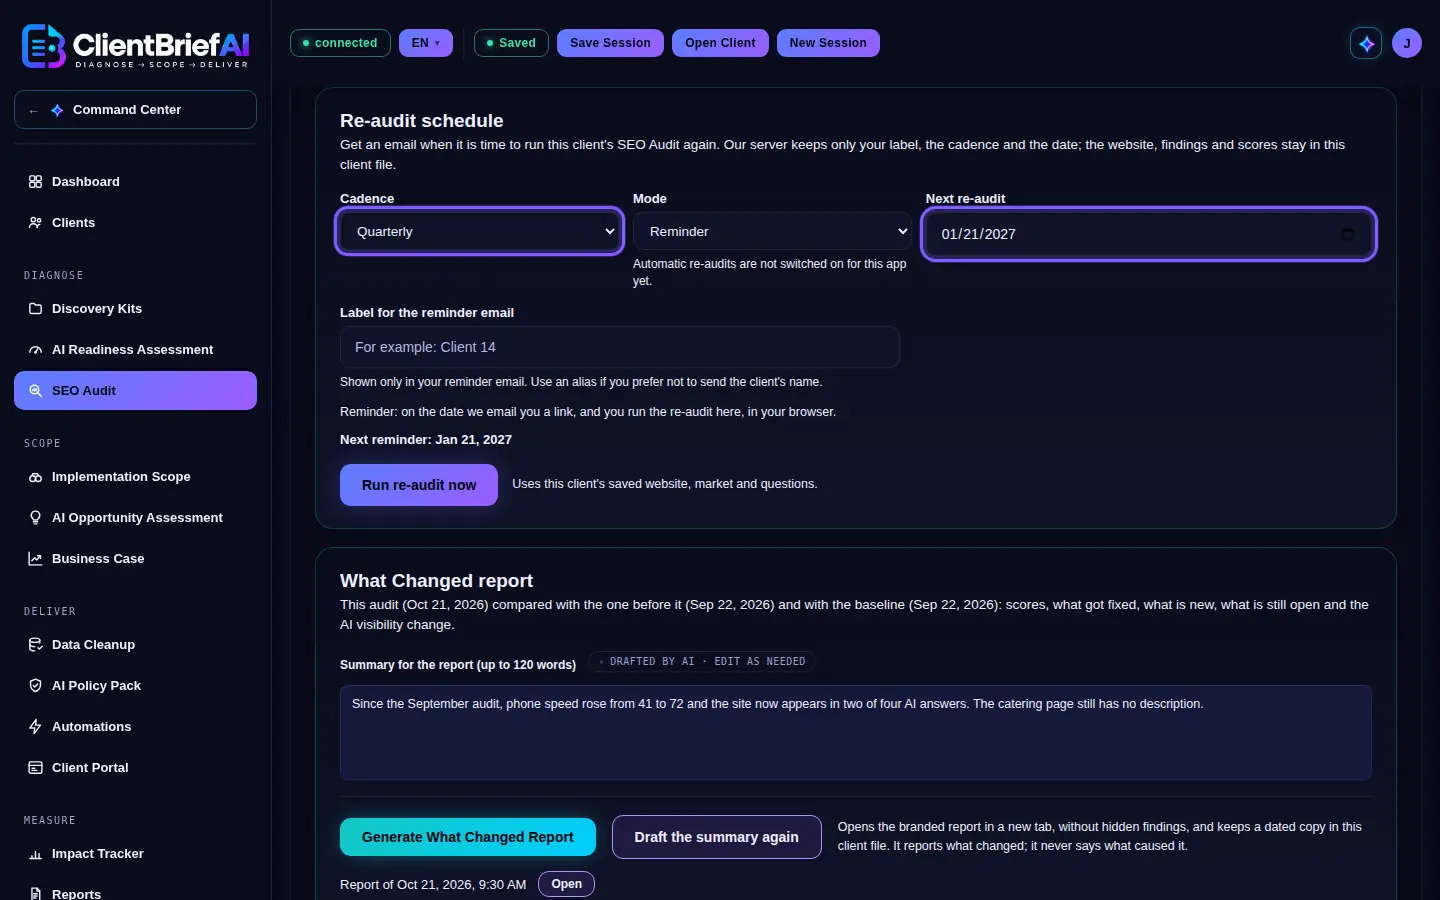
With Reminder, we email you a link on the day. -
Read the What Changed report
After a re-audit, the What Changed report compares this audit with the one before it and with the baseline: the scores, what got fixed, what is new, what is still open and the change in AI visibility. BriefPilot drafts a summary of up to 120 words, which you can edit or draft again. Click Generate What Changed Report for a branded copy; it reports what changed and never says what caused it. Each copy is kept, dated, in the client file and appears on the Reports page.
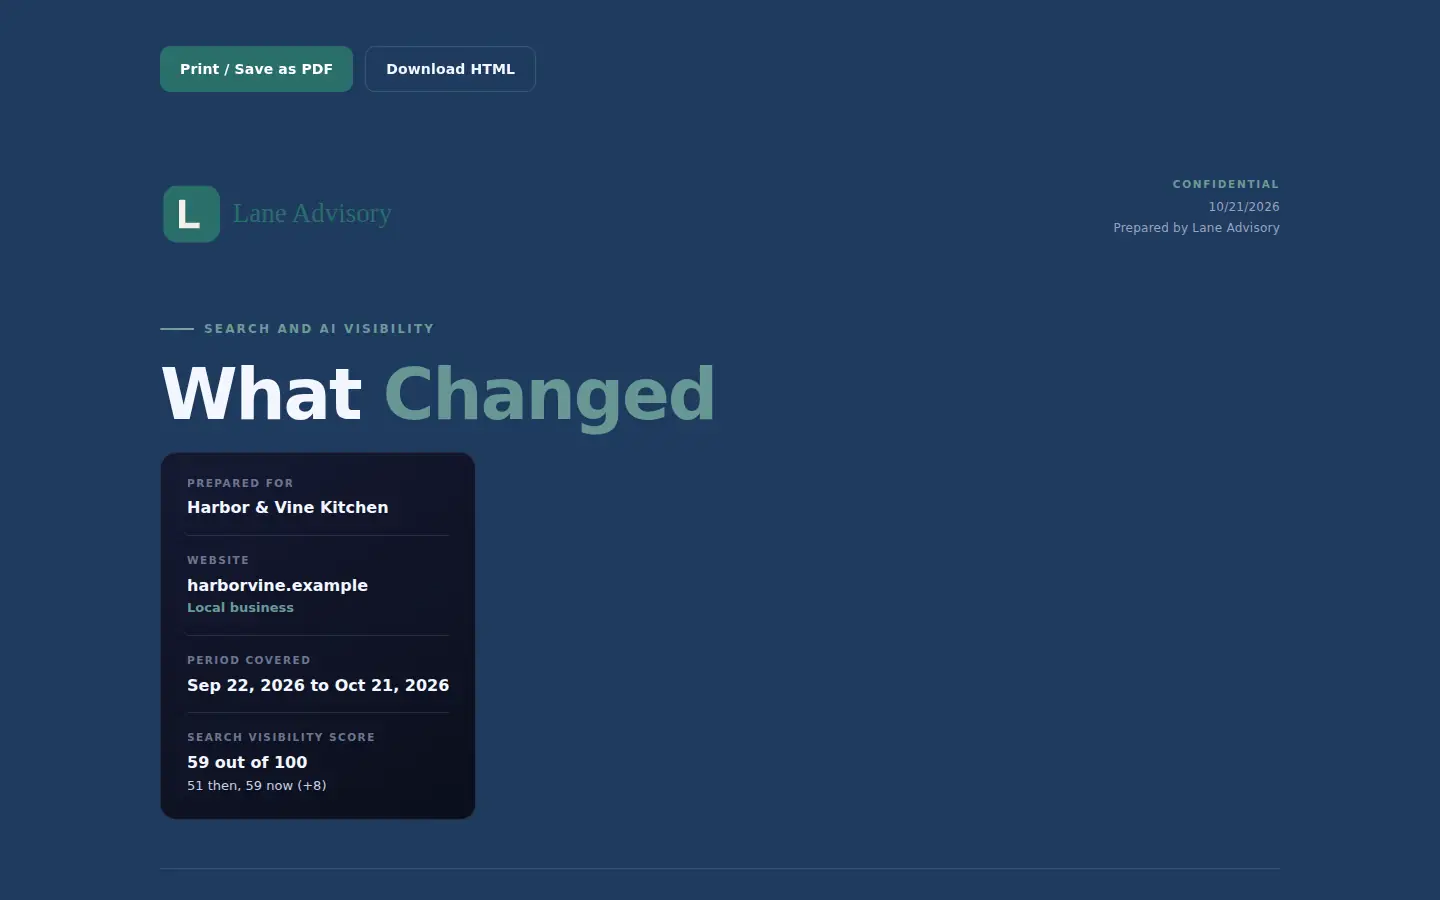
Scores, what got fixed, what is new and what is still open.
Good to know
- If Google PageSpeed could not measure the site, the line under the Speed gauge says why (for example the status Google returned) and Speed and mobile is left out of the score rather than counted as zero.
- Address and phone numbers in page text are recognised in North American formats only; elsewhere, local presence relies on the address and phone in the site's structured data.
- CuratorPilot on the suite home sees each client's latest SEO Audit score and date, and suggests running or repeating the audit at the right step.
- The Dashboard lists re-audits due in the next 14 days, or overdue, from the client files it has read.
- The audit identifies itself as SearchBriefAI and follows the site's robots.txt rules for SearchBriefAI.
- Links that Cloudflare adds to hide email addresses are not followed or reported as broken.
Scope
Implementation Scope
Implementation Scope covers 22 categories in four tiers. You score only the categories you discussed, generate a ranked plan at any time, and keep going.
-
Note the opening and paste the transcript
Ask the two opening questions and type the answers under Opening: where the client sees the biggest opportunity. It is optional and not scored. Paste your Discovery Call Transcript for BriefPilot.
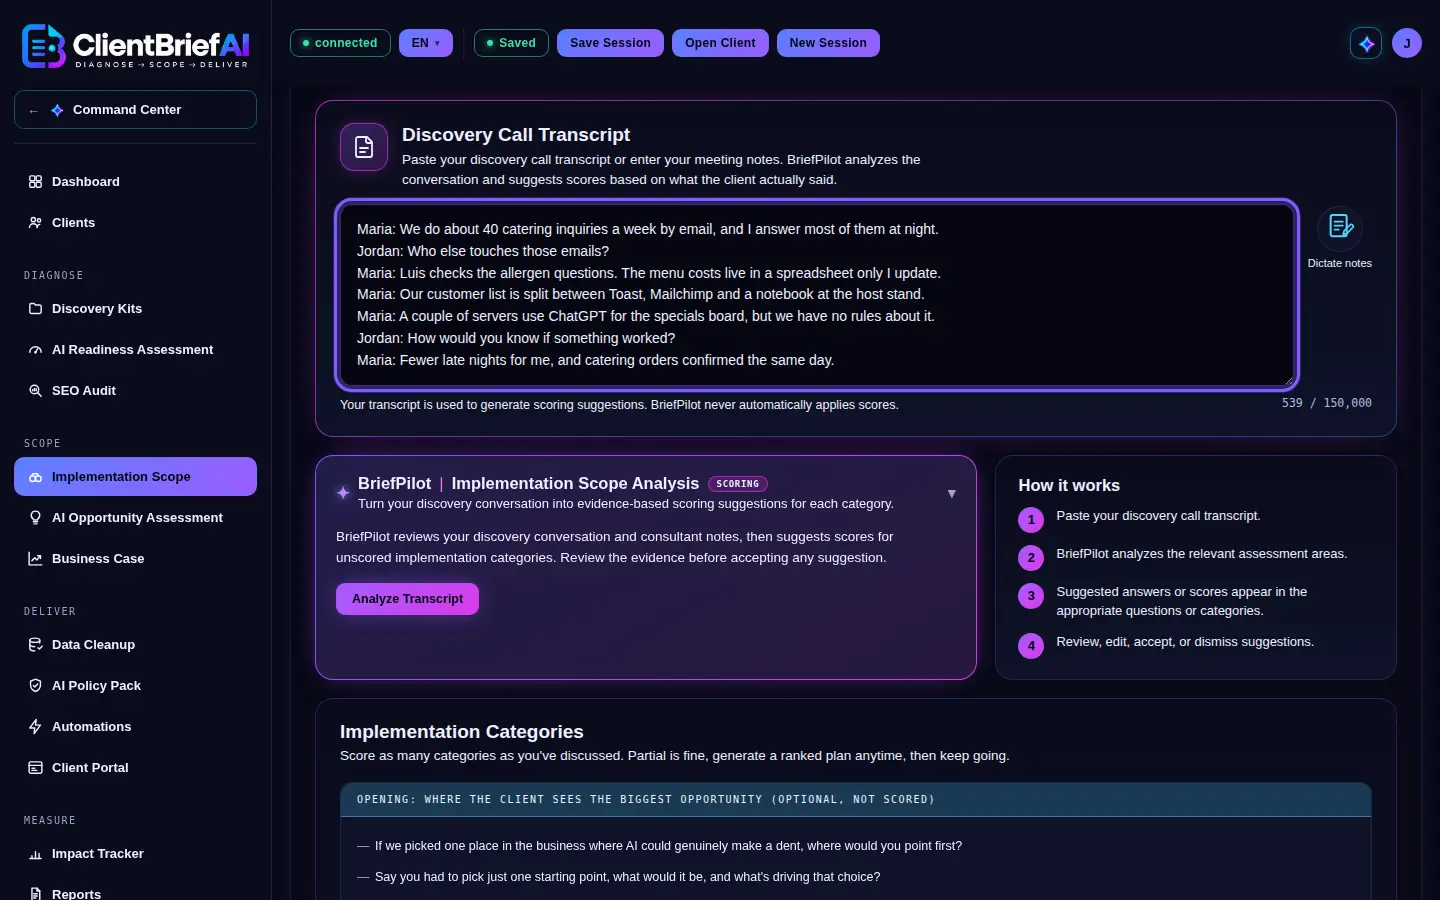
The same transcript feeds BriefPilot's scope suggestions. -
Know the four tiers and why they come in order
Foundation gates everything above it: Data Strategy, Process Documentation & Automation, IT & Cybersecurity, Legal & Compliance, and Change Management & Organizational Culture. Bridge connects the foundation to real business use: Customer Data & Insights, Internal AI Assistants & Knowledge Tools, and Employee Training & Skill Development. Application is where most day to day value is captured, once the first two can support it. Advanced carries the most prerequisites and is credible only once the tiers below are solid.
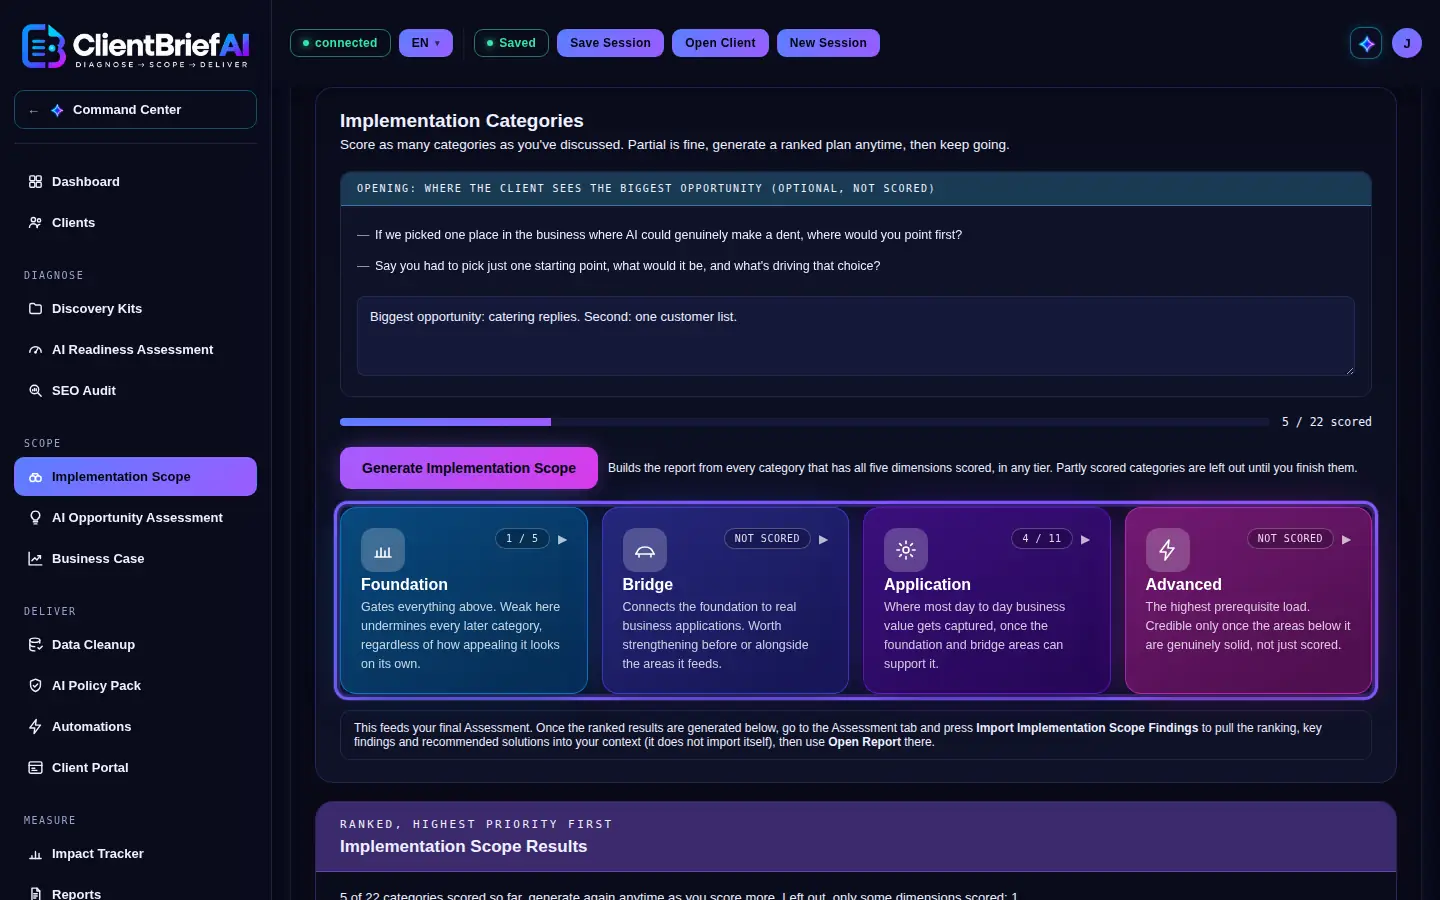
Foundation comes first: it gates every tier above it. -
Open a category and score the five dimensions
Use the category's questions to guide the talk and type your Consultant notes. Then score Current Pain, AI Fit, Team Readiness, Data Availability and ROI Potential from 1 to 5. Execution status and the client's self-rated criticality are optional.
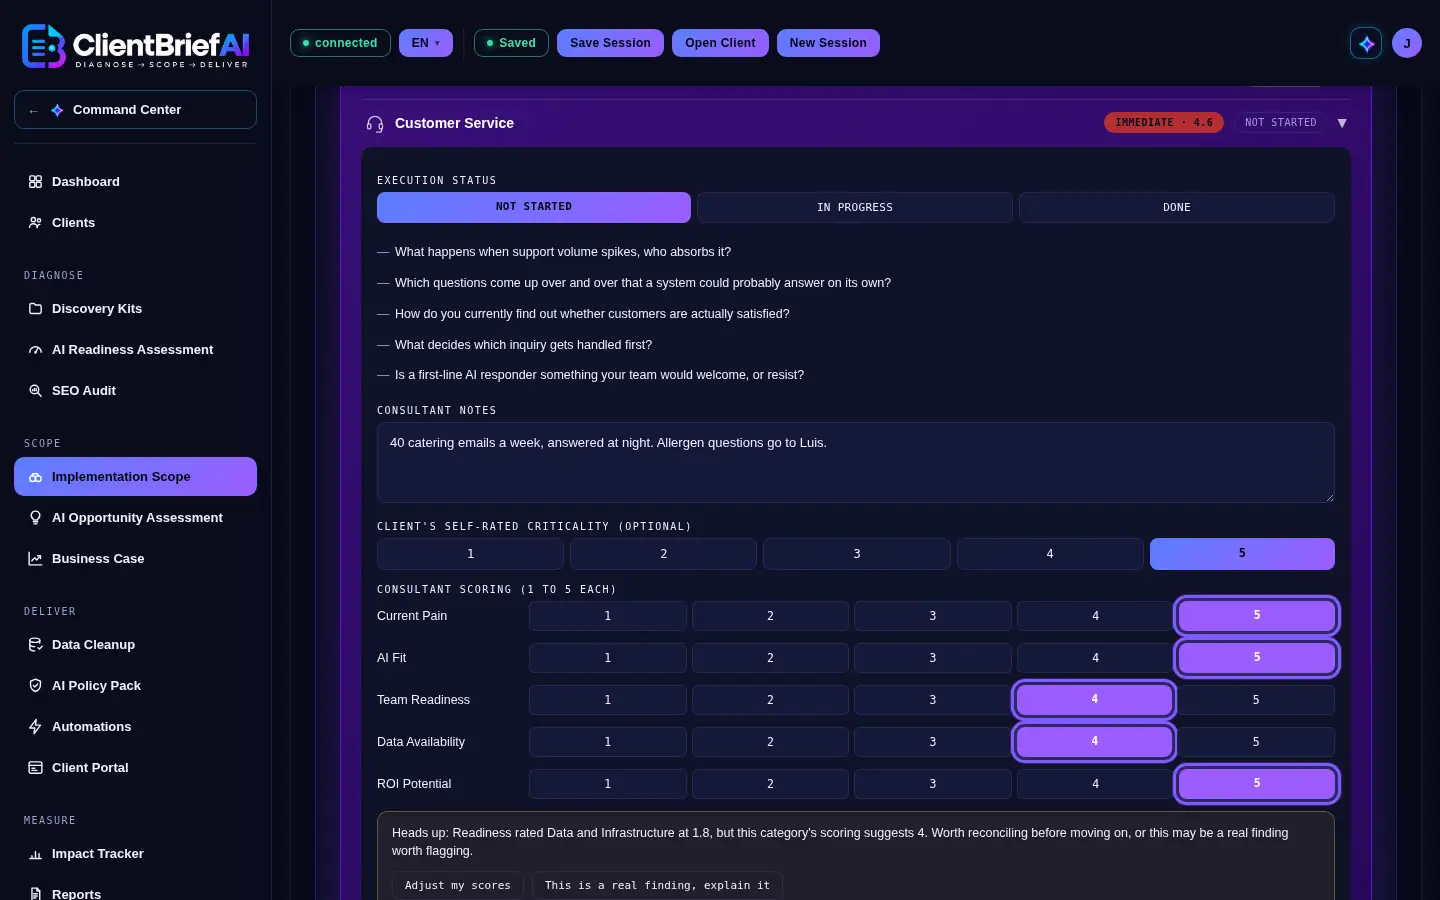
Score all five dimensions for a category to count. -
Score all five for a category to count
A category is included only when all five dimensions are scored. A partly scored one shows how many it has, for example 2 of 5 scored, and is left out of the report until you finish it. The progress bar and the sidebar count only complete categories.
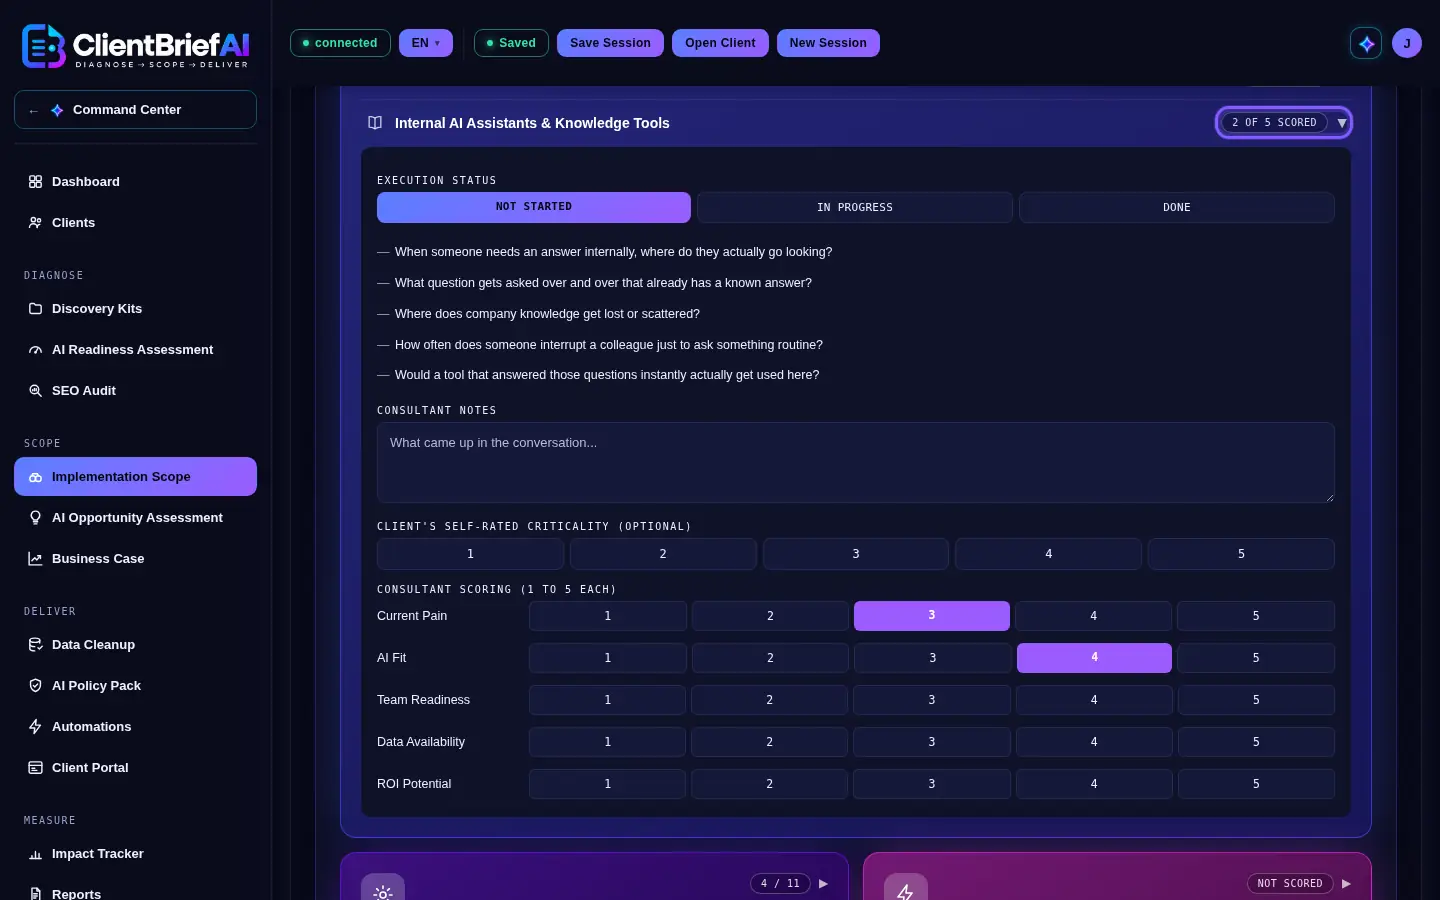
A partly scored category is left out until all five are set. -
Let BriefPilot suggest scores
Click Analyze Transcript in BriefPilot Implementation Scope Analysis. It reads the opening notes, the transcript and your category notes, and suggests scores for categories you have not scored. Accept fills only the dimensions it suggested, so a category can stay partly scored. A category the notes say nothing about is marked BriefPilot: nothing in the notes about this category.
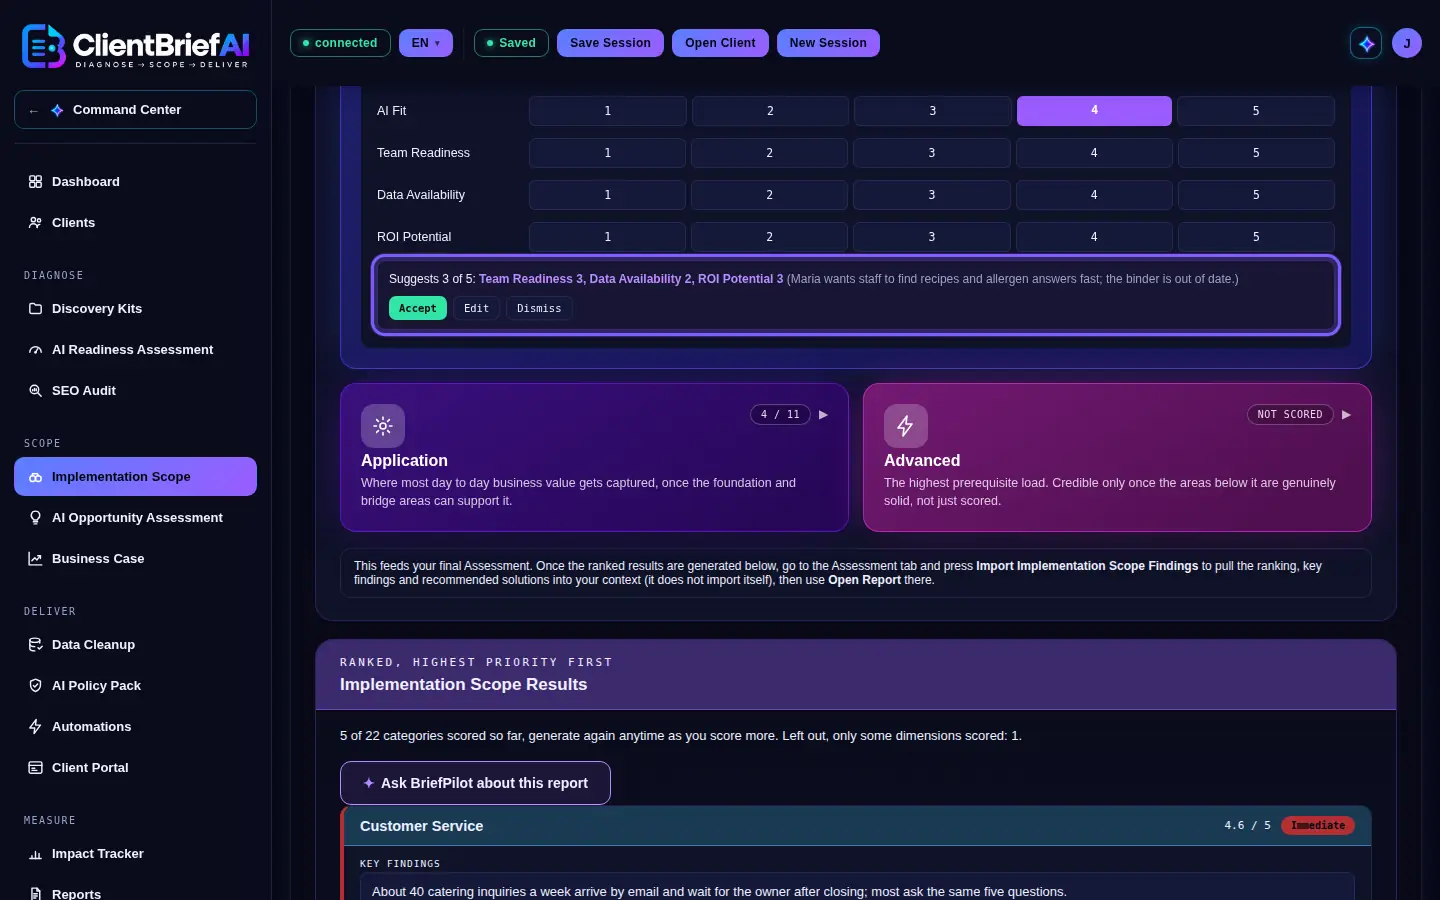
Accept sets only the dimensions the notes support. -
Generate and read the ranked plan
Click Generate Implementation Scope. Implementation Scope Results lists the complete categories, highest priority first. Each shows its score out of 5, a priority of Immediate (4.0 to 5.0), Short-Term (3.0 to 3.99), Planned (2.0 to 2.99) or Monitor (below 2.0), the Key Findings and a Recommended AI Solution, all editable.
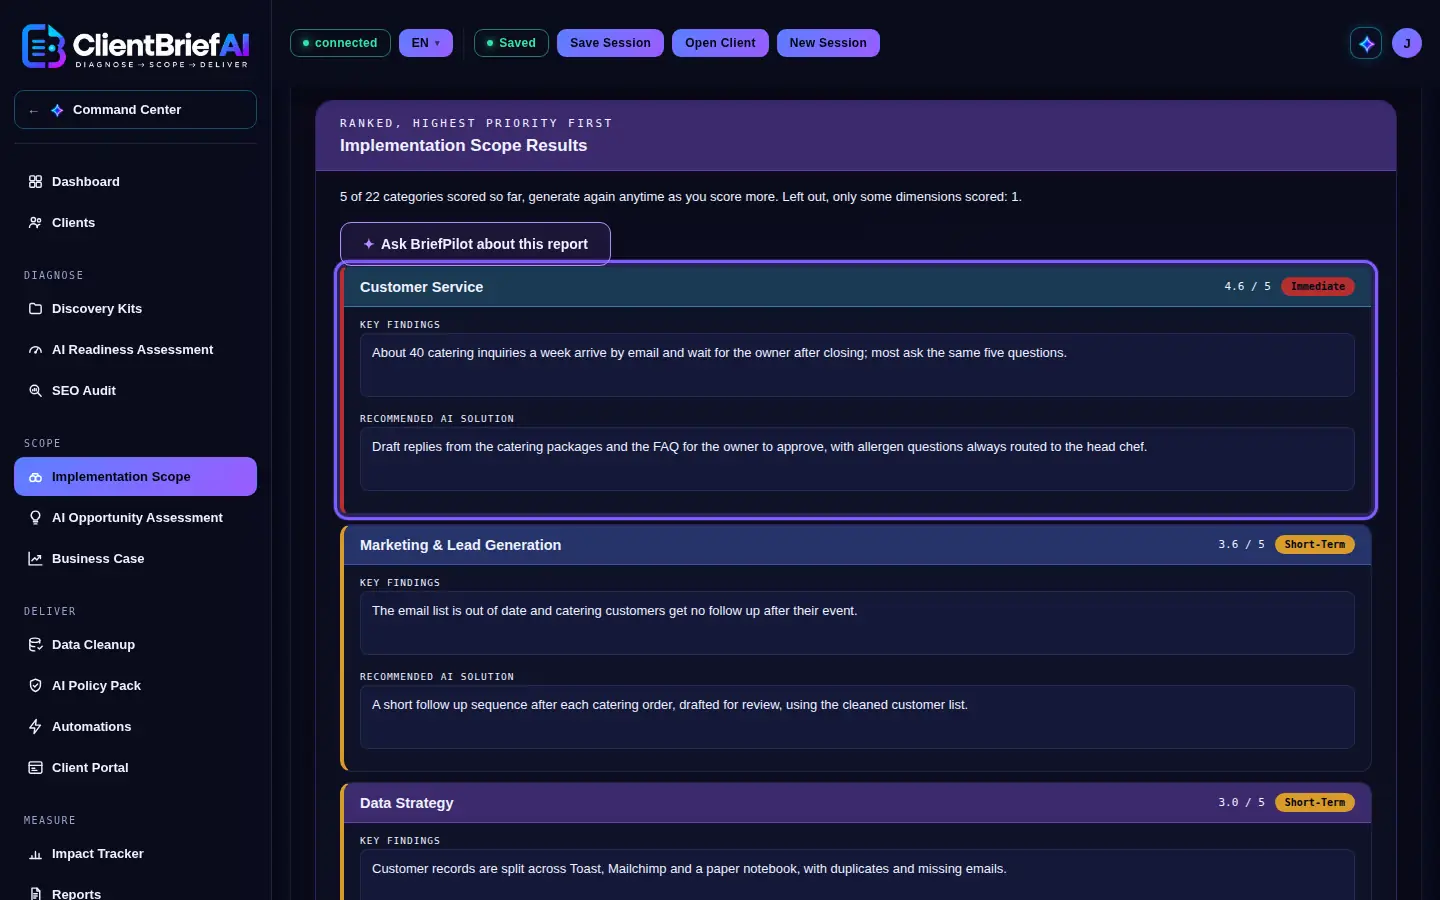
The plan is ranked, highest priority first.
Good to know
- If a category's Readiness score and your scope scores differ by 2 or more, the app points it out. Choose Adjust my scores, or This is a real finding, explain it.
- A category marked Done and not rescored for 90 days is flagged as worth a fresh look.
- The results feed the AI Opportunity Assessment through Import Implementation Scope Findings.
Scope
AI Opportunity Assessment
The AI Opportunity Assessment is the document you send to the client. It combines your Readiness and Scope findings with the client's goals.
-
Ask about the client's goals
Under Client Goals & Success Measures, ask the three questions and type the answers. They are added to the context when you generate.
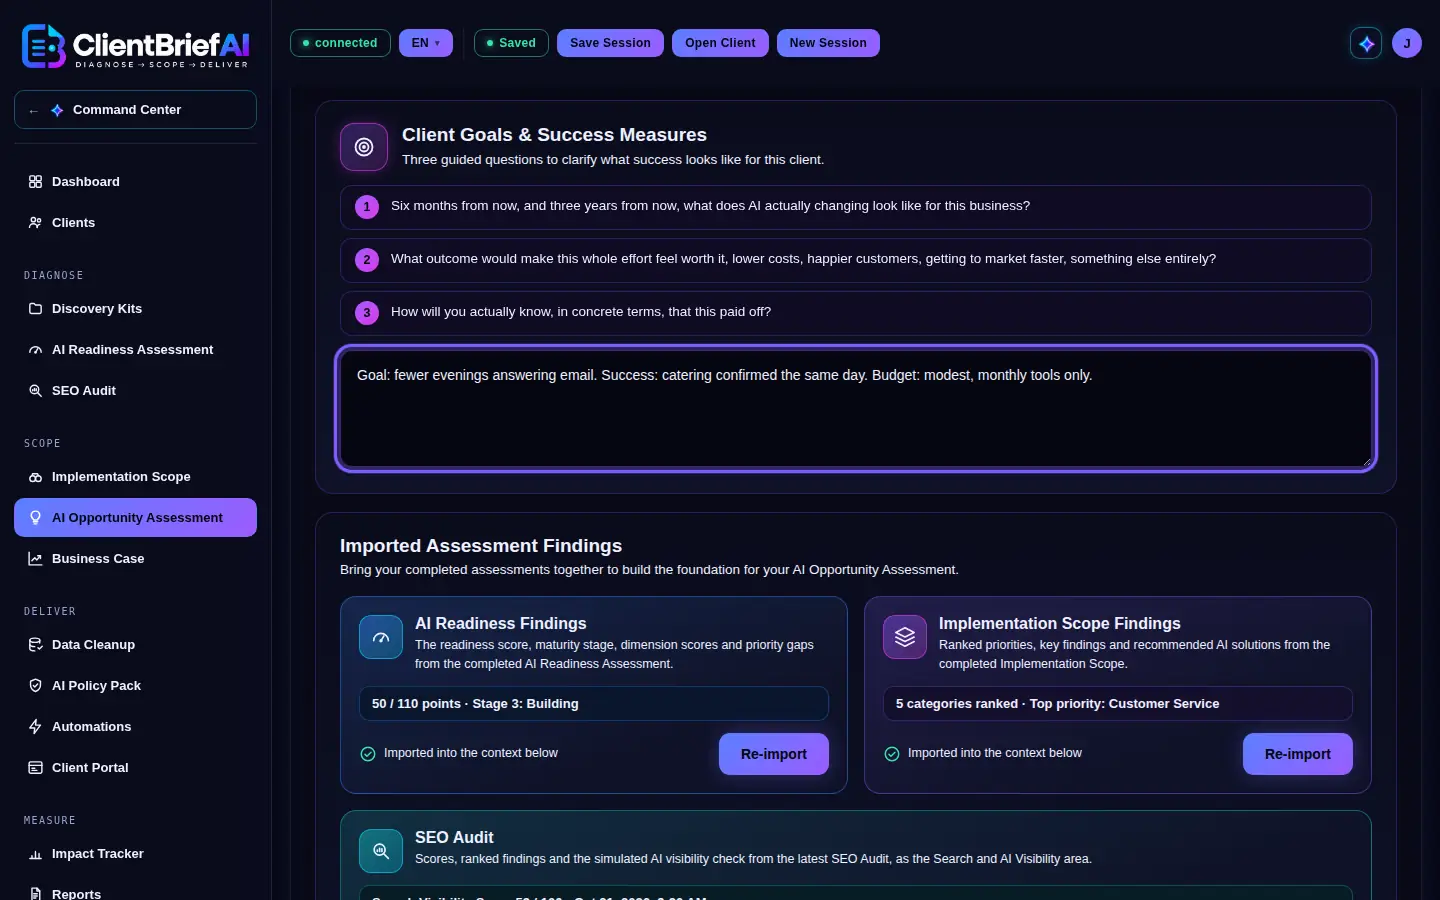
The client's goals frame the whole assessment. -
Import the Readiness and Scope findings
Under Imported Assessment Findings, click Import Readiness Findings and Import Implementation Scope Findings. Each button appears once that result exists for this client. Importing again replaces only the imported block, and the app asks first.
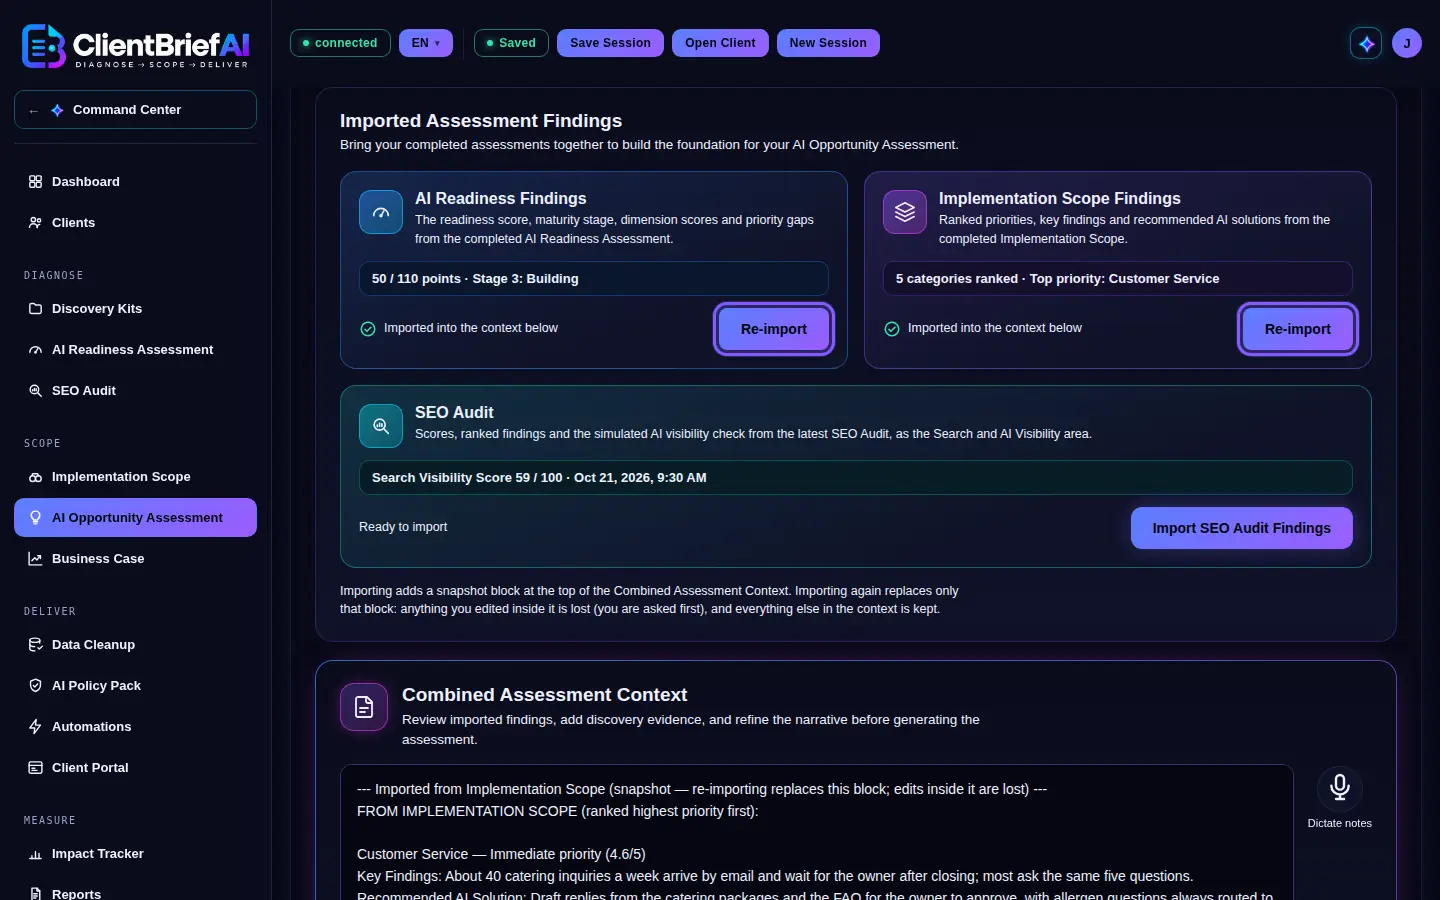
Each Import button appears once that result exists. -
Add evidence to the Combined Assessment Context
Review the imported findings and add what you know from your conversations in Combined Assessment Context. You can type, paste or dictate.
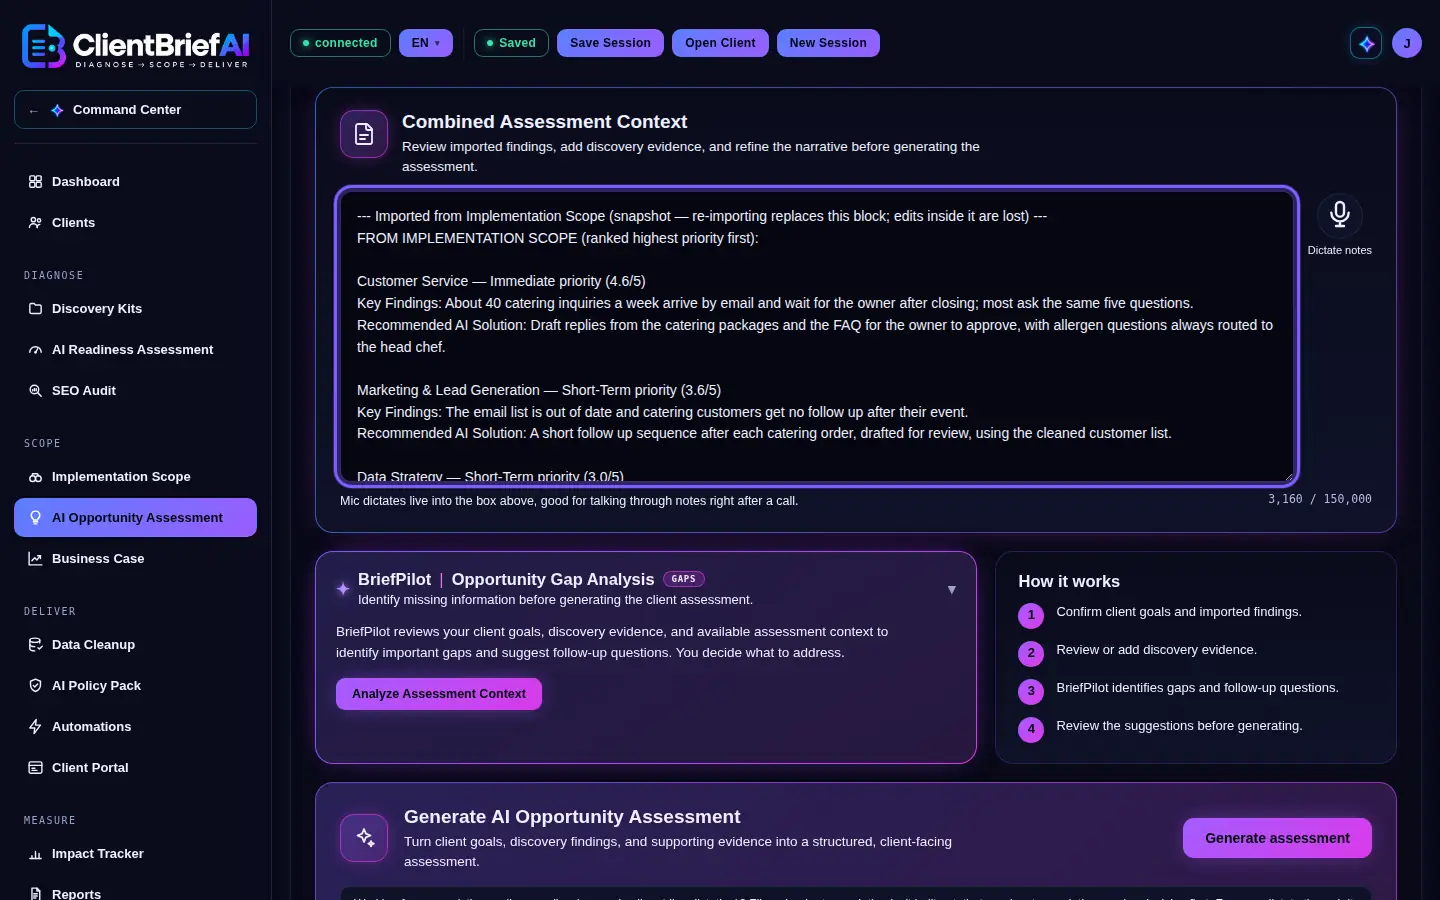
Add what you heard; it is what the assessment is built from. -
Check for gaps with BriefPilot
Click Analyze Assessment Context in BriefPilot Opportunity Gap Analysis. It lists missing information and follow-up questions to ask. It does not change anything. You decide what to address.
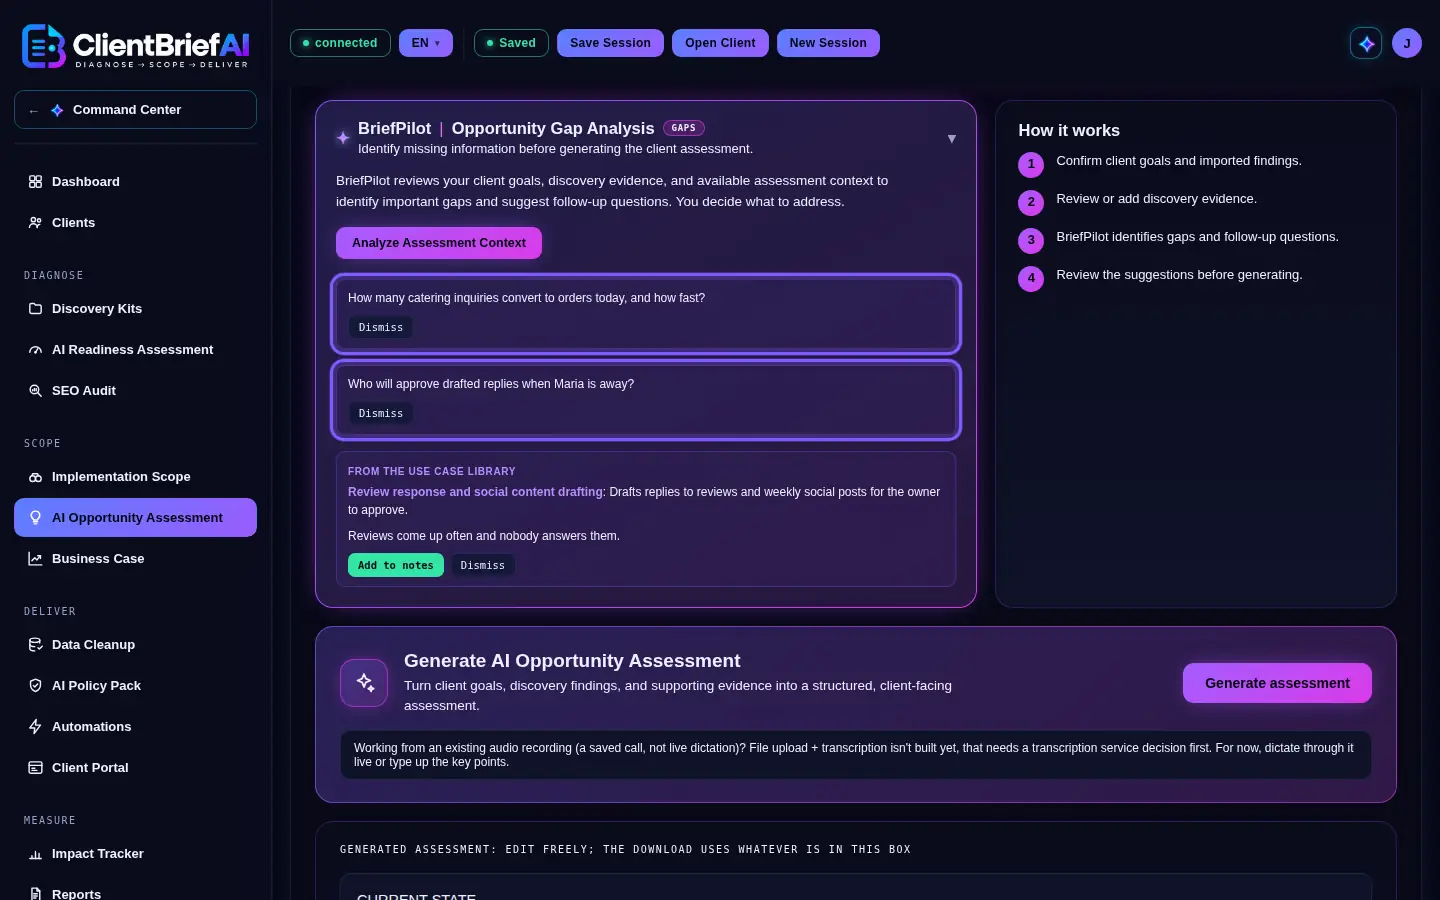
Gaps are questions to ask, never changes to your notes. -
Use the use case library
When you click Analyze Assessment Context, BriefPilot may also suggest up to three common AI use cases for the client's industry that your notes do not already cover, each marked From the use case library. Add to notes puts one line in your notes, so the next Generate considers it; Dismiss removes the card. Nothing is added on its own.
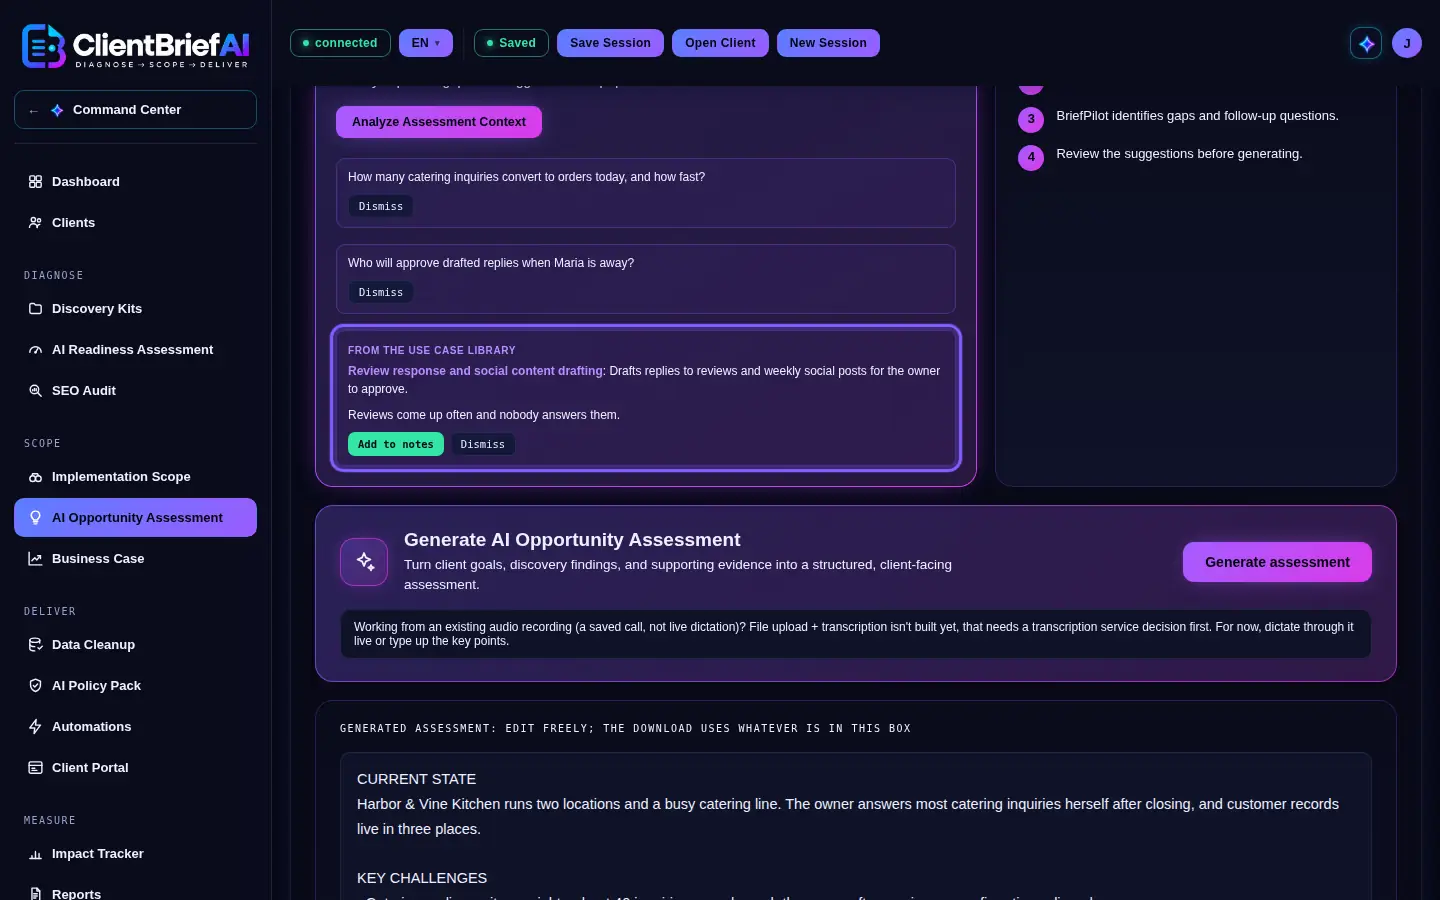
Add to notes puts the case in the context for the next generate. -
Generate the assessment
Click Generate assessment. The result covers Current State, Key Challenges, Recommended AI Opportunities, Estimated Impact and Suggested Next Steps. Edit anything in the box: the report uses whatever is there.
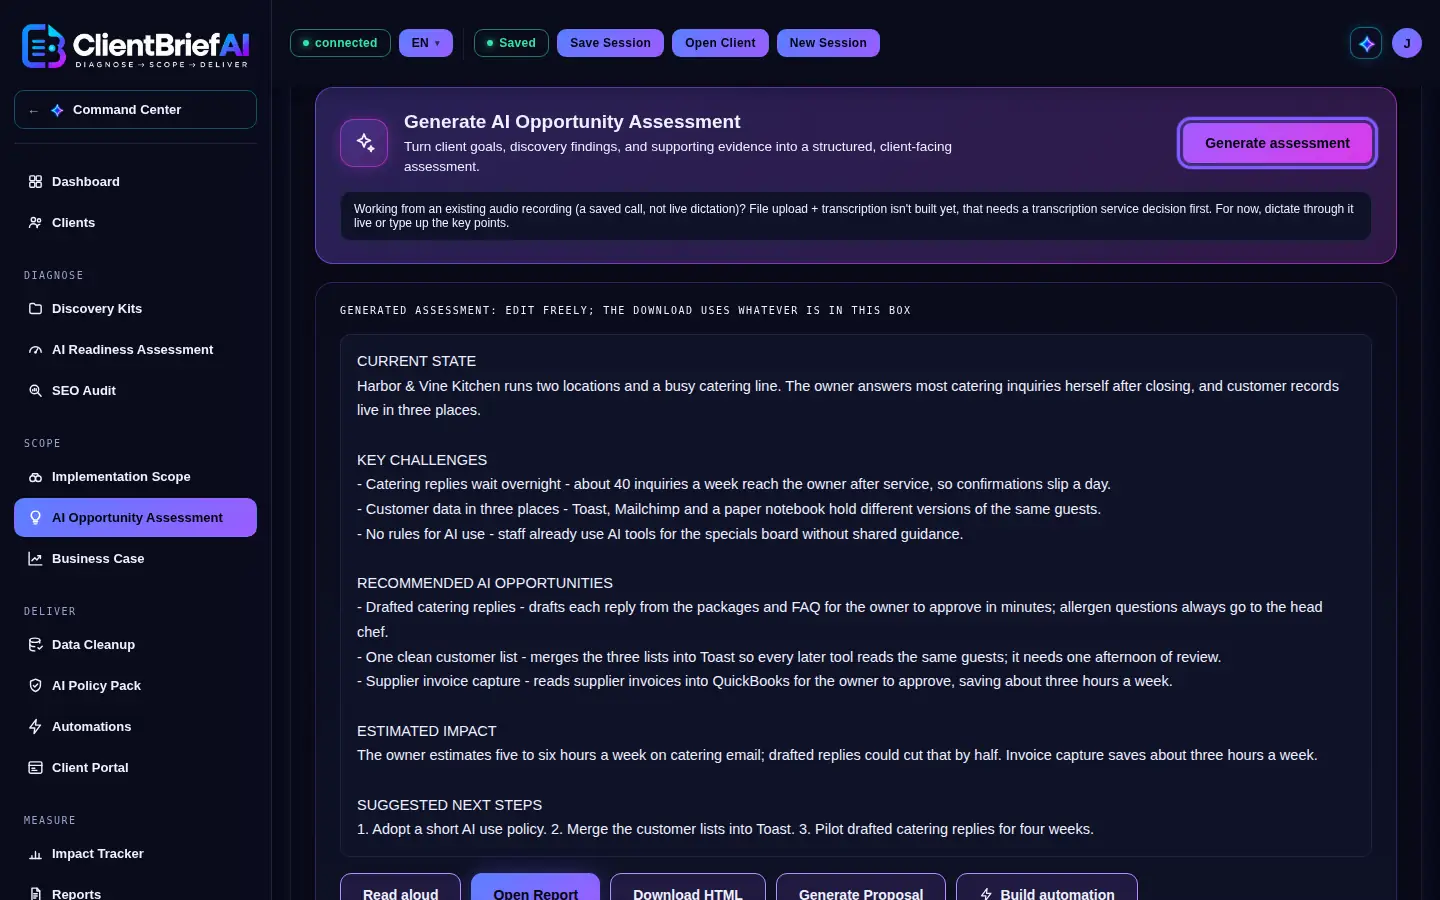
Generate writes the five sections from your context. -
Open, export or read the assessment aloud
Under the result, Read aloud plays it, Open Report shows the designed report in a new tab, and Download HTML saves it as one file. Print / Save as PDF is in the report tab.
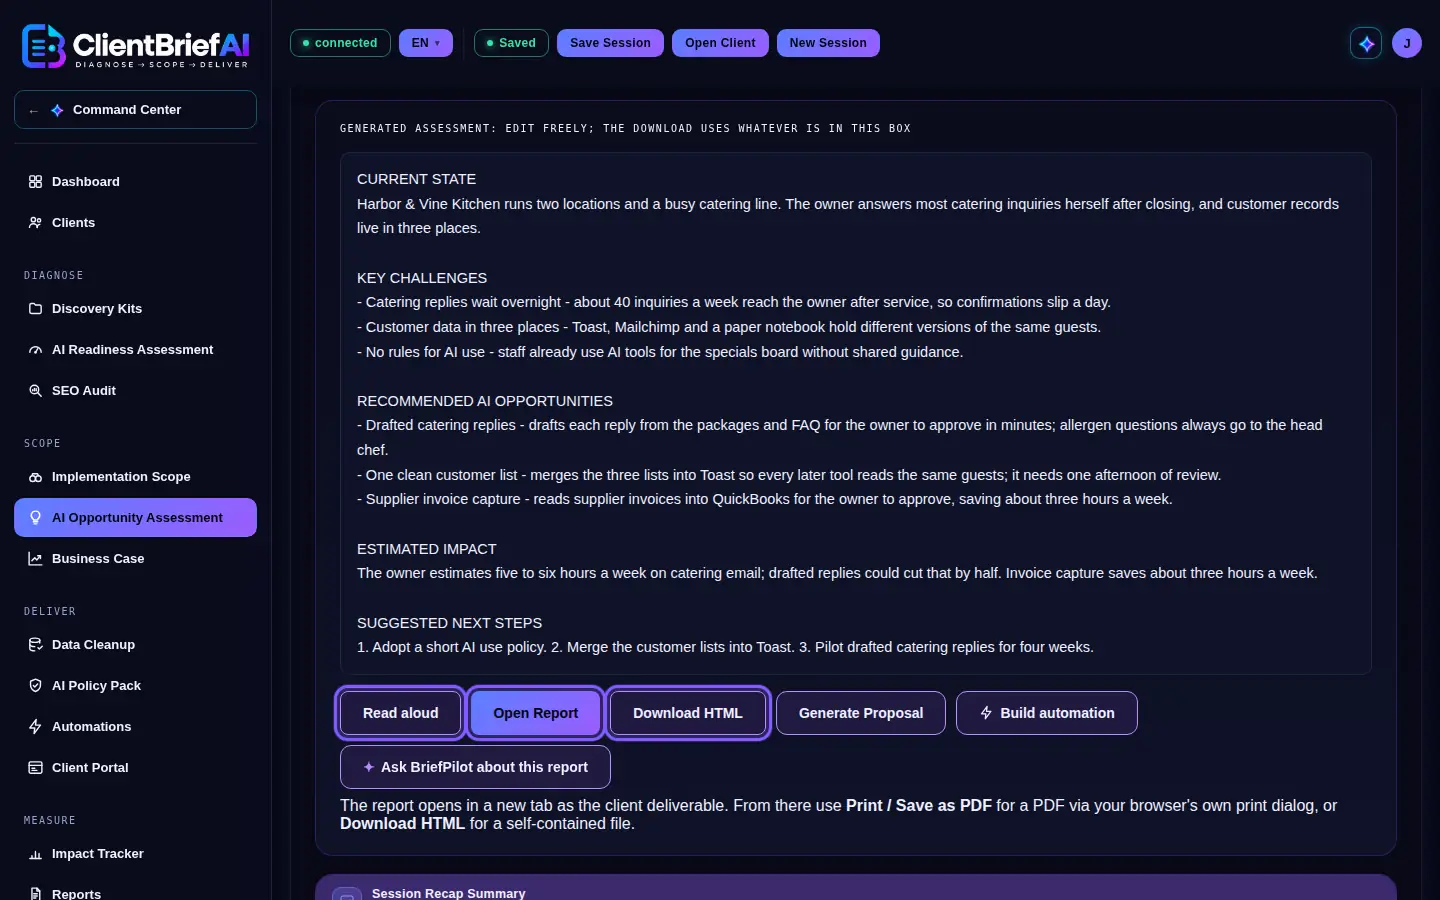
Edit the text freely; the report uses what is in the box. -
Build a proposal
Click Generate Proposal. In Build a proposal, tick 1 to 3 opportunities, enter the Estimated hours and your Hourly rate, and edit the introduction, timeline and next steps. Your hourly rate is saved for next time. Click Open Report or Download HTML. Each proposal you open or download is kept, dated, in the client's session file, so it can be reopened later and included in the Client Portal. If the client has a Business Case, the proposal offers Investment and Return. Tick it to add a section between Scope and pricing and Next steps: the total investment (your fee for the work in the proposal plus the tools and setup), the monthly net benefit, the payback and the value over the horizon, then a line for each opportunity. It covers only the opportunities in the proposal, and the sections renumber around it.
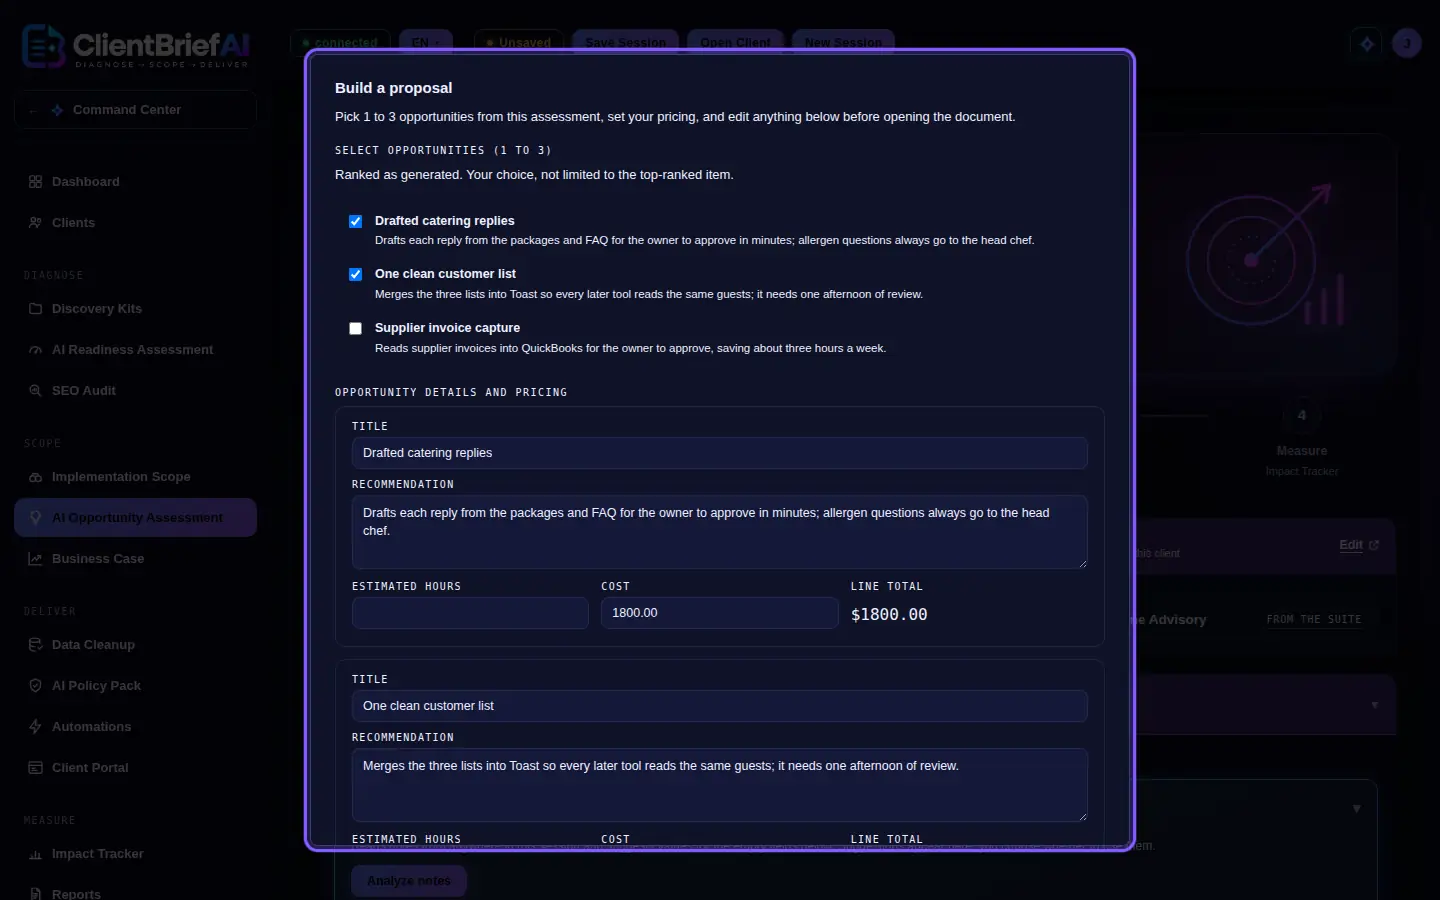
Tick one to three opportunities and set your pricing. -
Build an automation
When an opportunity in the assessment matches an automation in the library, Build automation appears next to Generate Proposal. It lists every opportunity: a match shows each automation that fits, with Open automation, which opens it on the Automations page, set up for this client; the others say there is no automation in the library for them yet. With no match, the button does not show.
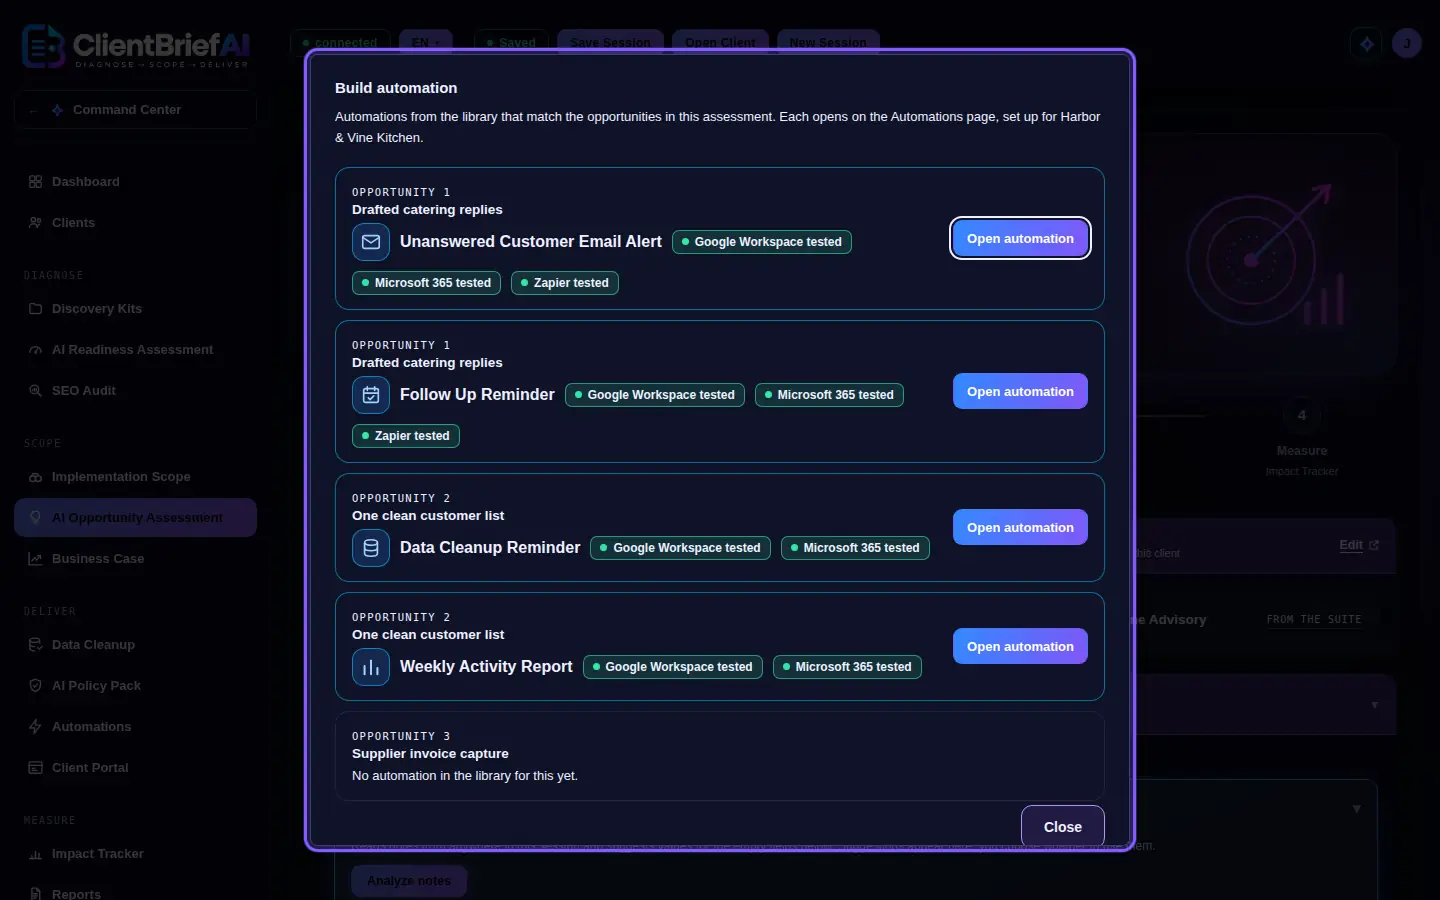
Open automation takes you to it, set up for this client.
Good to know
- The potential platforms listed beside each opportunity come from the AI Tool Library.
Scope
Business Case
The Business Case puts a number on every AI opportunity: projected savings, cost, payback and three-year value, ready for the owner's decision. It takes its opportunities from the AI Opportunity Assessment, so generate that first. It is in the Scope group, right after the AI Opportunity Assessment, on the trial, Full, Full Plus and owner plans (not Starter).
-
Check the assumptions
The Assumptions card holds the figures behind every row: the Fully loaded hourly cost of the staff involved (drafted from the industry until you confirm it), Working weeks per year (48), the Discount rate (10 percent), the Horizon (3 years) and the Currency symbol. Expected or Conservative switches the scenario; Conservative counts 60 percent of every benefit.
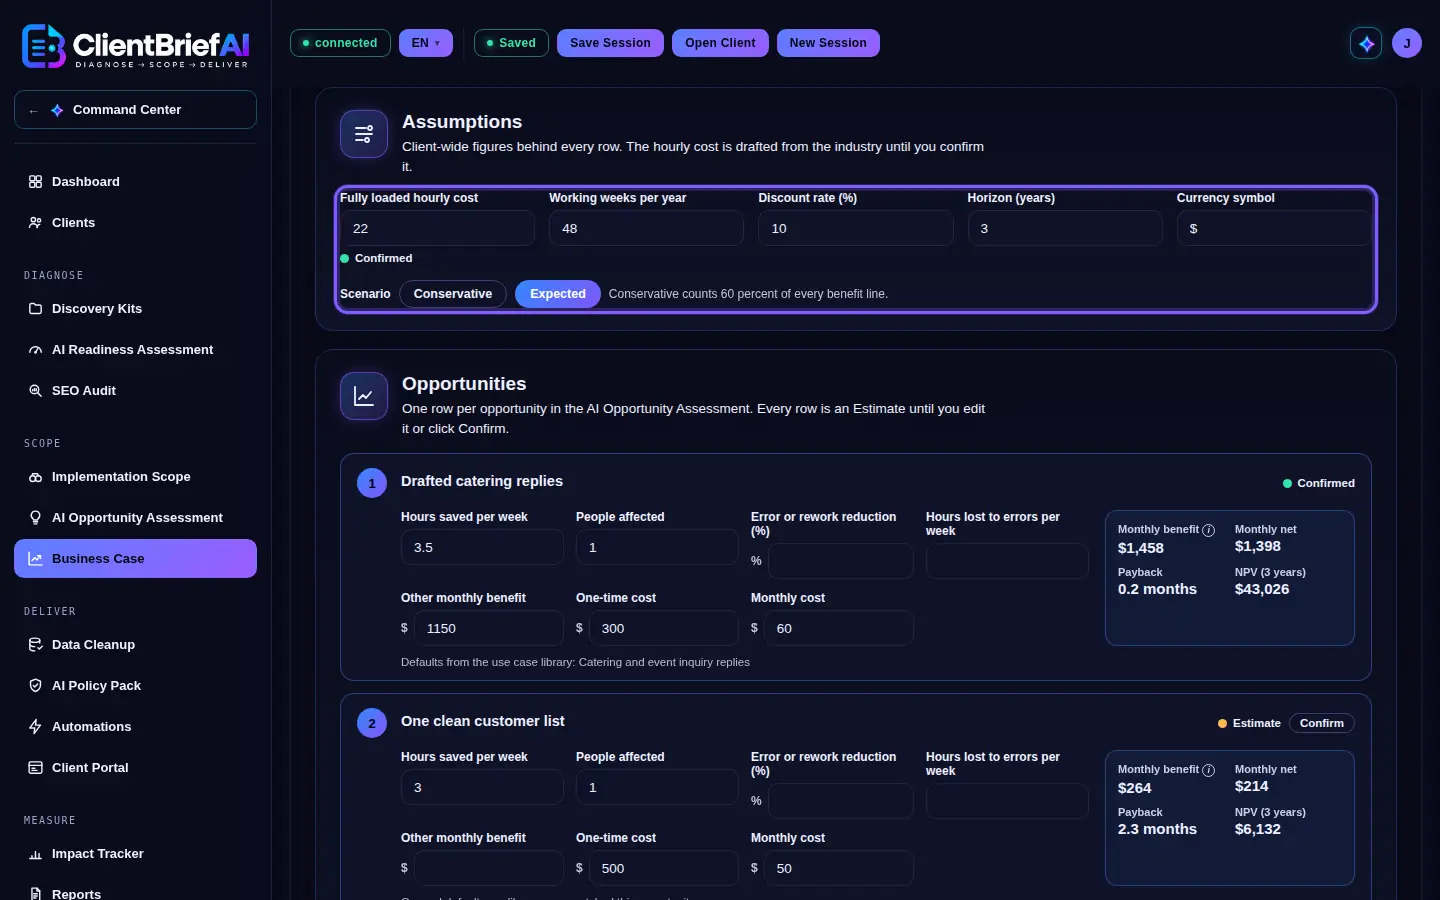
These figures sit behind every row. -
Review each opportunity
There is one row per opportunity, filled in from the closest case in the use case library (the row says which, or General defaults when none fits): Hours saved per week, People affected, Error or rework reduction, Hours lost to errors per week, Other monthly benefit, One-time cost and Monthly cost. Monthly benefit, Monthly net, Payback and NPV update as you type; hover over Monthly benefit to see the formula.
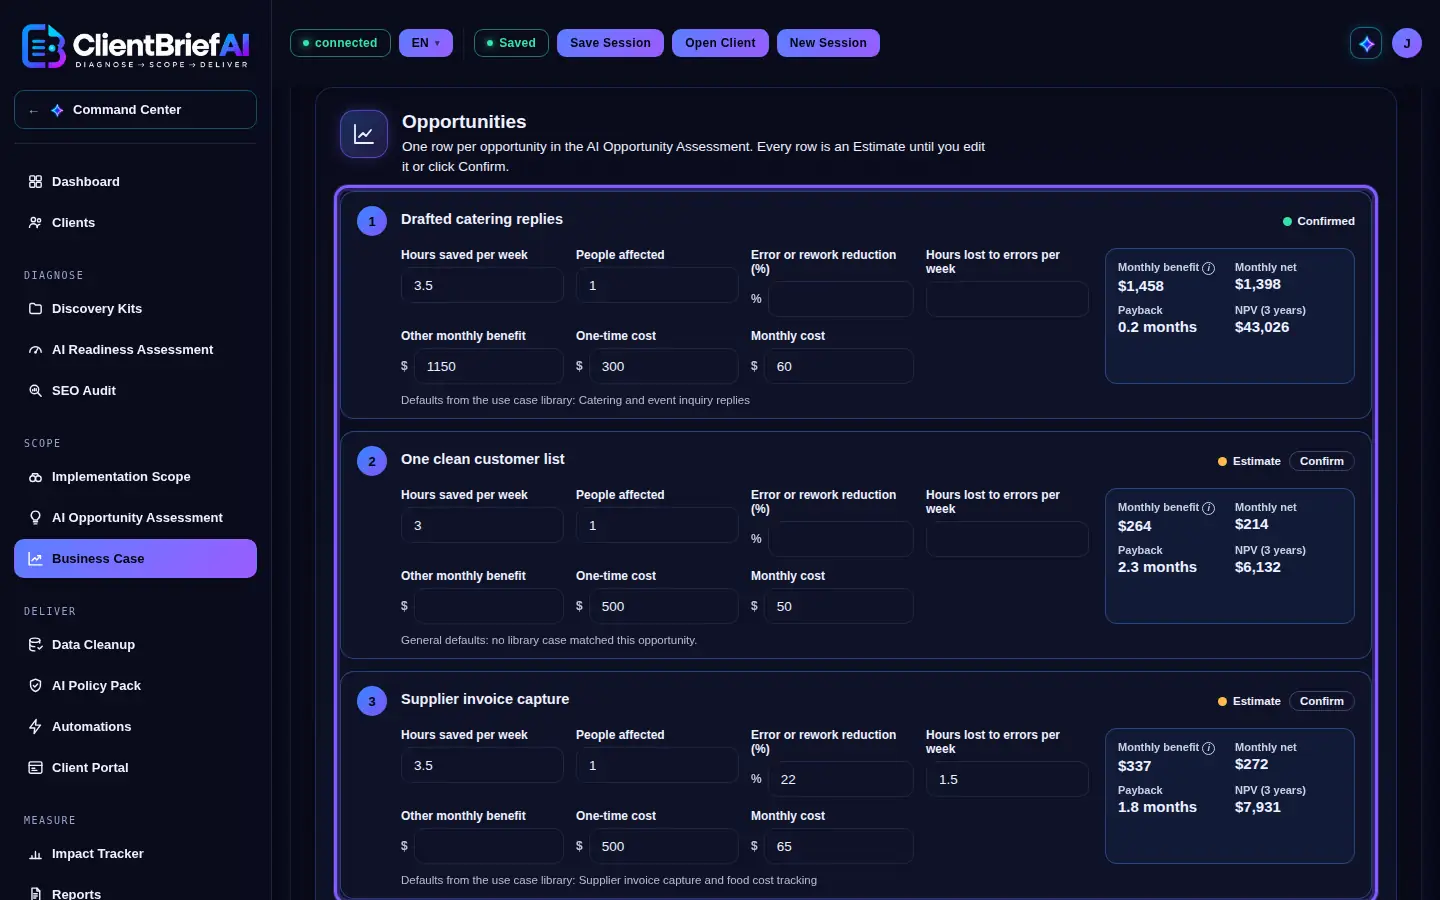
Each row starts from the closest use case library case. -
Confirm the figures
Every row is an Estimate until you edit it or click Confirm. The header counts how many are confirmed.
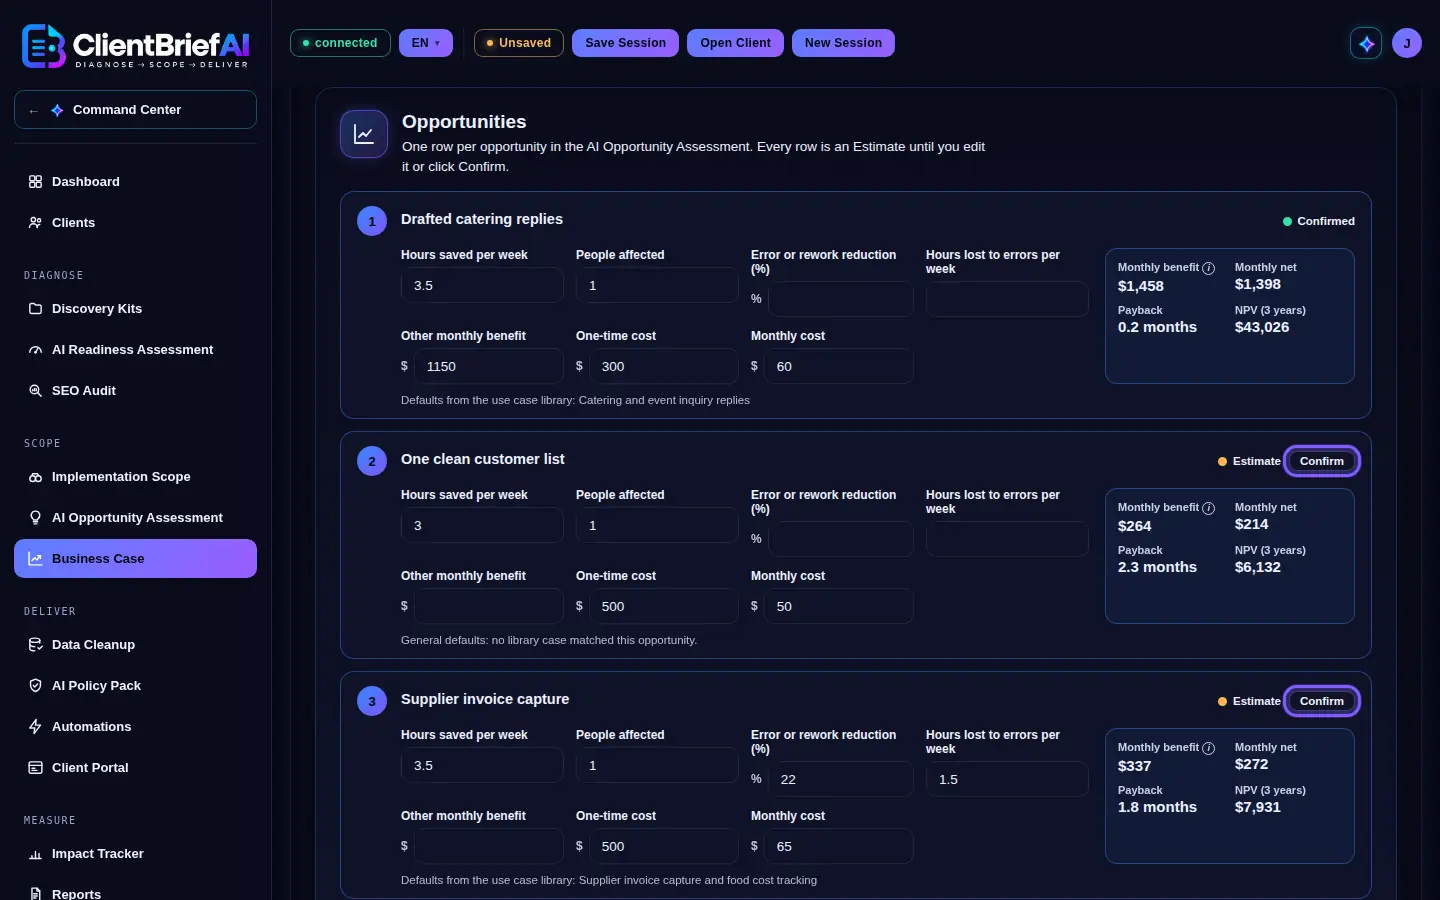
A row stays an Estimate until you edit or confirm it. -
Read the totals
Total one-time cost, Total monthly net, Blended payback and Total NPV, with a bar for each opportunity, highest value first.
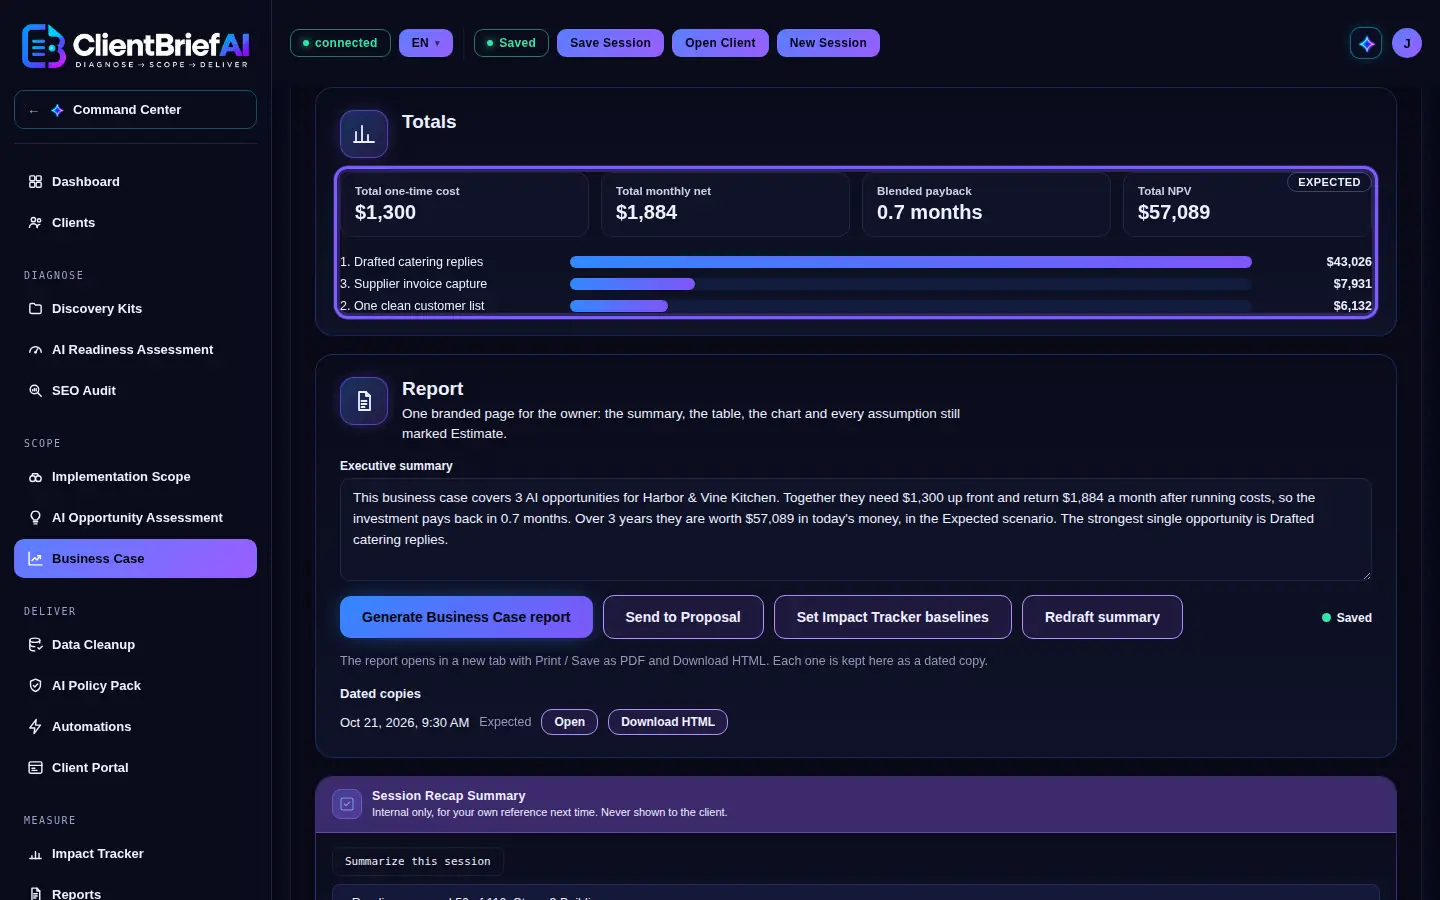
Highest value first. -
Generate the report
BriefPilot drafts the Executive summary from the totals; edit it as you like. Generate Business Case report opens one branded page: the summary, the table with a totals row, the chart, the assumptions and every figure still marked Estimate. Print / Save as PDF or Download HTML. Each report is kept as a dated copy you can open or download again.
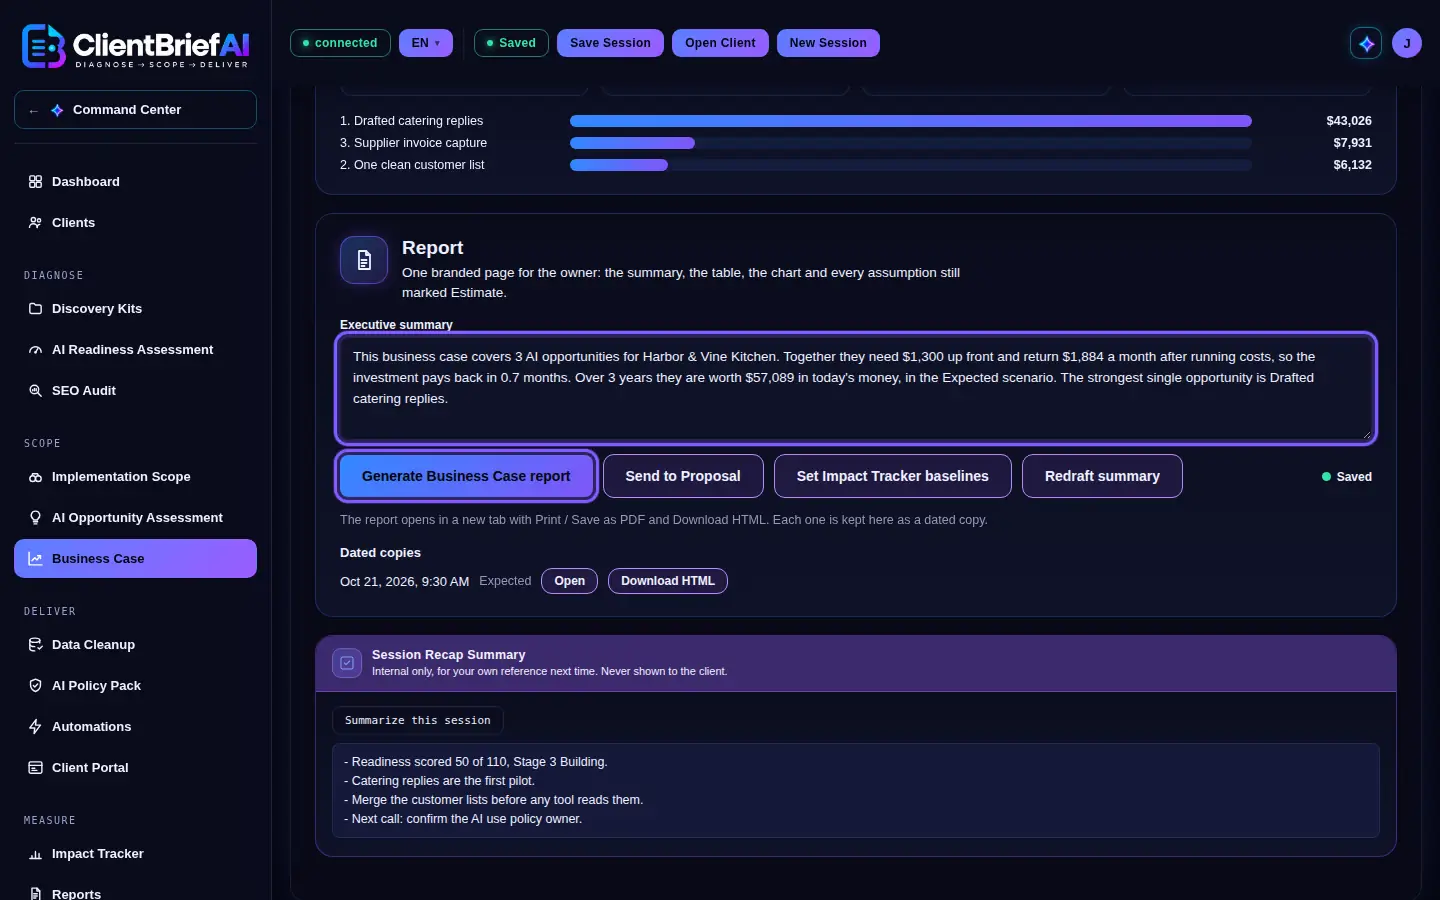
Edit the summary as you like before generating. -
Send to Proposal
Opens the proposal with Investment and Return ticked (see Build a proposal in the AI Opportunity Assessment).
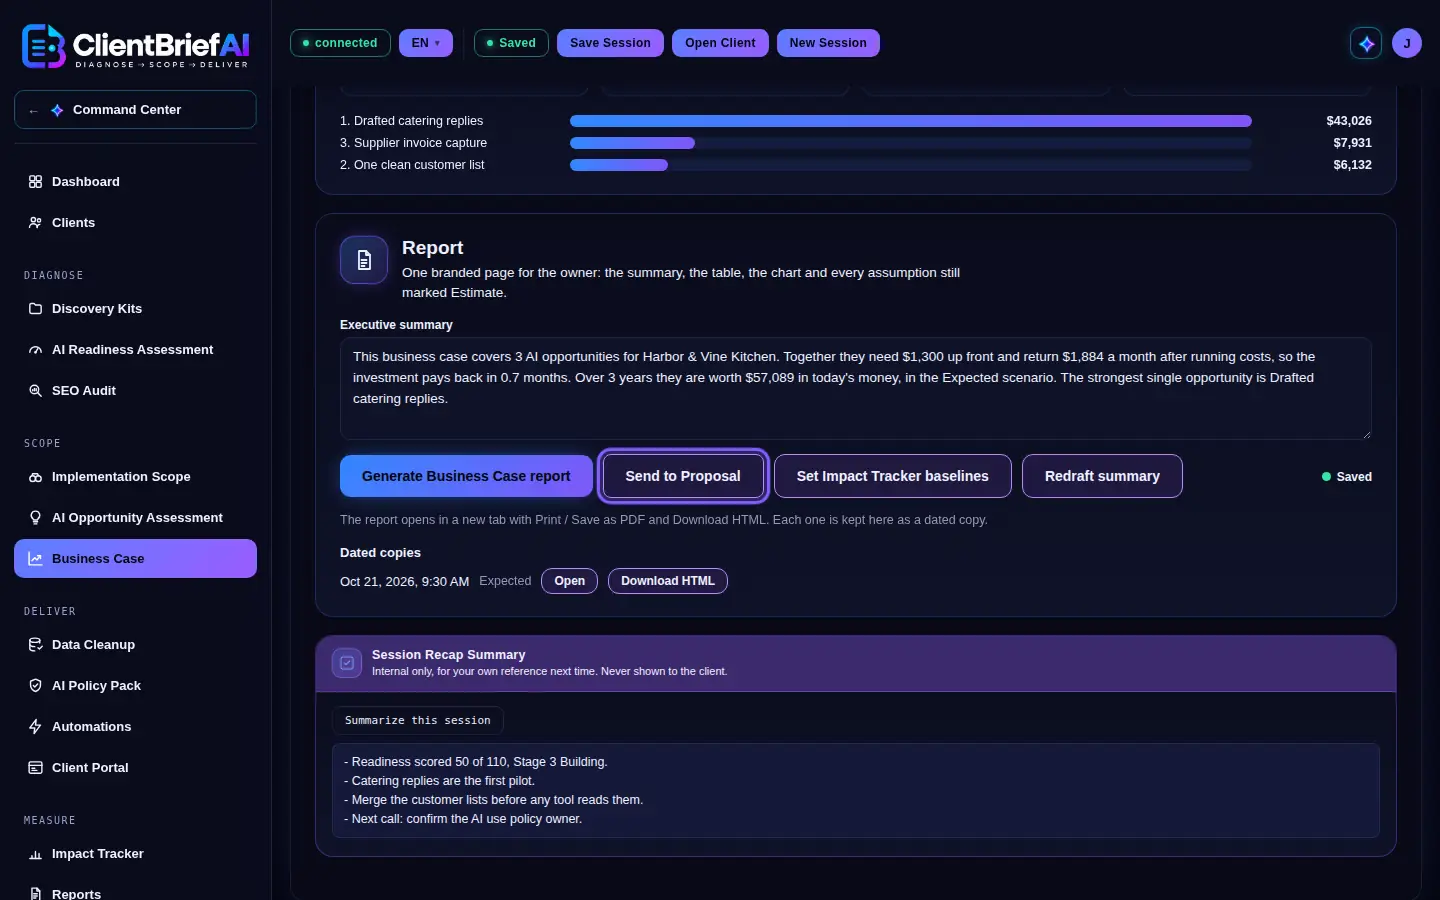
Opens the proposal with Investment and Return ticked. -
Set Impact Tracker baselines
On Full Plus, this writes each opportunity's projected monthly benefit and hours per week into the Impact Tracker as Projected. If projections are already there, you are asked before they are replaced.
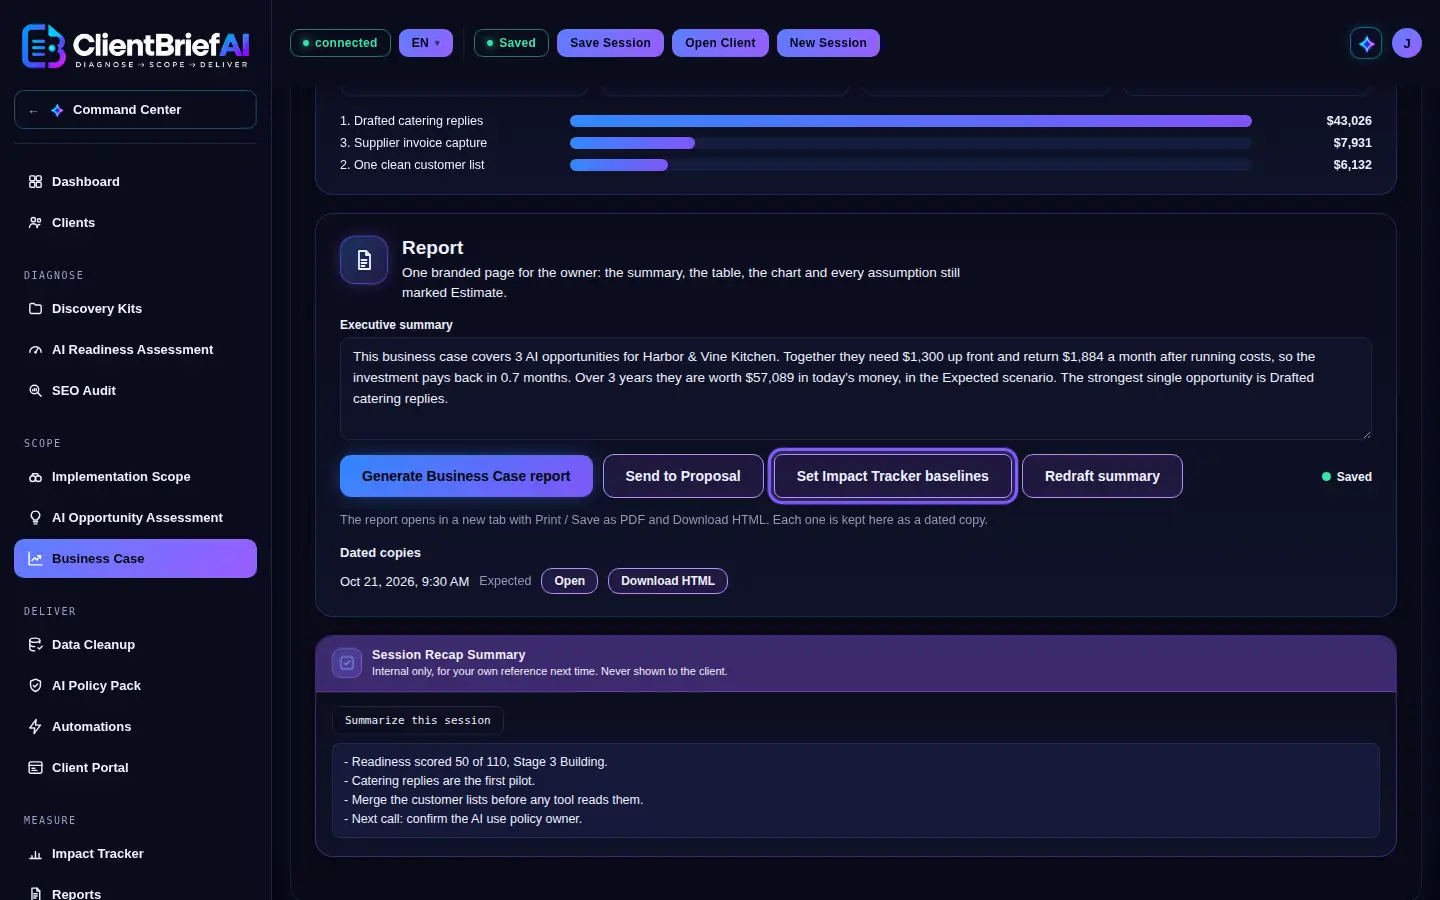
Projected benefits go to the Impact Tracker as Projected.
Good to know
- Payback reads Never when the monthly net is zero or below, and Immediate when there is no one-time cost.
- Projections are estimates based on the assumptions listed; the report says so in its footer.
- Everything is saved in the client file.
Deliver
Data Cleanup
Data Cleanup turns "the customer data is a mess" into a step you can run with the client. It gives you a Data Cleanup Playbook, drafted for this client, and DataPilot, a chat that writes the formulas and scripts for the cleanup. No customer data ever enters ClientBriefAI: there is no file upload anywhere on the page, and you describe the data instead of pasting it. It is the first item in the Deliver group, on the trial, Full, Full Plus and owner plans (not Starter).
-
Fill in the interview
Under Where customer data lives today, the client's core software from Client Context is listed first; systems ClientBriefAI knows are ticked for you, and others are listed by name. Below them are the common places for a small business (point of sale, CRM, email marketing tool, accounting, booking system, spreadsheets, paper or phone contacts, website forms); add any other place by name. For each ticked source, pick roughly how many customer records it holds, whether it is merged into the master or retired after the cleanup, and note any problems.
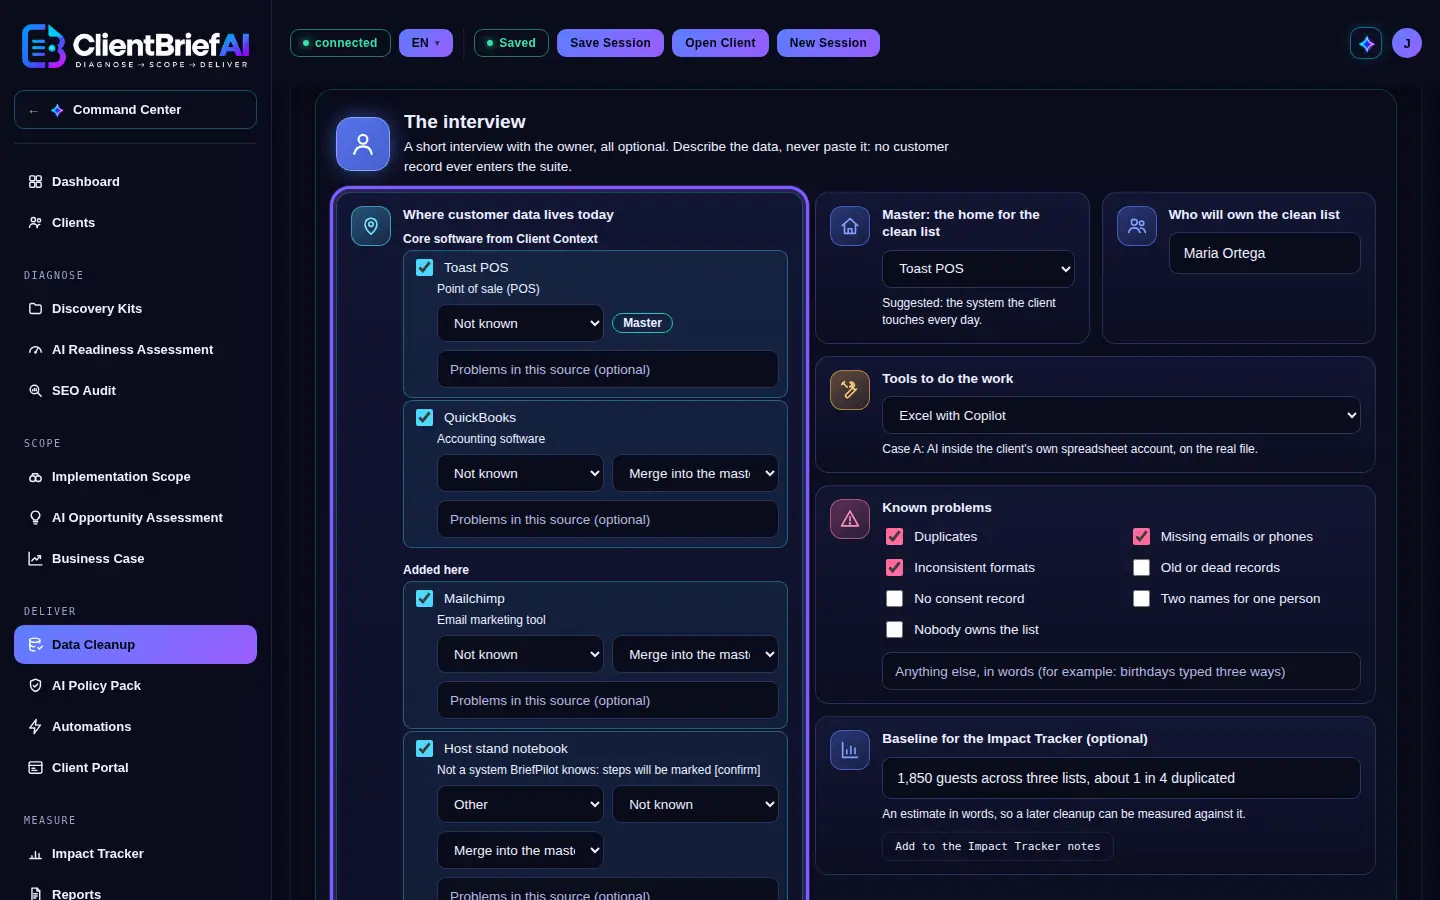
Core software from Client Context is listed first. -
Pick the master and the owner
Master: the home for the clean list. The page suggests the system the client touches every day (the point of sale for food and retail, the CRM for services, the booking tool for appointments); you can choose another. Enter Who will own the clean list, a role or a name.
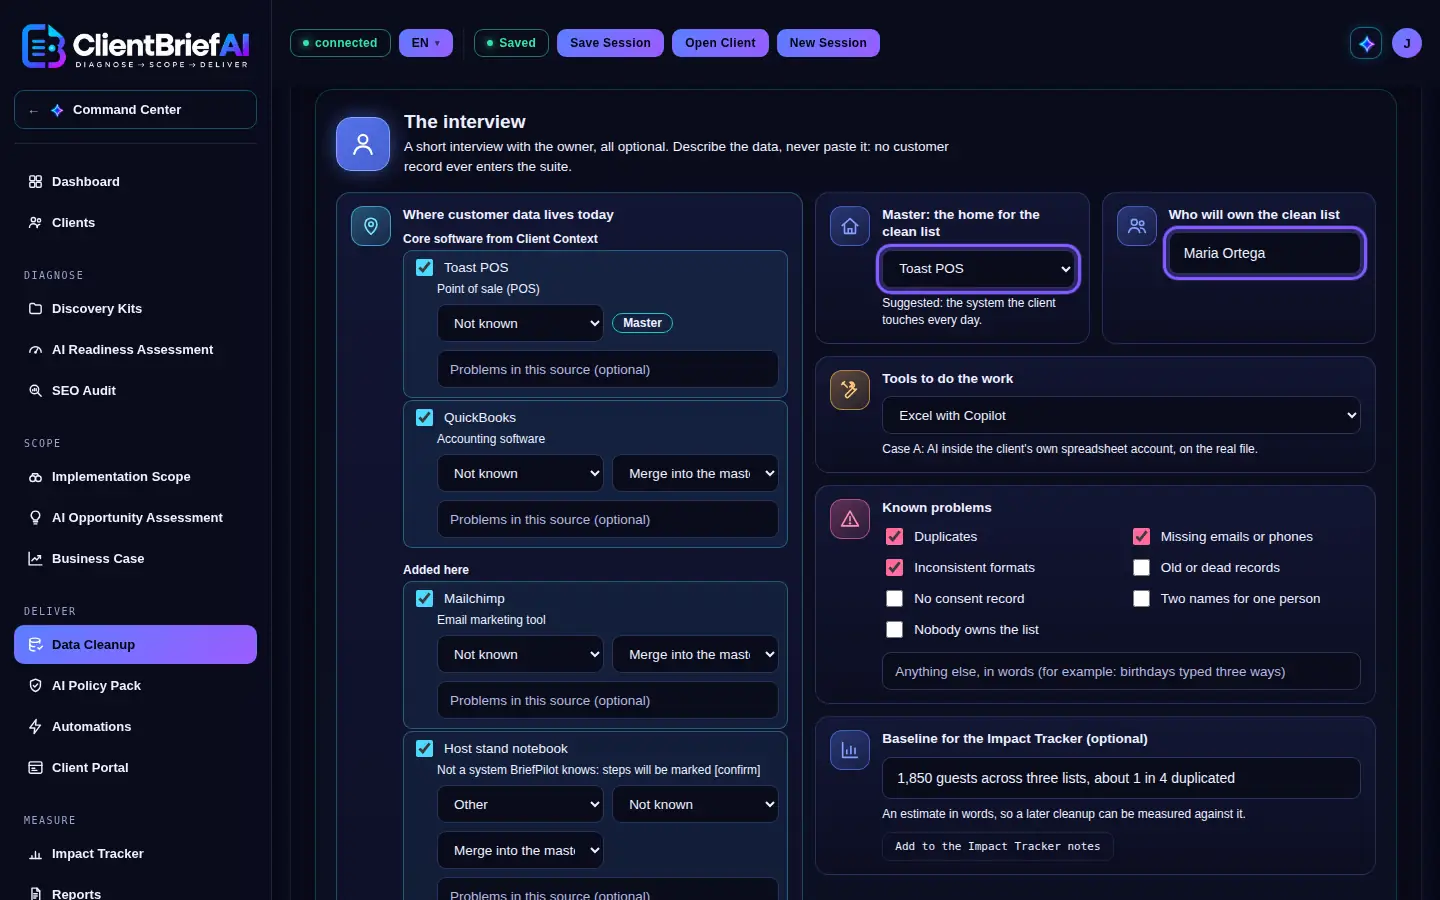
The page suggests the system the client uses every day. -
Note the problems, the goal and the tools
Tick the Known problems (duplicates, missing emails or phones, inconsistent formats, old records, no consent record, two names for one person, nobody owns the list) and add others in words. Pick What the clean list is for first from the AI Opportunity Assessment. Under Tools to do the work, pick what the client has: Excel or Google Sheets, with or without Microsoft Copilot or Gemini. That sets the case: Case A uses Microsoft Copilot or Gemini on the real file inside the client's own account; Case B uses a masked copy with a public assistant such as ChatGPT or Claude. Real records never go into a public tool.
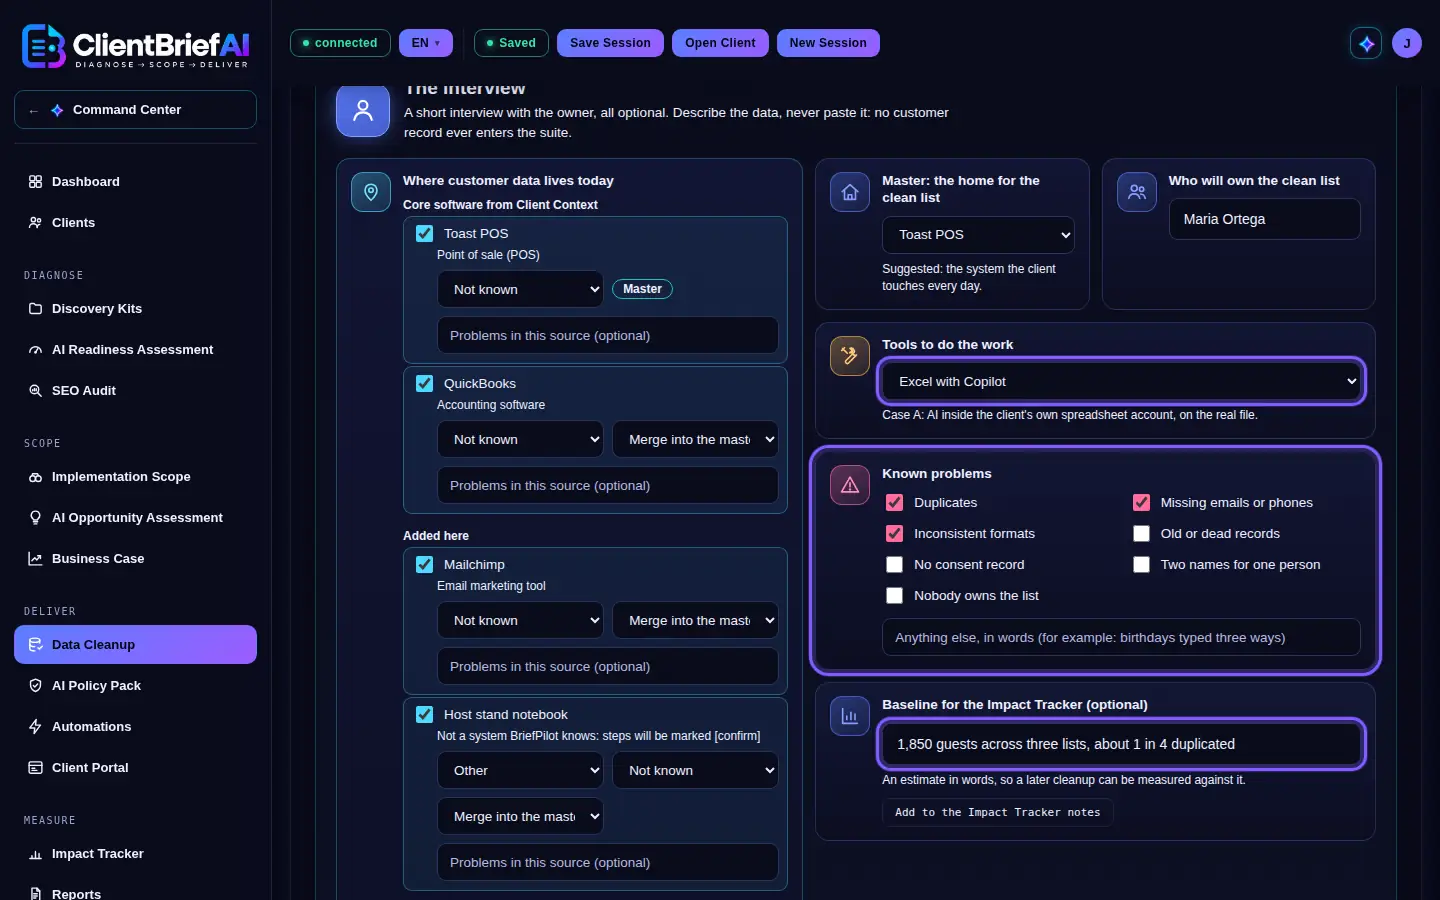
Tick what is wrong; describe the data, never paste it. -
Draft the Playbook
Click Draft Playbook. BriefPilot drafts the ten steps for this client in under a minute: Find it, Pick the master, Export everything to spreadsheets, Decide which AI touches the data, Standardize columns, Normalize formats, Dedupe, Fill and tag, Load the master and archive the rest, Keep it clean. Every step has What to do, What to use and Done when; Steps 5 to 8 also have an AI hack with a ready-to-paste prompt for Case A and for Case B.
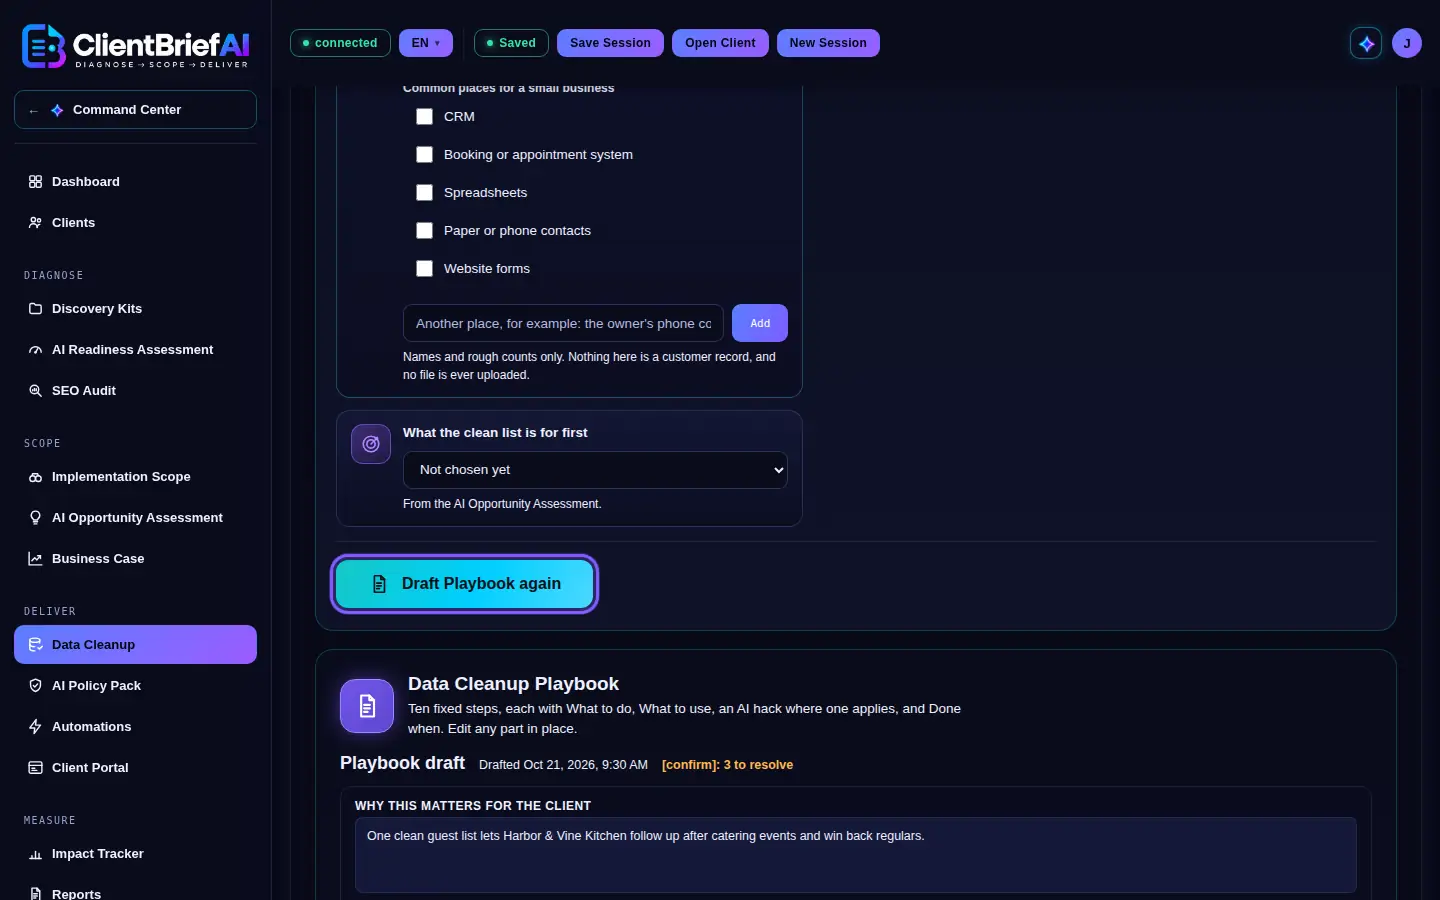
BriefPilot drafts the ten steps for this client. -
Edit and resolve every [confirm]
Open each step and edit any part in place. [confirm] marks something you must check with the client, such as menu steps for a system ClientBriefAI does not know; the count at the top shows how many are left. The masking recipe and the formulas are added to the Playbook as fixed, tested text, in an Excel and a Google Sheets version.
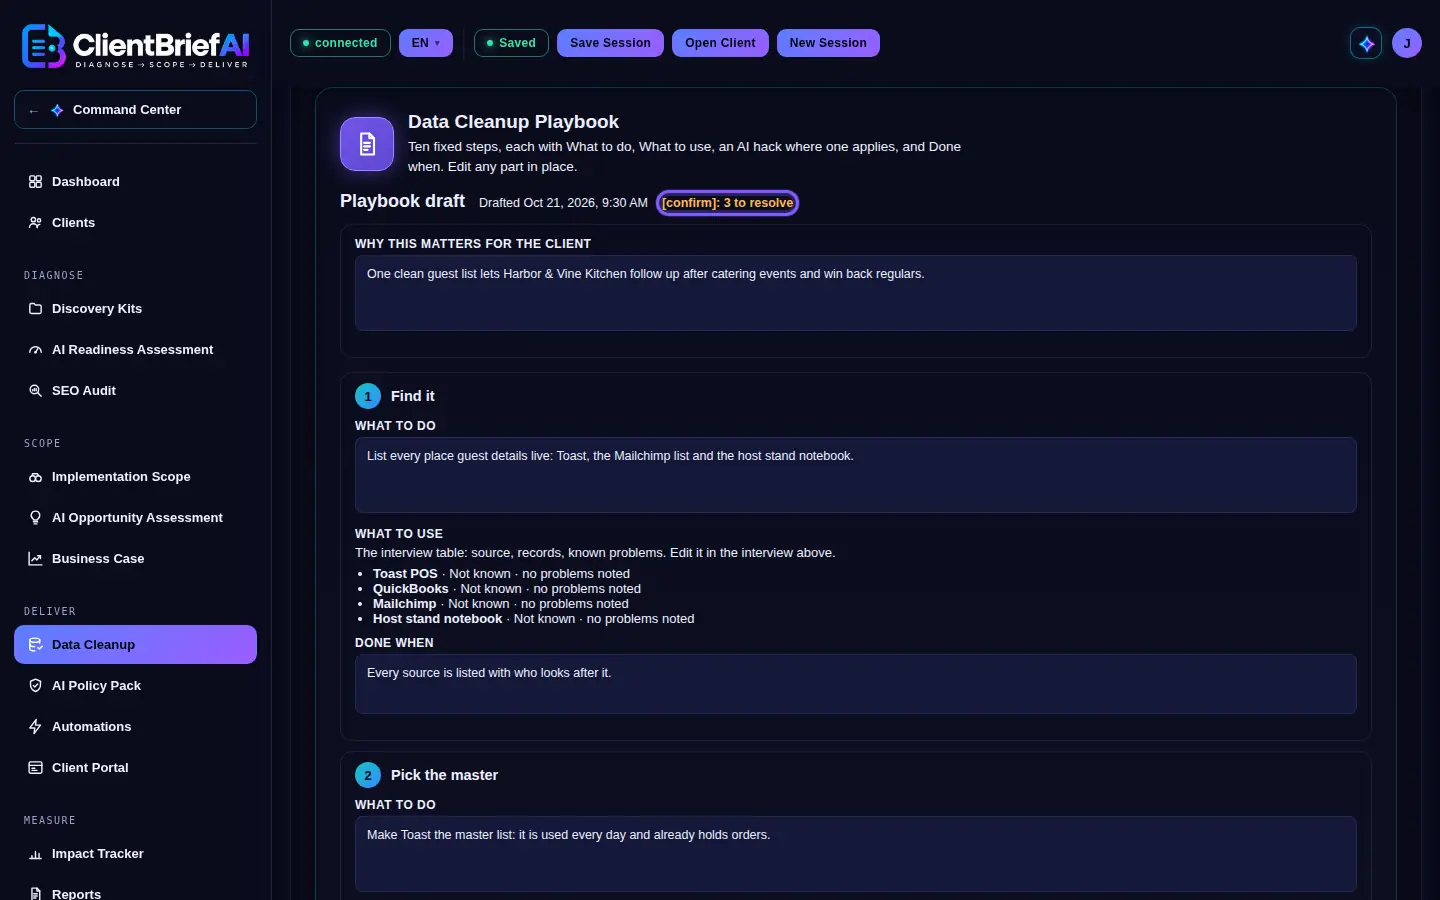
[confirm] marks what to check with the client. -
Generate the Playbook
Click Generate Playbook to open it with your branding, Download HTML to save it, or Print to PDF. Each copy is kept, dated, in the client file and appears on the Reports page. The field standard (the eleven fields every customer record should have) prints on its own page.
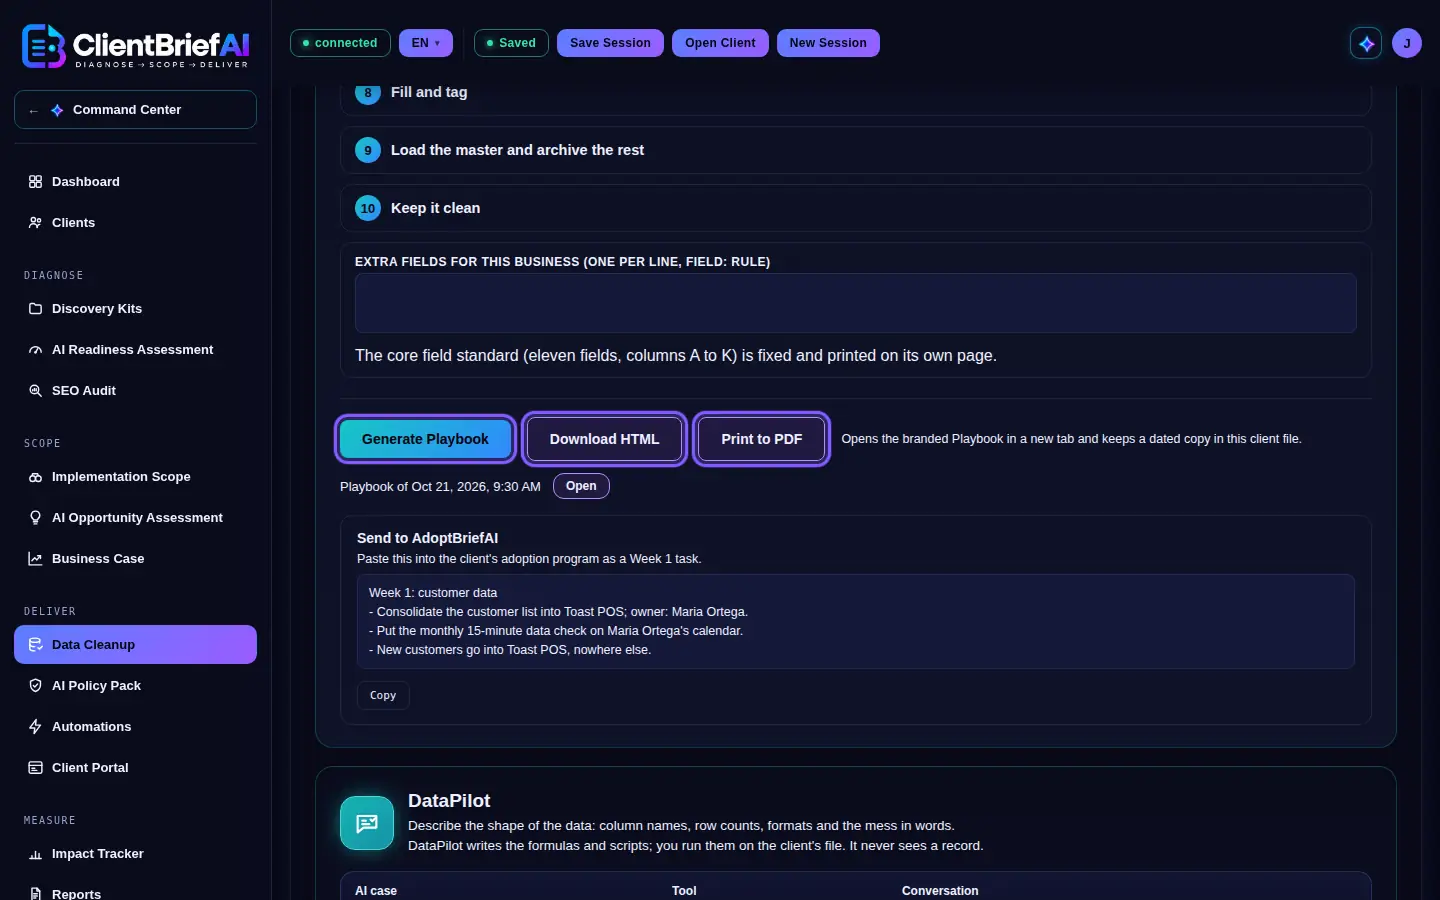
Each copy is kept, dated, in the client file. -
Send the first task to AdoptBriefAI
Under Send to AdoptBriefAI, click Copy and paste the Week 1 task into the client's adoption program: consolidate the customer list into the master, with the owner's name.
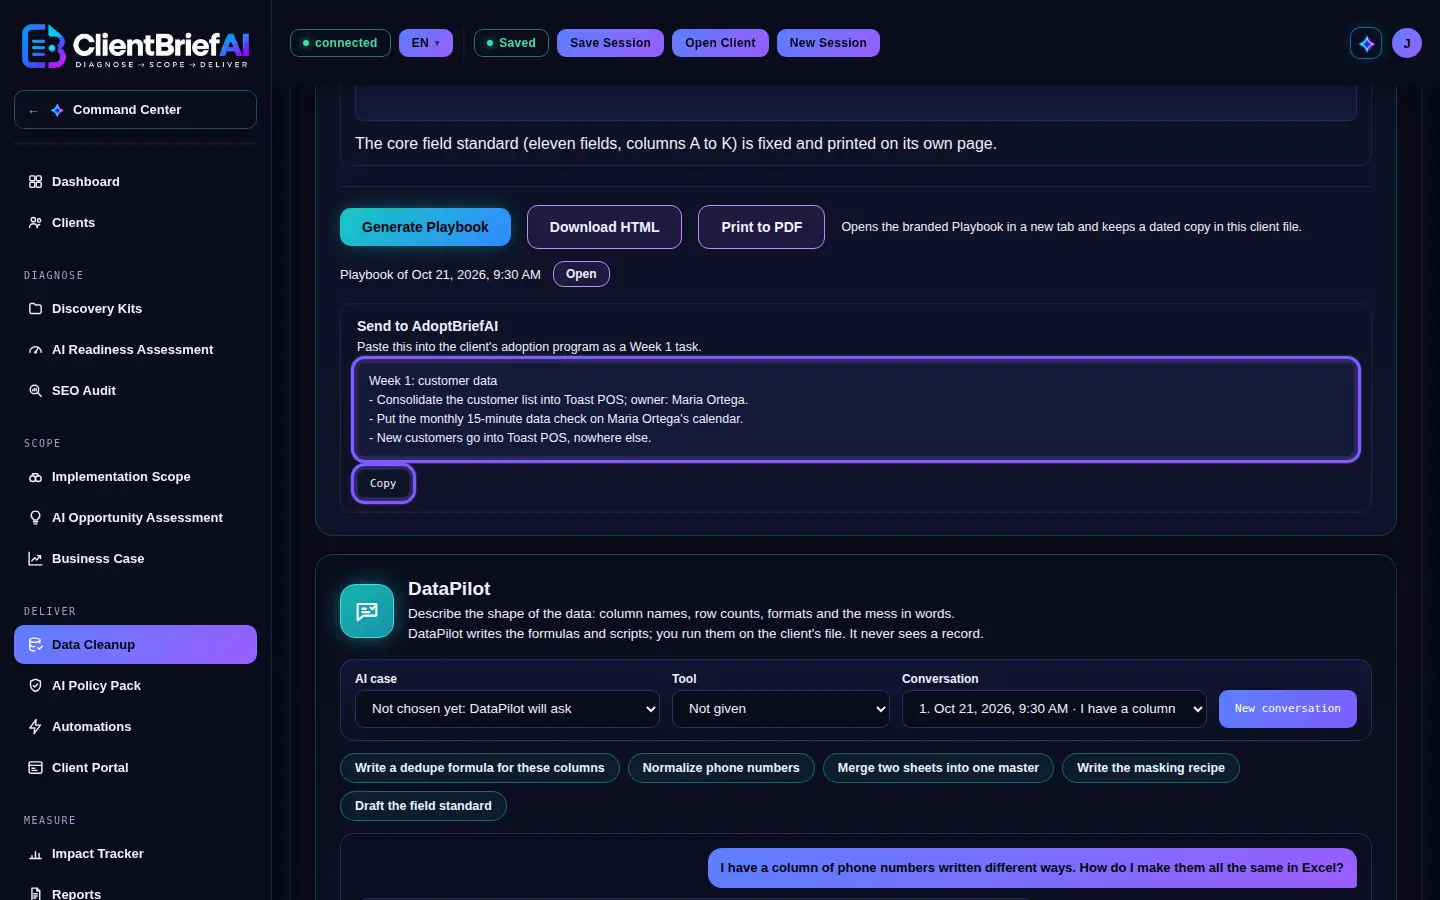
Paste it into the client's adoption program. -
Ask DataPilot for formulas and scripts
Describe the shape of the data, never the data: column names, row counts, formats and the mess in words. Pick the AI case, the Tool (Excel, Google Sheets, Python, Apps Script or Power Query) and, for Excel, the version. Or use a quick action: Write a dedupe formula for these columns, Normalize phone numbers, Merge two sheets into one master, Write the masking recipe, Draft the field standard. Every answer starts with "Run this on the file locally. Do not paste customer records here." and puts each formula in a box with Copy.
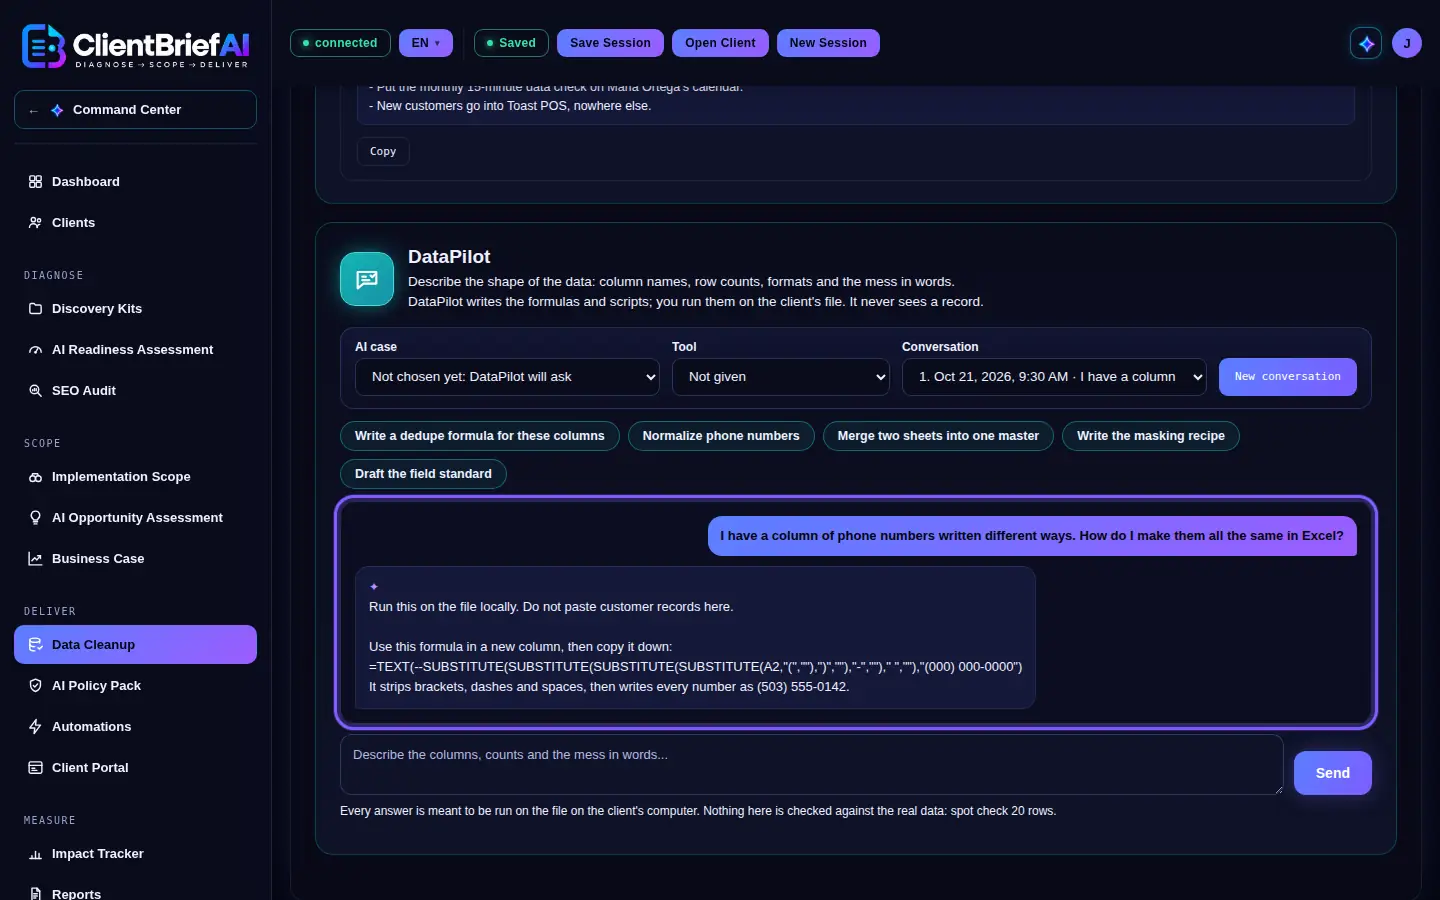
Describe the shape of the data, never the data.
Good to know
- If a message looks like real customer records (three or more email addresses, phone numbers or names with street addresses), DataPilot does not send it and offers Mask and send, which turns emails into user@domain, phones into XXX-XXX and the last four digits, and names into initials, on your computer, before anything is sent. Made-up examples such as (555) 201-3344 are fine.
- Nothing is checked against the real data. Spot check 20 rows after every formula.
- The formulas are written for Excel 365 (or 2021 and later) and Google Sheets with English function names. Excel set to another language uses different function names and separators.
- With a Playbook drafted, the AI Policy Pack's Customer Data and AI Statement is drafted from its field standard and its rule that real records never go into a public AI tool.
- On Full Plus, Add to the Impact Tracker notes puts the baseline you typed (for example "3 sources, estimated 30% duplicates") into Impact Tracker, dated.
- The interview, the Playbook, its dated copies and every DataPilot conversation are saved in the client's file when you save.
- General guidance, not legal advice.
Deliver
AI Policy Pack
The AI Policy Pack gives the client plain-language rules for using AI that they can adopt this week, drafted from this client's Readiness answers, Client Context and approved tools. You edit every section before it goes out. It is in the Deliver group, right after Data Cleanup, on the trial, Full, Full Plus and owner plans (not Starter). On Full Plus and the trial, the pack can also include the AI Governance Framework: the rules for the client's AI program itself, ready for a board or the owner to review. The header shows where the pack stands: Setup until you draft, Generate while it drafts, then Documents once they are ready. The marks only show progress; you can go back and change the setup at any time.
-
Answer some Readiness questions first
The pack is drafted from the AI Readiness Assessment, so answer at least a few of its questions before drafting.
Answer a few Readiness questions before drafting. -
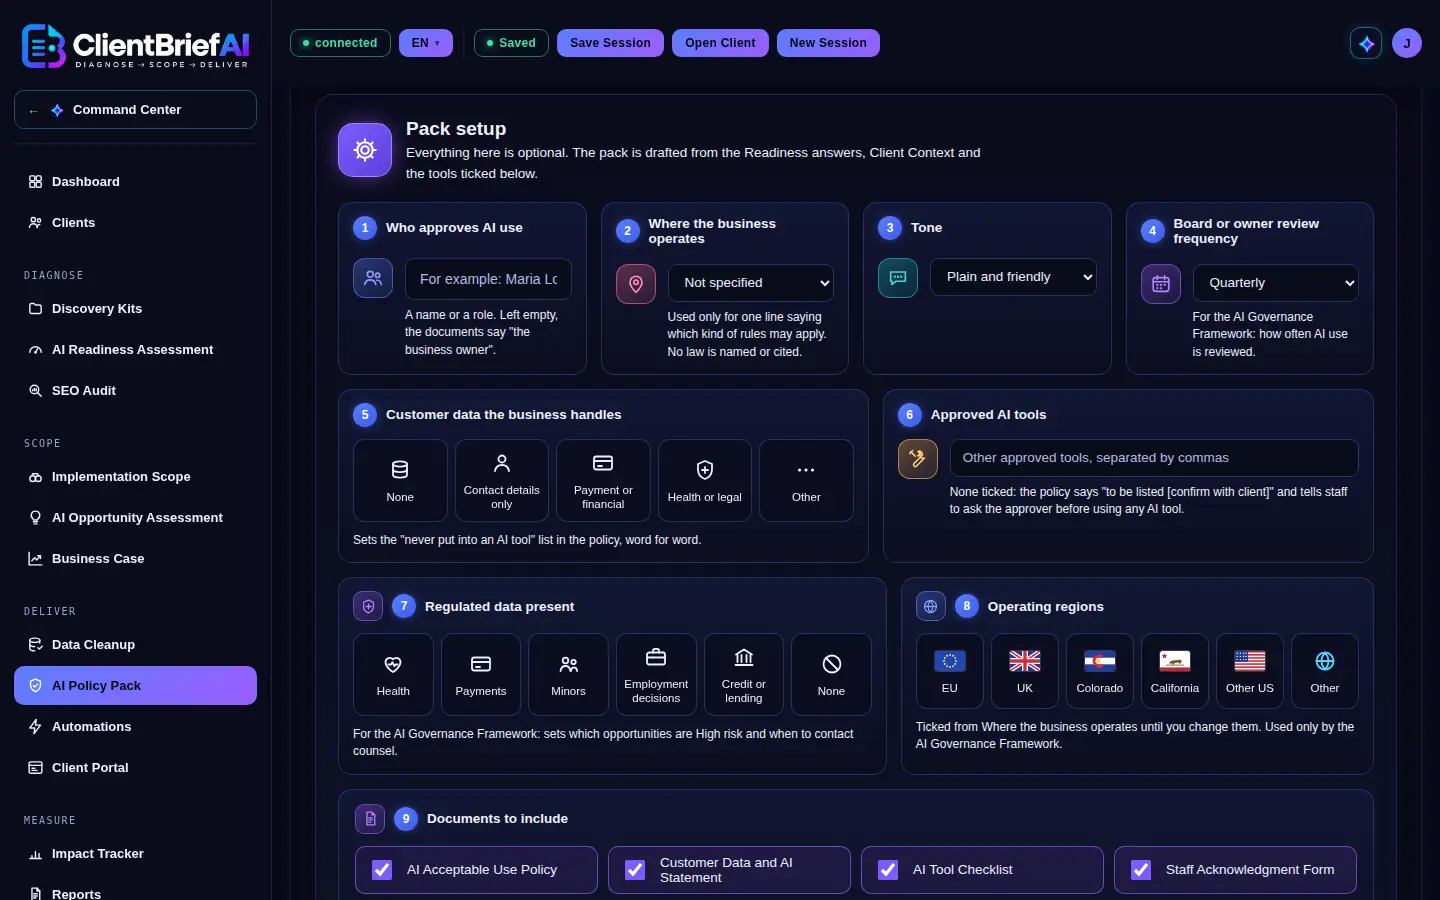
Fill in the pack setup
Everything is optional. Who approves AI use (a name or a role), Where the business operates, Tone (Plain and friendly or Formal), and Customer data the business handles, which sets the "never put into an AI tool" list word for word. On Full Plus and the trial, three more fields feed the AI Governance Framework only: Board or owner review frequency (Monthly, Quarterly, the default, or Twice a year), Regulated data present (Health, Payments, Minors, Employment decisions, Credit or lending, or None) and Operating regions (EU, UK, Colorado, California, Other US or Other, ticked from Where the business operates until you change them). The setup is laid out as cards. Customer data the business handles, Regulated data present and Operating regions are tiles: click a tile (or Tab to it and press Space) to select it, and again to clear it; you can select more than one. The numbers on the cards only help you find your place; fill them in any order.
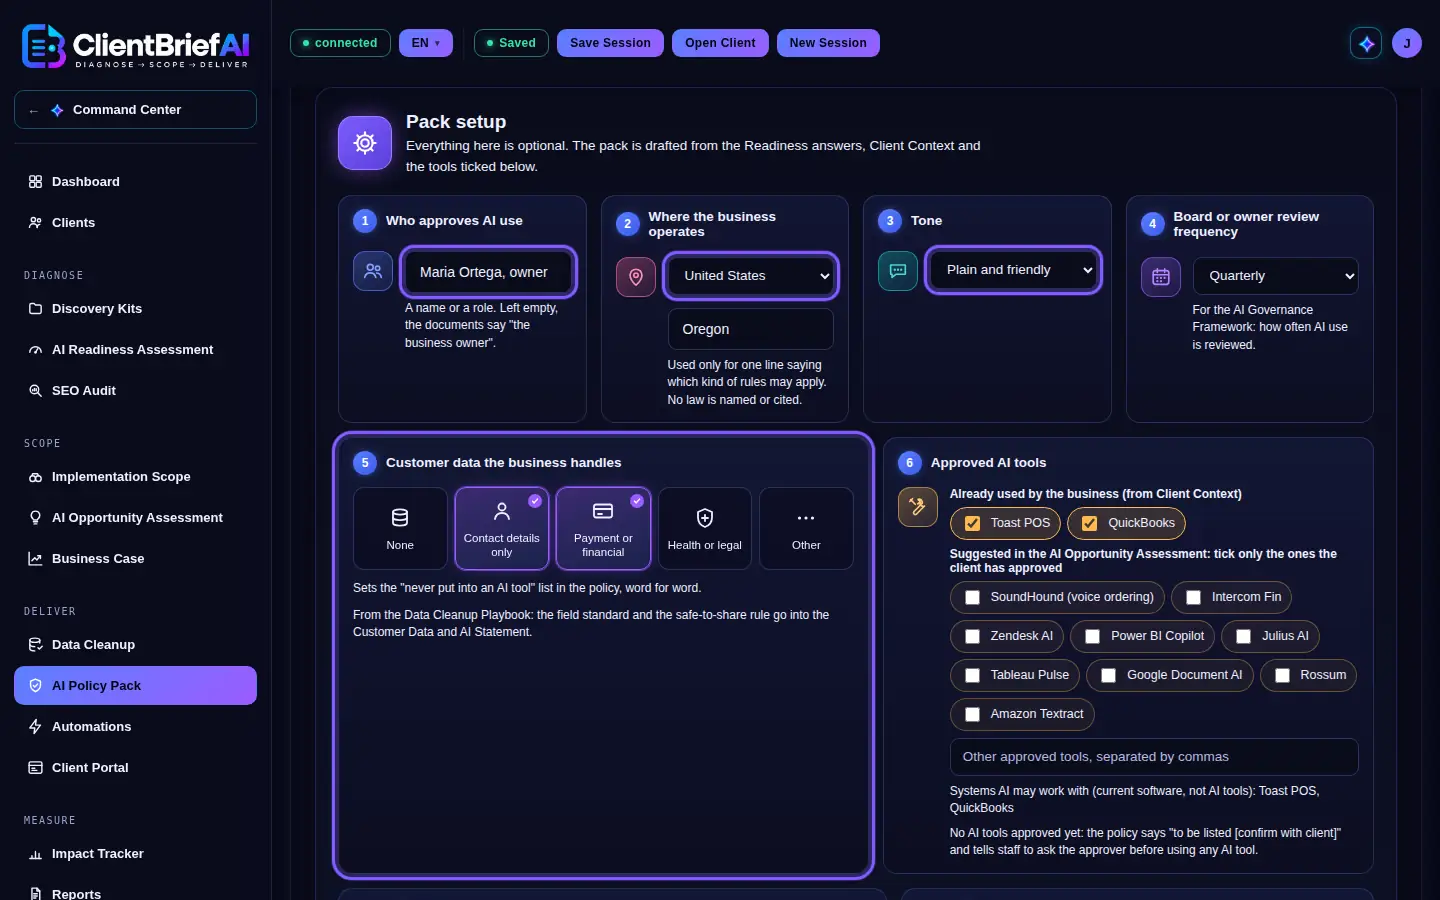
Everything here is optional; it makes the drafts specific. -
Tick the approved AI tools
The client's core software from Client Context is ticked for you, since the business already uses it. Tools suggested in the AI Opportunity Assessment are listed but not ticked: approval is the client's decision. Add others by name. With nothing ticked, the policy says the tools are to be listed and tells staff to ask the approver before using any AI tool. The client's core software and the tools suggested in the AI Opportunity Assessment show as small tick boxes above the box for other approved tools.
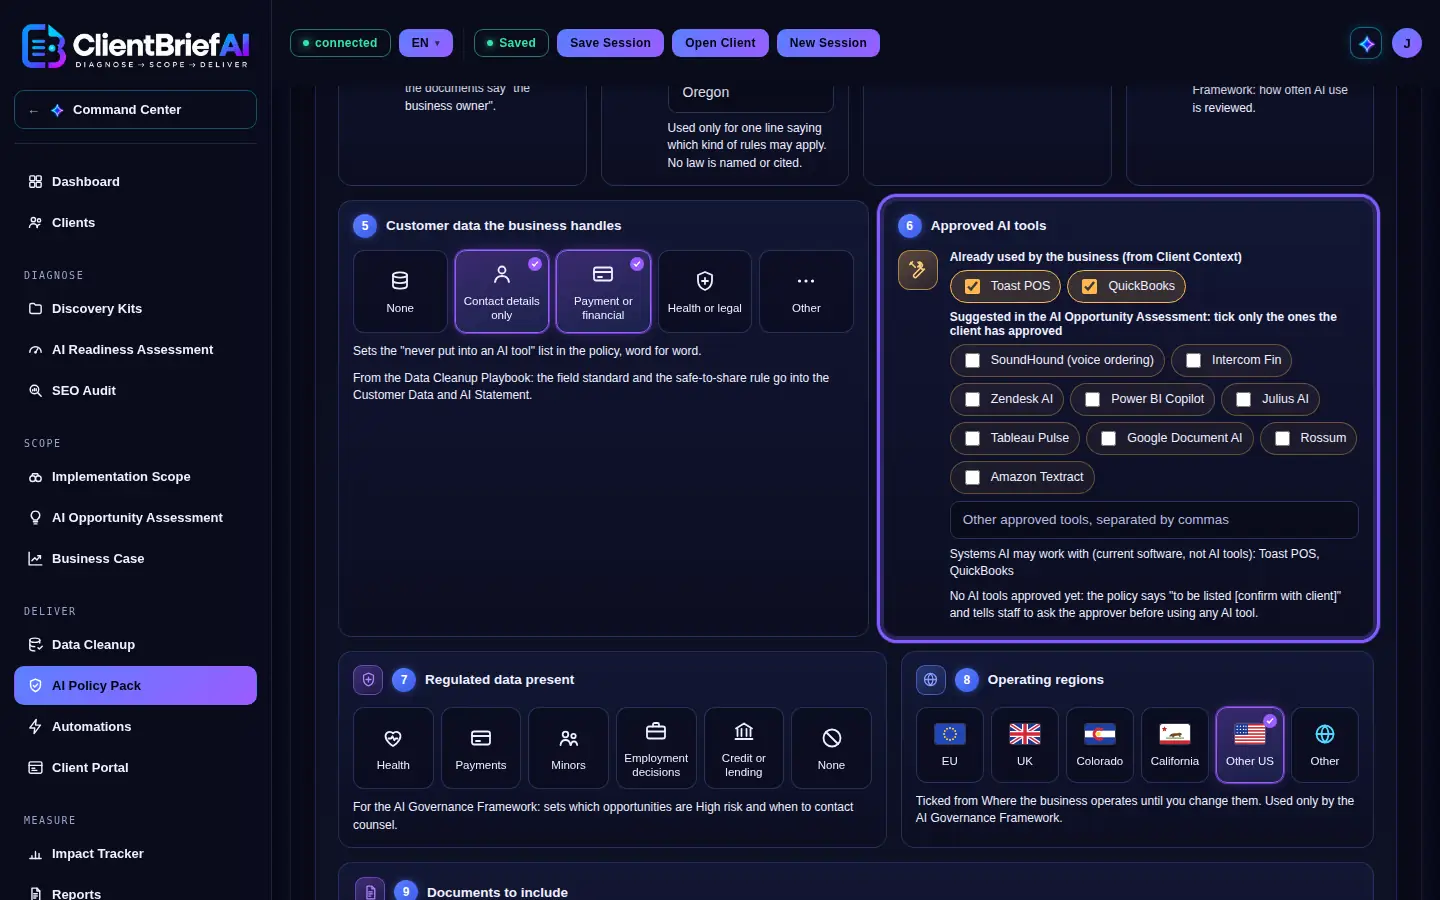
Tools the business already uses are ticked for you. -
Choose the documents and draft the pack
Under Documents to include: AI Acceptable Use Policy, Customer Data and AI Statement, AI Tool Checklist and Staff Acknowledgment Form are ticked; One-page AI Principles is optional. Click Draft pack; the documents are drafted together. On Full Plus and the trial, AI Governance Framework is ticked too. On Full Practice it shows as AI Governance Framework (Full Plus), and its tab, marked with a lock, opens an upgrade card. If the AI Readiness Assessment has no answers yet, an amber note above Draft pack says so, with a button that takes you there.
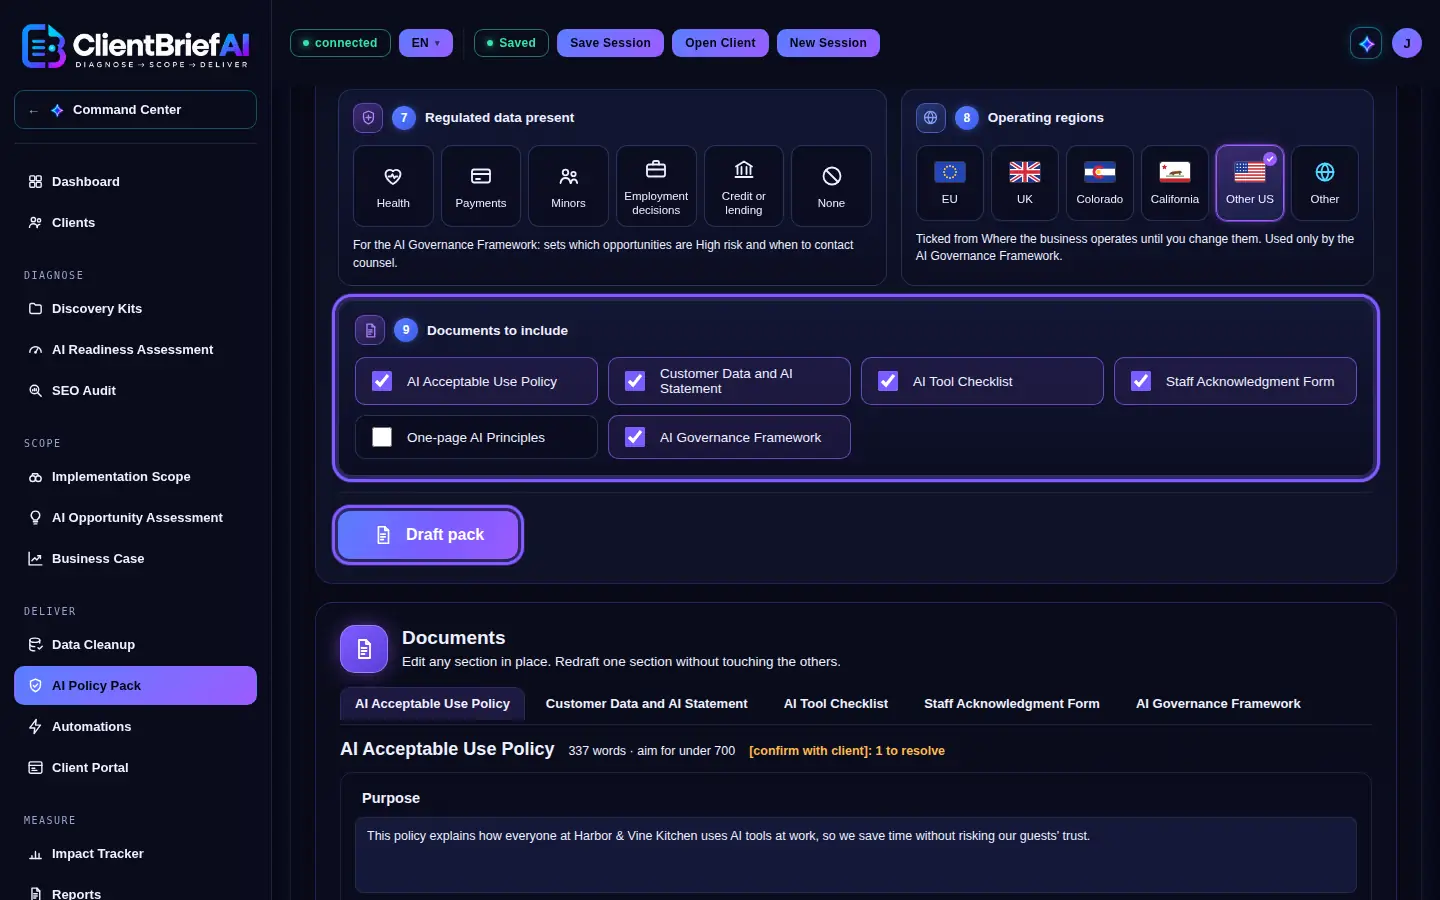
Pick the documents, then draft them all at once. -
Edit, and redraft one section at a time
Each document has its own tab. Edit any section in place, or click Redraft this section to replace just that one; your other sections are kept. Resolve every [confirm with client] before sending.
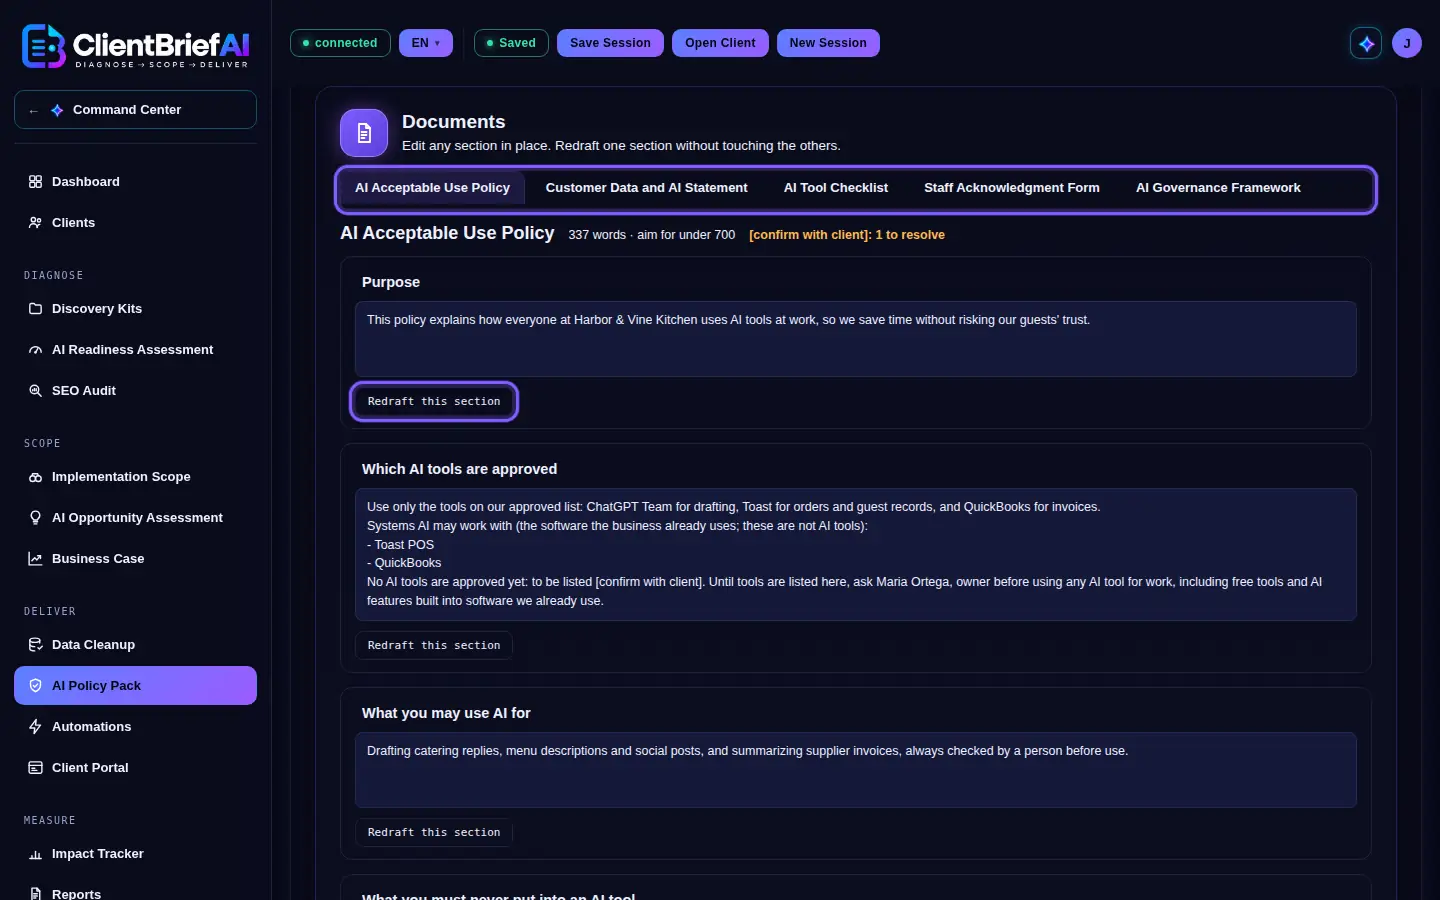
Redraft one section; the others are kept. -
Work on the AI Governance Framework
The framework's tab has six sections. Framework crosswalk: the four functions Govern, Map, Measure and Manage, each with what the client already has and the gap to close, edited cell by cell. Rules that may apply where you operate: only when the setup calls for it (EU or UK, or Colorado or California with employment, credit or health data). Risk register: one row for each opportunity in the AI Opportunity Assessment, in the same order, with the data it touches, a risk level (Low, Medium or High), the human review point and the fallback, edited cell by cell; if the assessment changes, the row is marked Opportunity changed, and Redraft this section updates it. Oversight and review cadence and Incident response: standard text built from the setup, with the reviewer, how often, the agenda and when to pause a tool, and four steps (Contain within 24 hours, Assess, Notify, Record), contacting counsel first when regulated data is ticked; Reset to the standard text puts back the original wording. Audit trail: a table of Date, Tool, Action, Approved by and Policy version that starts with the approved tools; Add a row for each tool approved, paused or retired. It is kept in the client file across later packs. Resolve every [confirm with counsel] as well as [confirm with client] before sending.
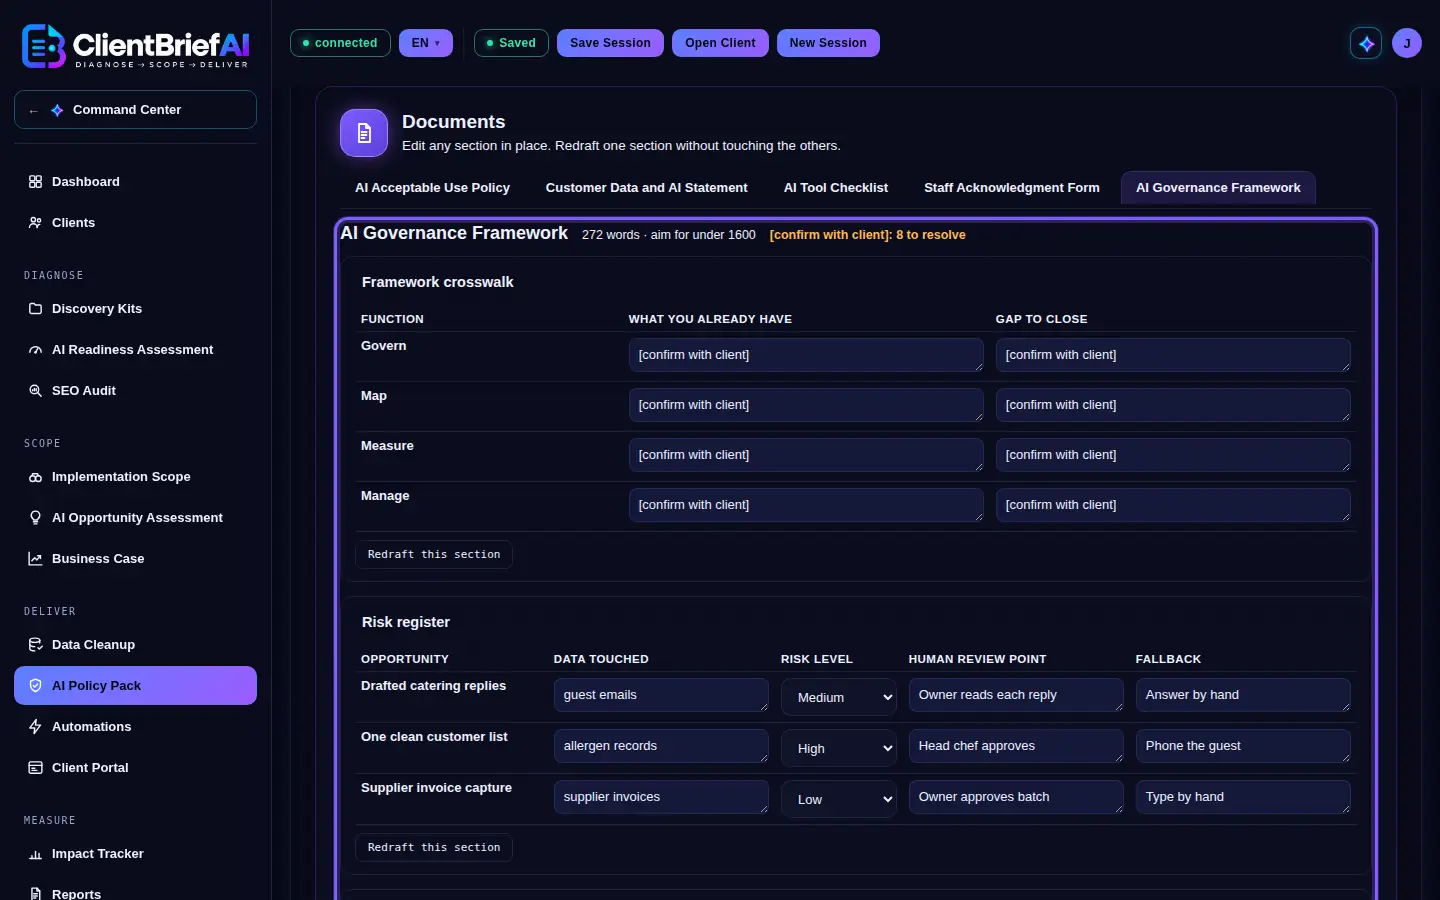
Six sections, from the crosswalk to incident response. -
Generate the pack
Click Generate Pack for one branded file with each document on its own printed page, or Download this document for one document on its own. Each pack is kept, dated, in the client file and appears on the Reports page. With the AI Governance Framework included, the pack's cover lists it, its crosswalk, risk register and audit trail print as tables, and [confirm with counsel] is highlighted. Download this document on its tab gives the framework on its own as a branded file. Each dated pack keeps the audit trail as it was, so a later pack shows the earlier rows too.
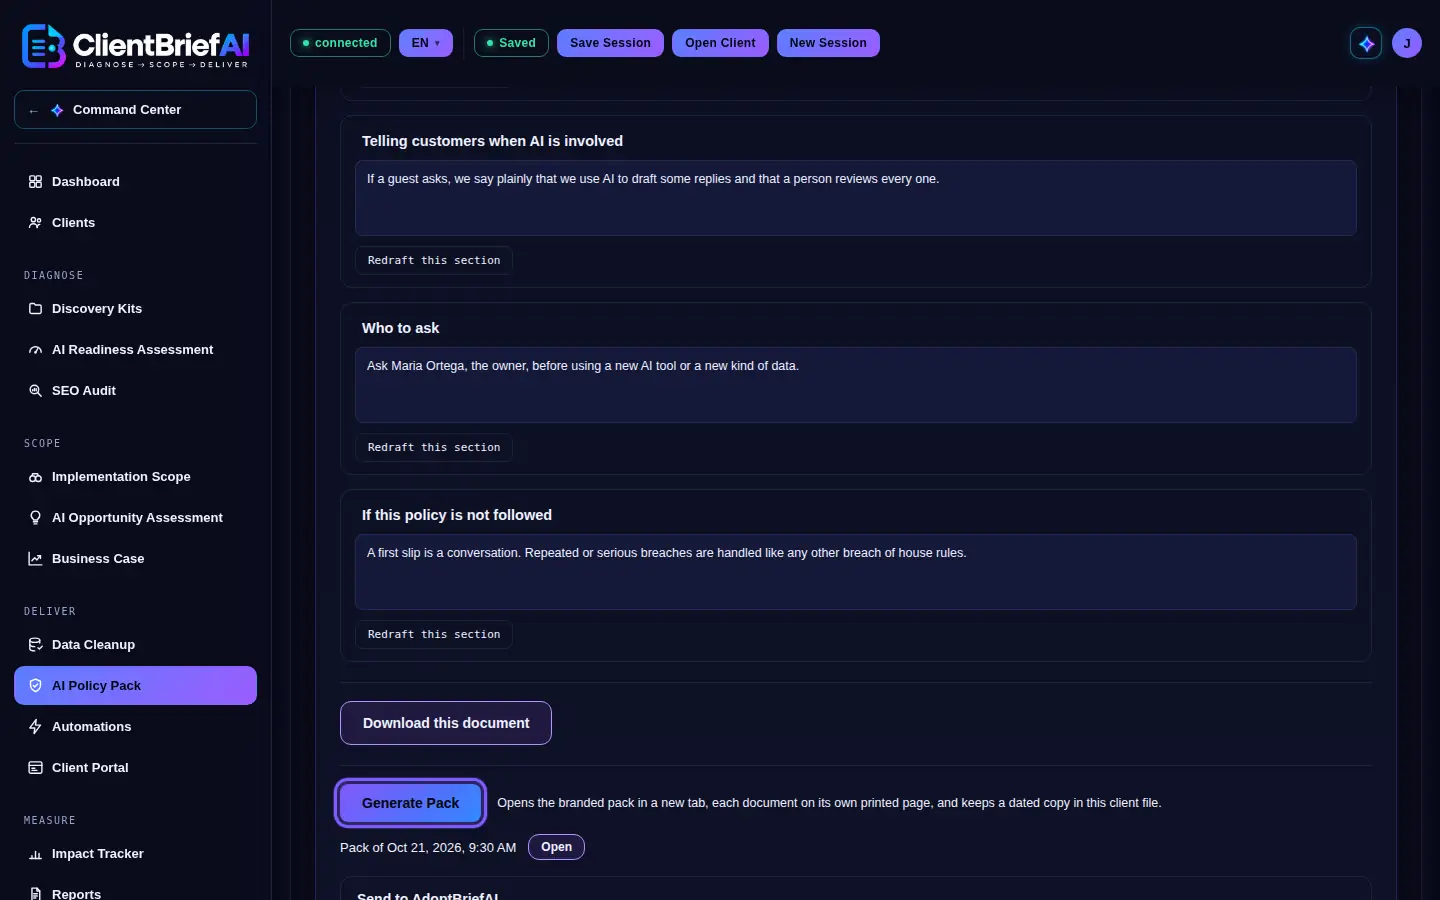
One branded file, each document on its own page. -
Send it to AdoptBriefAI
Under Send to AdoptBriefAI, click Copy and paste the Week 1 item into the client's adoption program. With the AI Governance Framework included, the hand-off also has a "Set up human review" line for each High risk row of the register, and the recurring governance review at the frequency you chose.
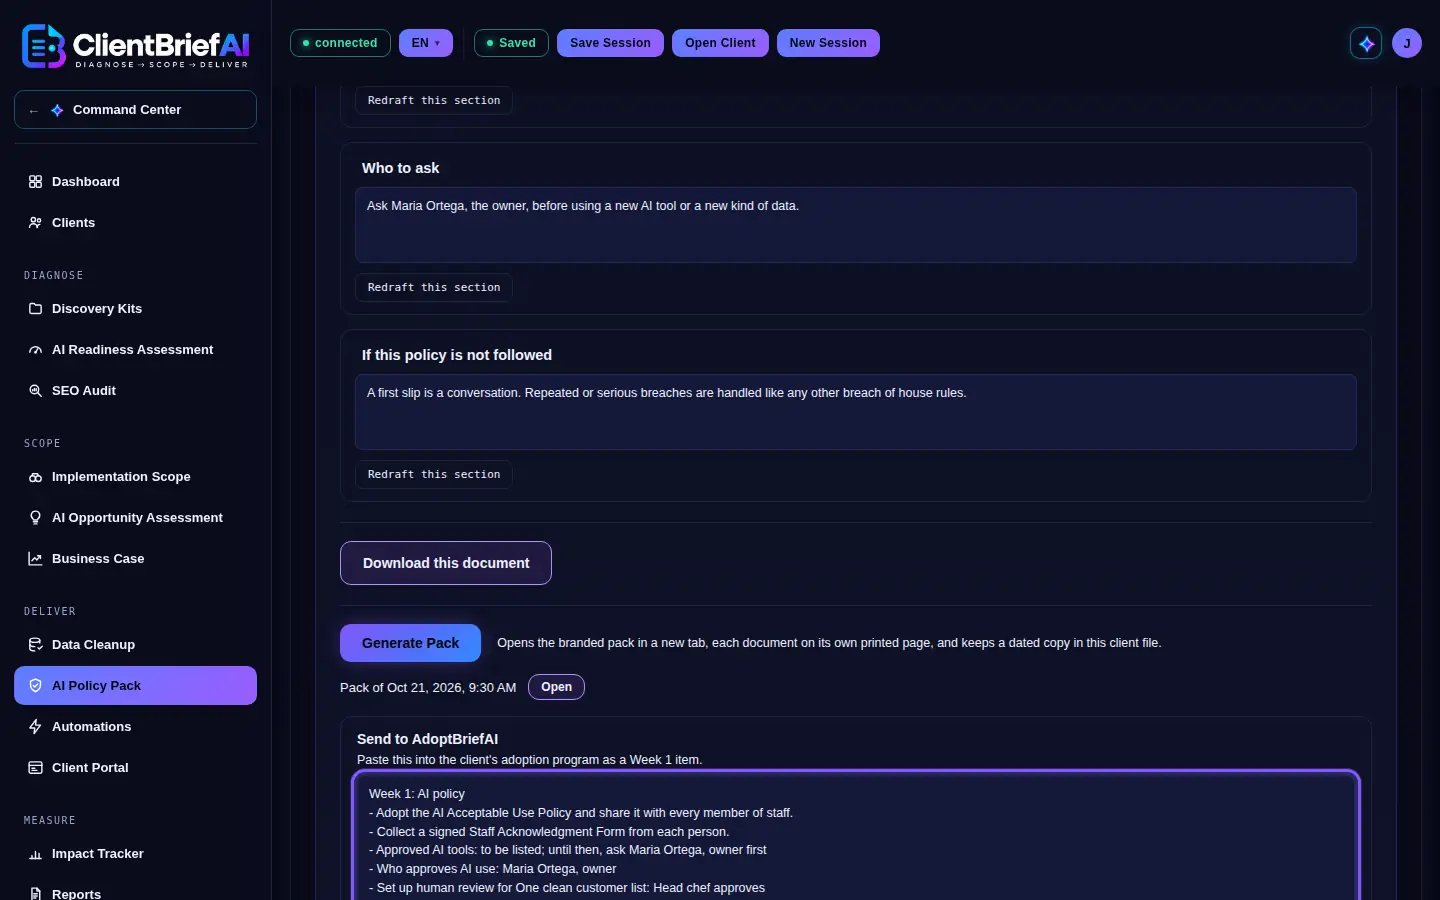
The policy becomes the first adoption milestone.
Good to know
- No law is named or cited. A one-line note says which kind of rules may apply where the business operates, and every document carries a not-legal-advice note.
- If the client has a Data Cleanup Playbook, the Customer Data and AI Statement uses its field standard and its safe-to-share rule.
- Save the session to keep the setup, the drafts and your edits.
- The AI Governance Framework names no law either, and its not-legal-advice note is printed at the foot of every page.
Deliver
Automations
Ready-made automations you hand over at delivery. Each one runs on what the client already owns, never replies to, deletes or moves the client's data, and comes with an install sheet and one number to track in the Impact Tracker. Nothing runs inside ClientBriefAI: you download it, set it up for the client, and install it on the client's account.
-
Pick an automation
The library on the left lists them; click one to see it on the right. Search by name or by what it does, or pick a category. There are five: Unanswered Customer Email Alert (every hour, one digest of customer emails waiting more than 24 hours), Follow Up Reminder (every morning, the follow-ups due or overdue in a shared sheet), Data Cleanup Reminder (every week, duplicates, blanks and bad formats in the client's own list), New Lead Notification (every five minutes, inquiry emails logged and the owner alerted) and Weekly Activity Report (every Monday, last week's totals against the week before). Each one says what it does, what it never does, and the number to track in the Impact Tracker.
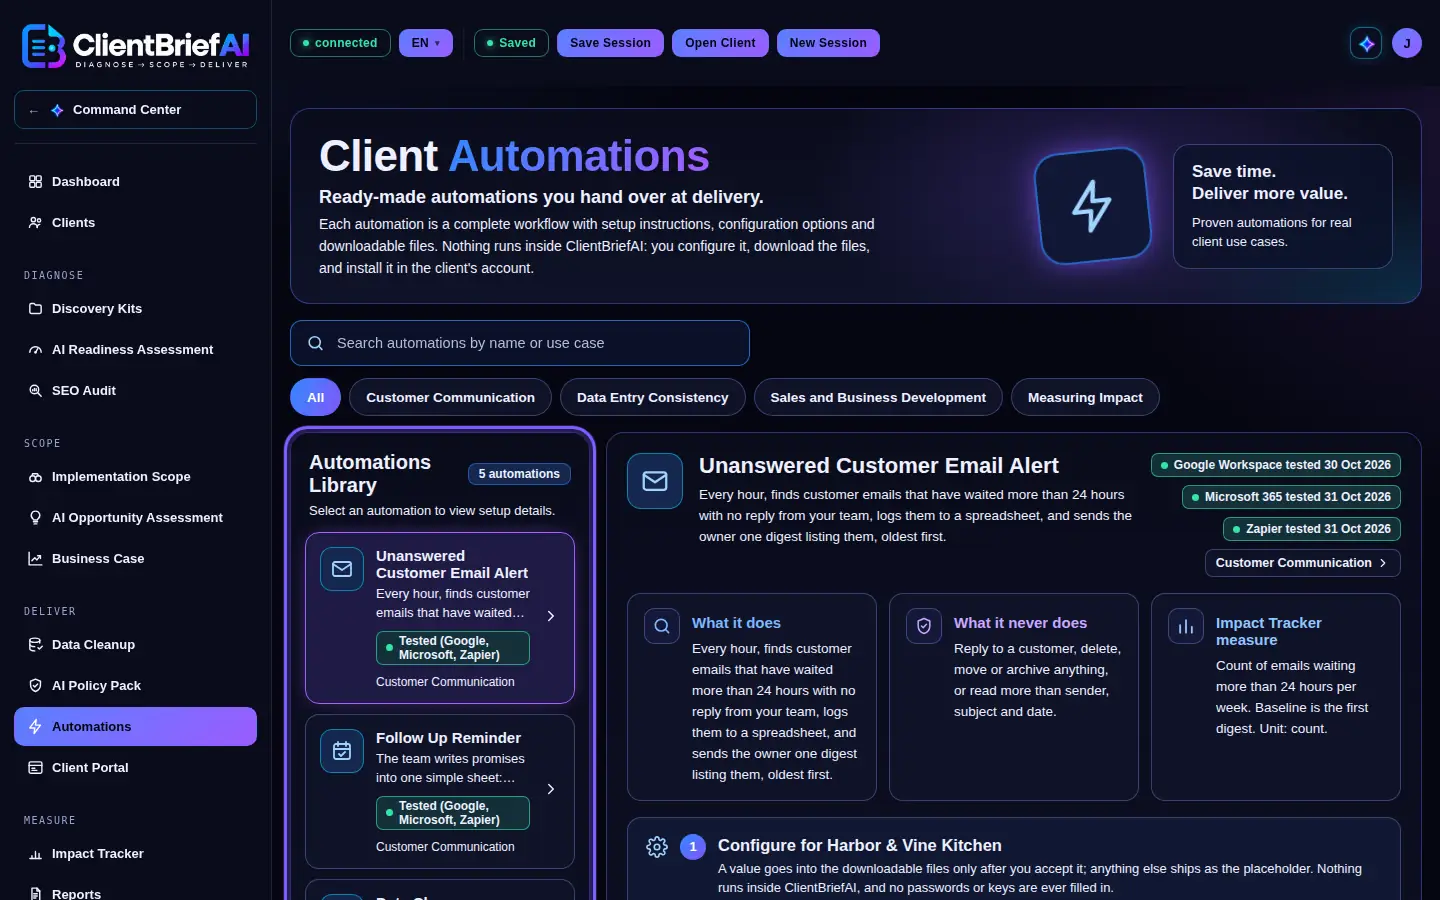
Pick an automation; its details open beside the library. -
Configure for the client
Step 1 holds the settings the client would otherwise type in: who gets the email, the client's email domain, a spreadsheet or column name, the hours, or a word list, as that automation needs. Emails and domains found in this session are suggested, from the client's email on the Clients page, an email address in the session notes, or the SEO Audit's website. Check each one and click Accept. You can also type your own value and accept it. Use the placeholder takes a value back out.
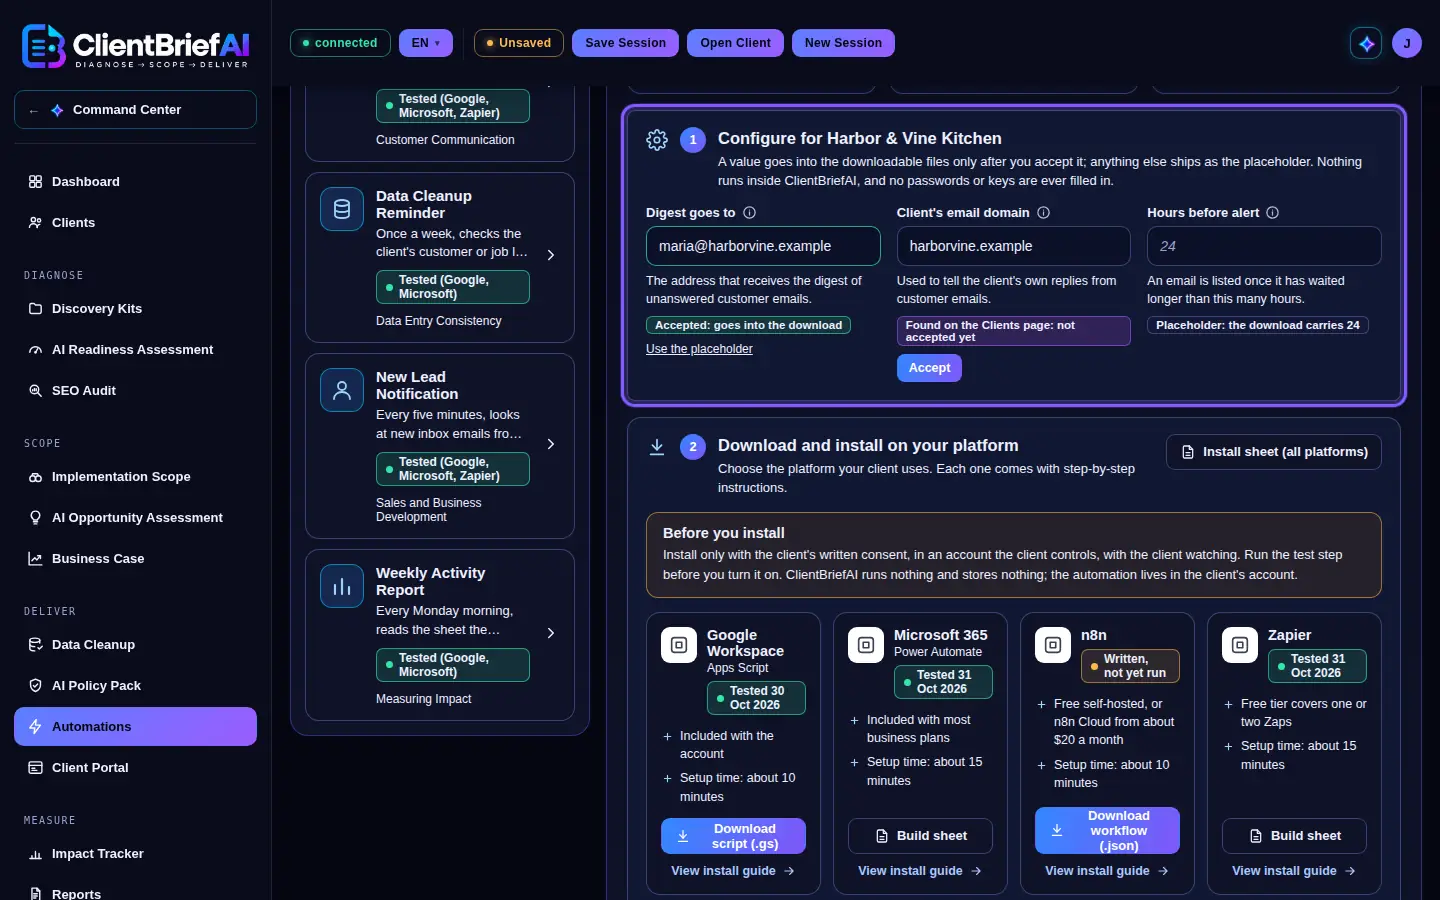
A value goes into the download only after you accept it. -
Download and install
Step 2 starts with Before you install: only with the client's written consent, in an account the client controls, with the client watching, and after the test step. Then a card for each platform: whether that version has been tested on a real account, its cost to the client and the setup time. Google Workspace and n8n download a file to import; Microsoft 365 and Zapier download a build sheet with the steps. View install guide opens that platform's steps in a new tab. A platform an automation cannot run on shows Not offered on this platform, with the reason.
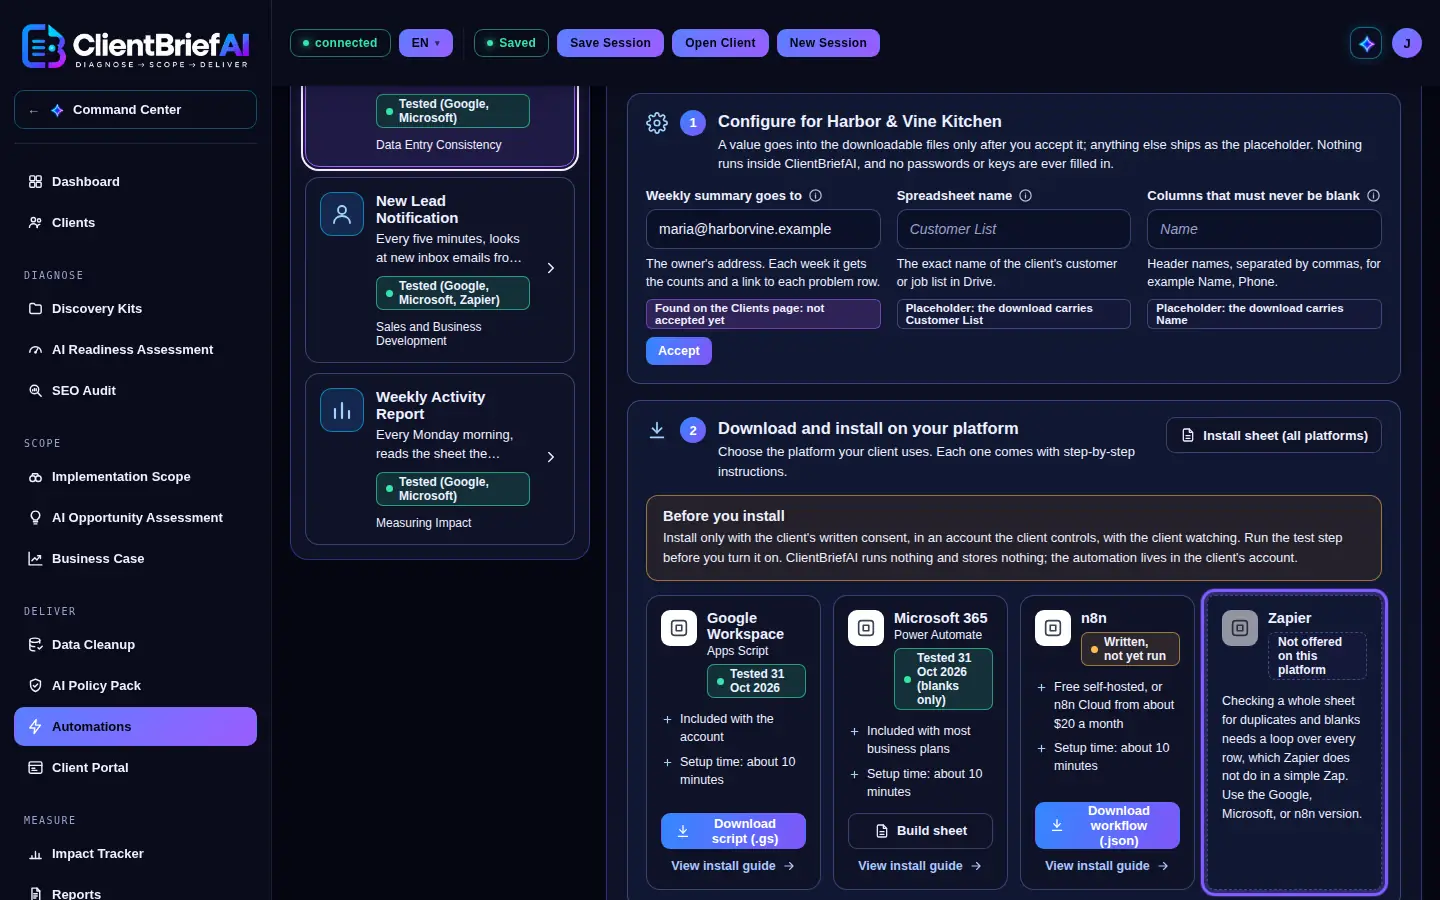
Each platform with its status, cost and setup time. -
Download the install sheet
Install sheet (all platforms) is one page covering every platform, with the client's settings at the top: the accepted values, and the rest marked as placeholders to fill in.
Good to know
- A download carries a value only after you click Accept. Anything not accepted ships as the placeholder, for example owner@example.com.
- Changing an accepted value means accepting it again.
- No passwords or keys are ever filled in: the client signs in during install.
- Every Google Workspace and Microsoft 365 version, and every Zapier version, has been tested on a real account. The n8n versions are marked "written, not yet run": test on the client's account before handing over.
- Some Microsoft 365 versions do less than the others, and the card says so: blanks only, subject only, or rows only.
- New Lead Notification checks only the Primary inbox tab, skips newsletters and bulk mail, and matches whole words: "book a" matches, "playbook" does not. Add the client's own service names to its inquiry words.
- The Google versions find the client's sheet by its name, and skip copies in the trash and files that are not Google Sheets.
- Data Cleanup Reminder and Weekly Activity Report are not offered on Zapier: a simple Zap cannot loop over every row of a sheet.
- The accepted values are saved with the client. New Session clears them.
- The page is in four languages; the automations and install sheets are in English.
Deliver
Client Portal
The Client Portal puts everything about the engagement on one page the business owner can open any time: the headline numbers, the reports, what changed, what is next and how to reach you. It is a single file you share however you already share files; nothing is stored or hosted by AI Curator. It is the last item in the Deliver group, after Automations, on the trial, Full, Full Plus and owner plans (not Starter).
-
Choose the sections
Under Sections to include, tick Headline numbers, Where we are, Your reports, What changed recently, What is next, Your AI principles and Contact. A section with nothing to show is left out automatically.
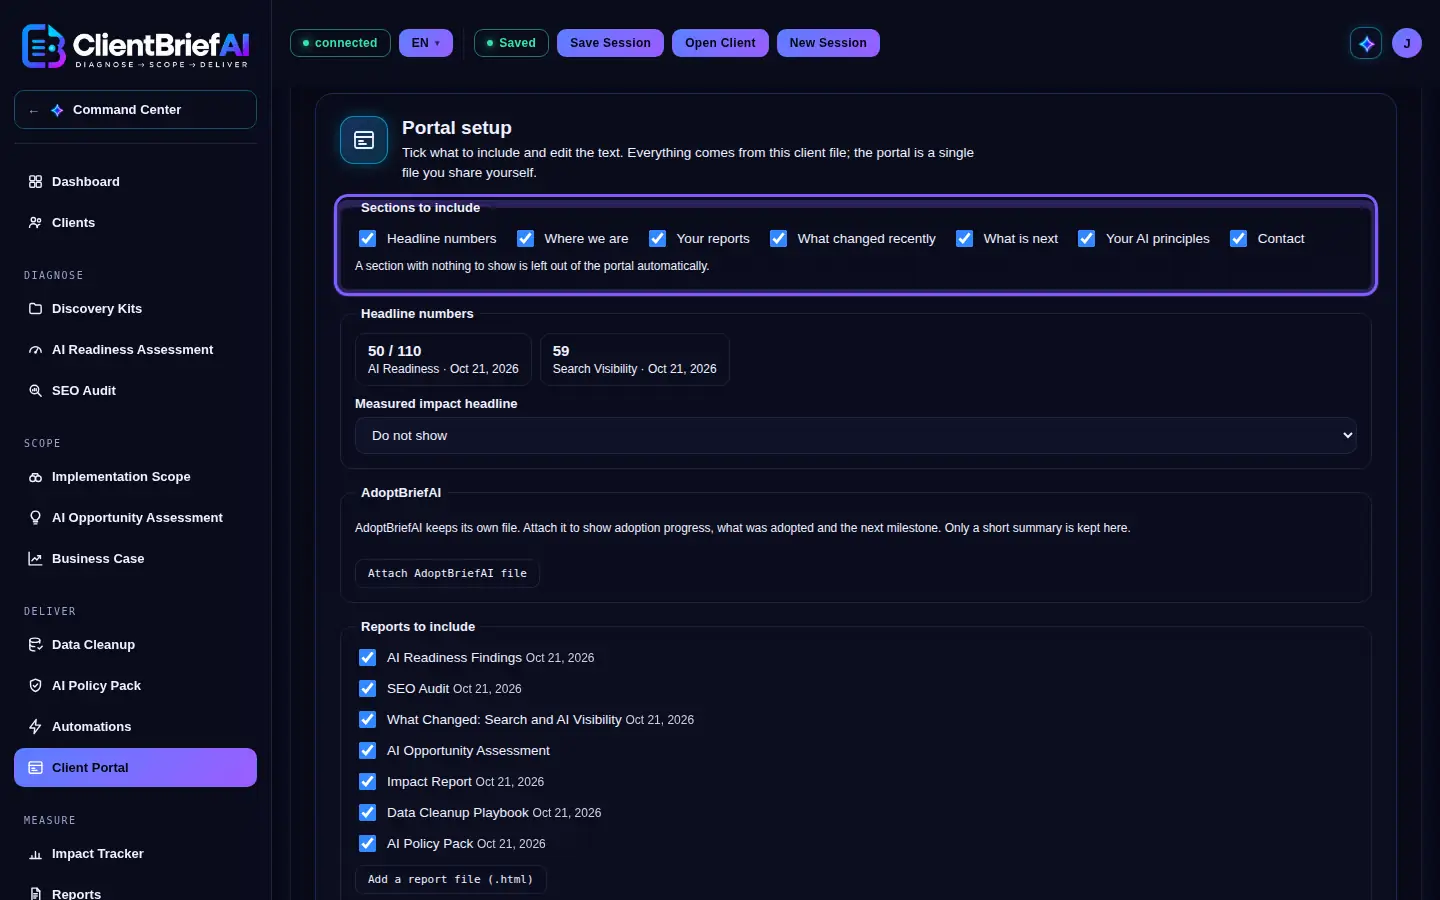
A section with nothing to show is left out. -
Check the headline numbers
They come from this client file, each with the date it was measured: the AI Readiness score, the SEO Audit score, Adoption progress when an AdoptBriefAI file is attached, and, when there is one, a Measured impact headline from the Impact Tracker.
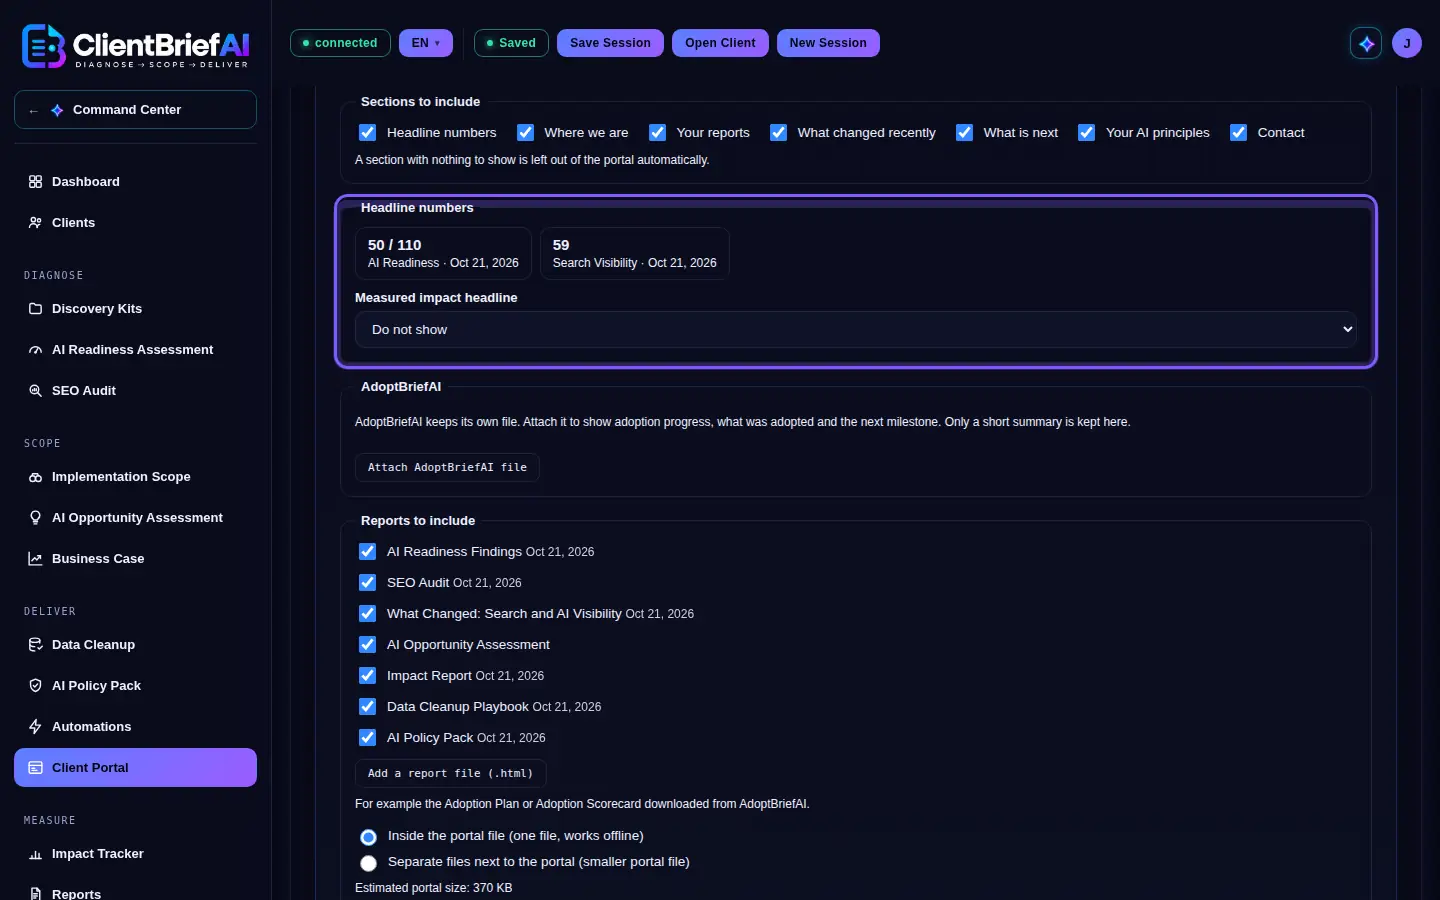
Each number shows when it was measured. -
Write or draft Where we are
Write it yourself, or click Draft with BriefPilot for up to 80 words drawn from the client file. It is also drafted for you when you generate, if the box is empty.
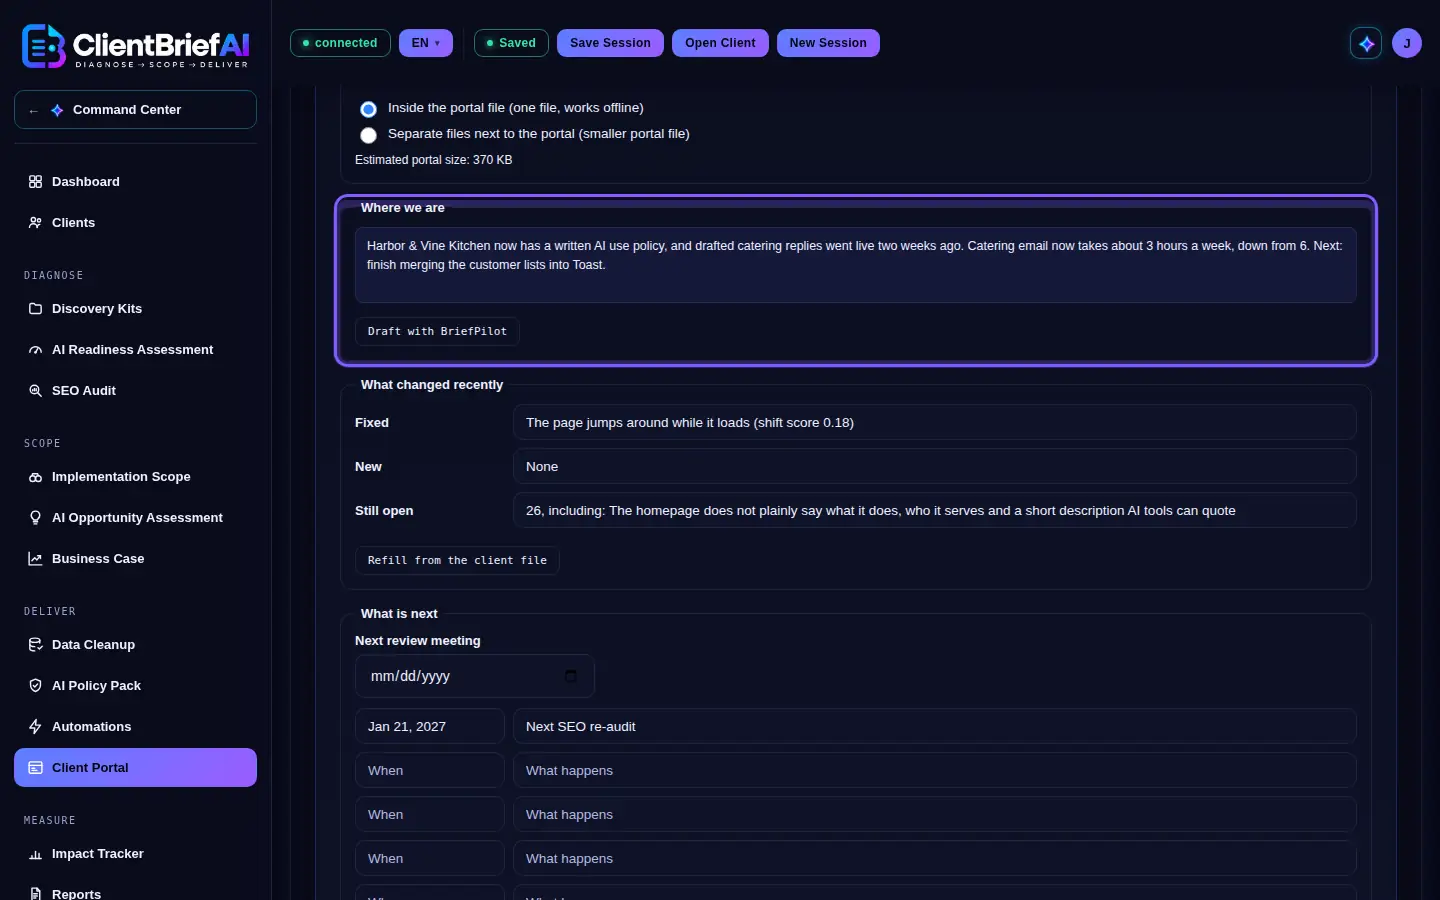
Write it yourself, or let BriefPilot draft 80 words. -
Pick the reports
Every report in this client file is listed: AI Readiness, SEO Audit, What Changed, Data Cleanup Playbook, AI Opportunity Assessment, Proposal, Impact Report and AI Policy Pack. Add a report file (.html) for others, for example the Adoption Plan or Adoption Scorecard downloaded from AdoptBriefAI (up to 8 MB each).
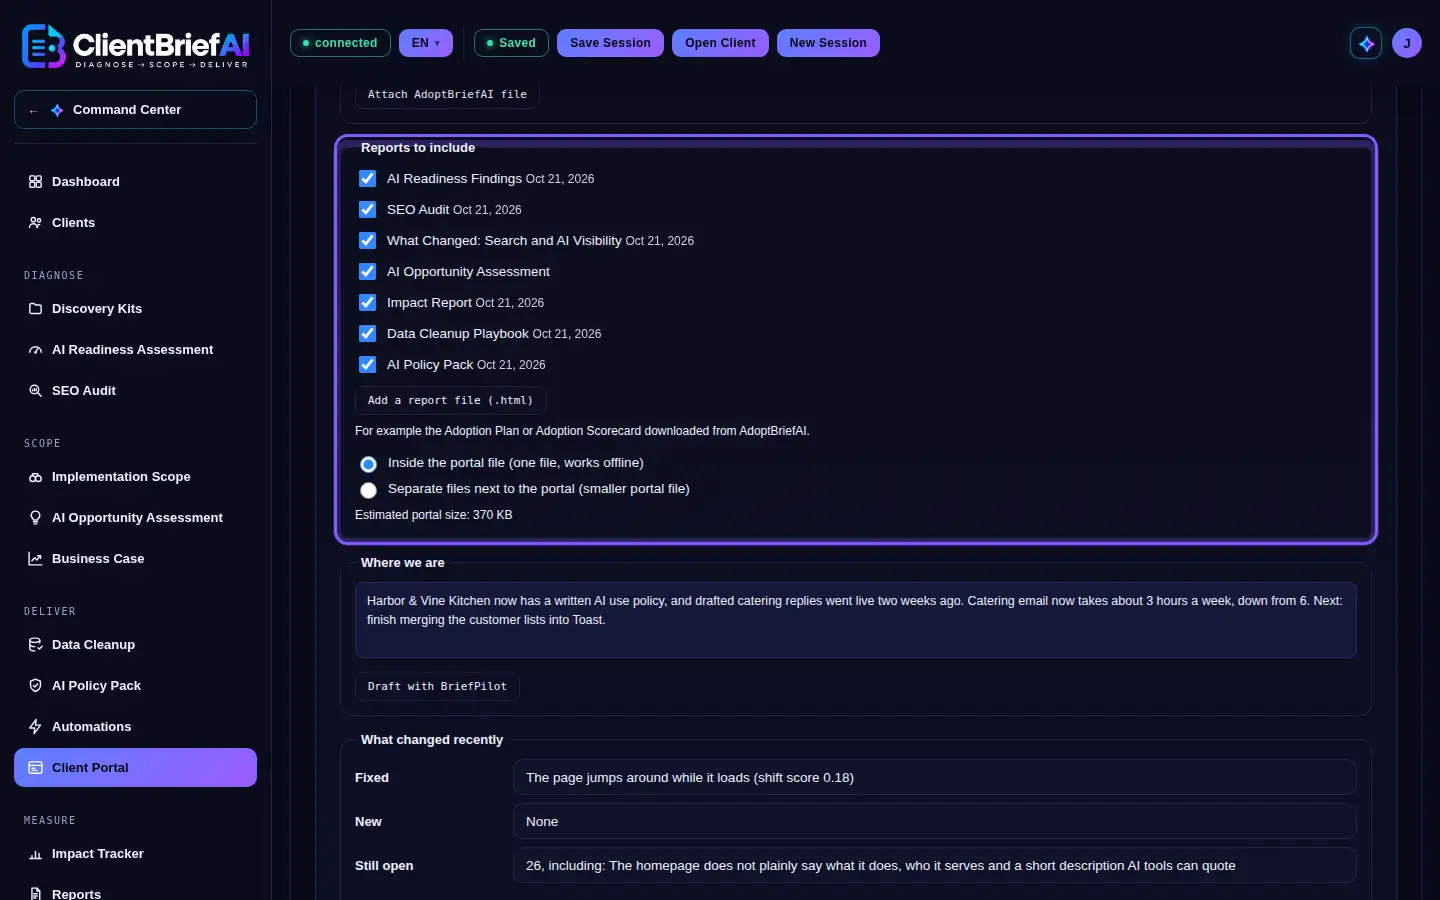
Tick the reports the client should see. -
Attach the AdoptBriefAI file
AdoptBriefAI keeps its own file. Click Attach AdoptBriefAI file to show adoption progress, what was adopted and the next milestone; only a short summary is kept here.
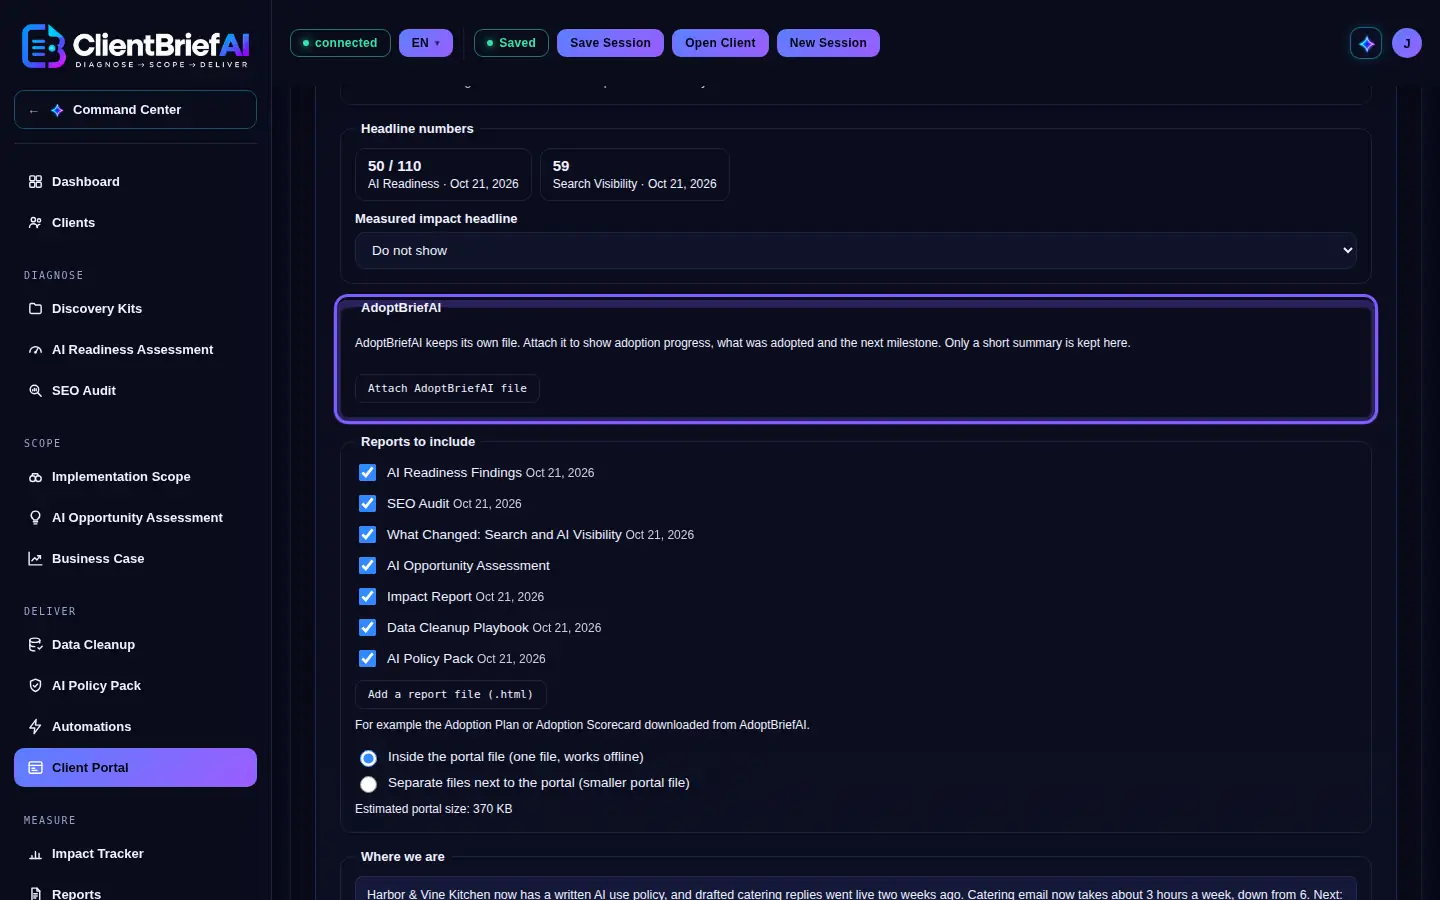
Only a short summary of adoption is kept. -
Fill in what changed and what is next
What changed recently and What is next are filled in from the client file, with the Next review meeting and the Next SEO re-audit; edit them freely. Refill from the client file starts them again.
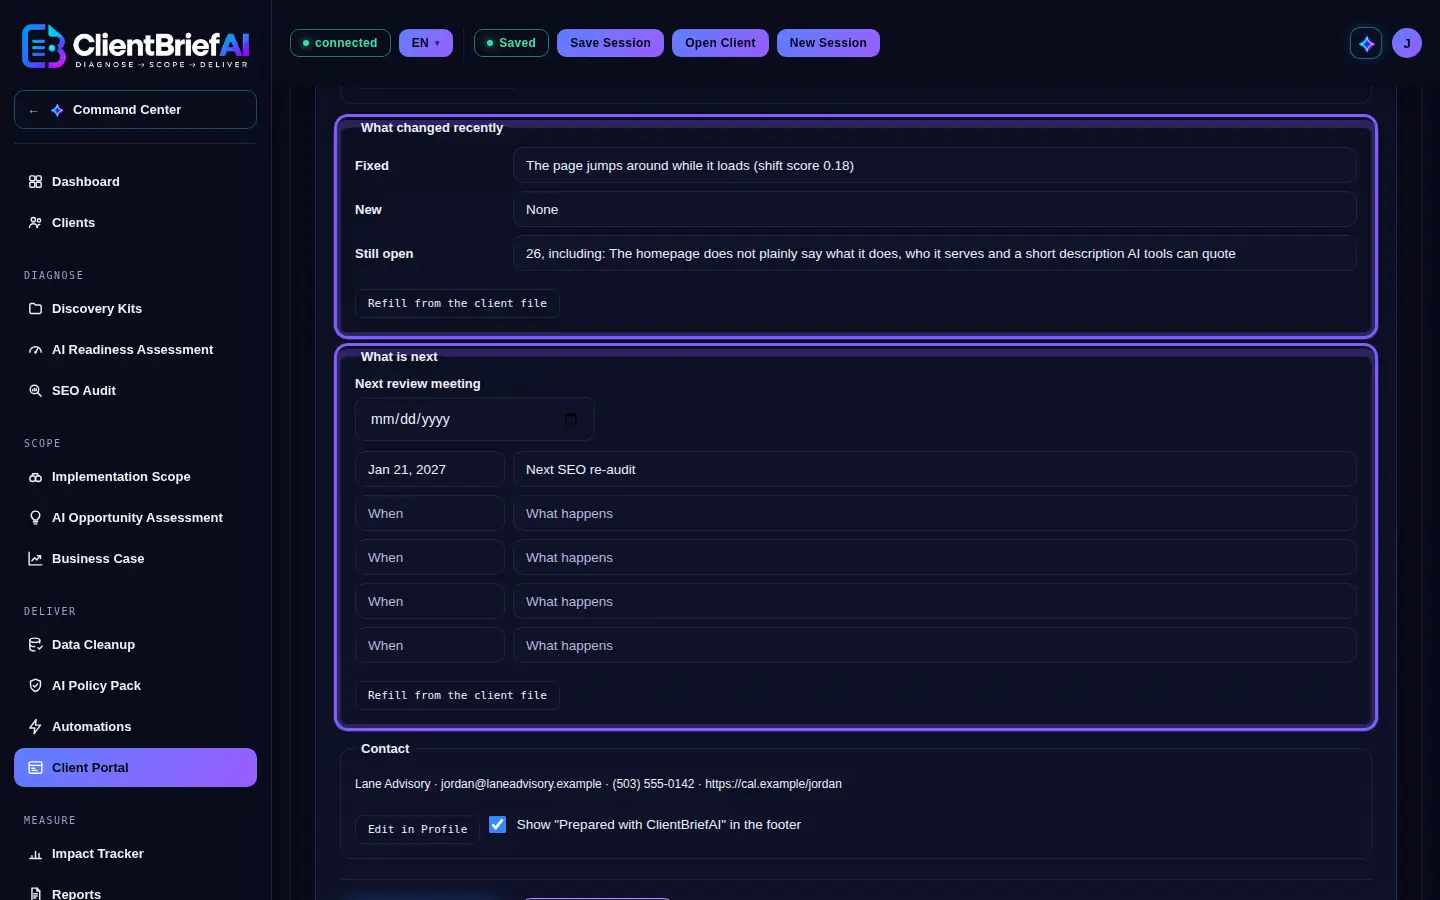
Edit freely, or refill from the client file. -
Check your contact details
The Contact block uses the Contact email for clients, Phone and Booking link from Profile, Report branding. Edit in Profile changes them.
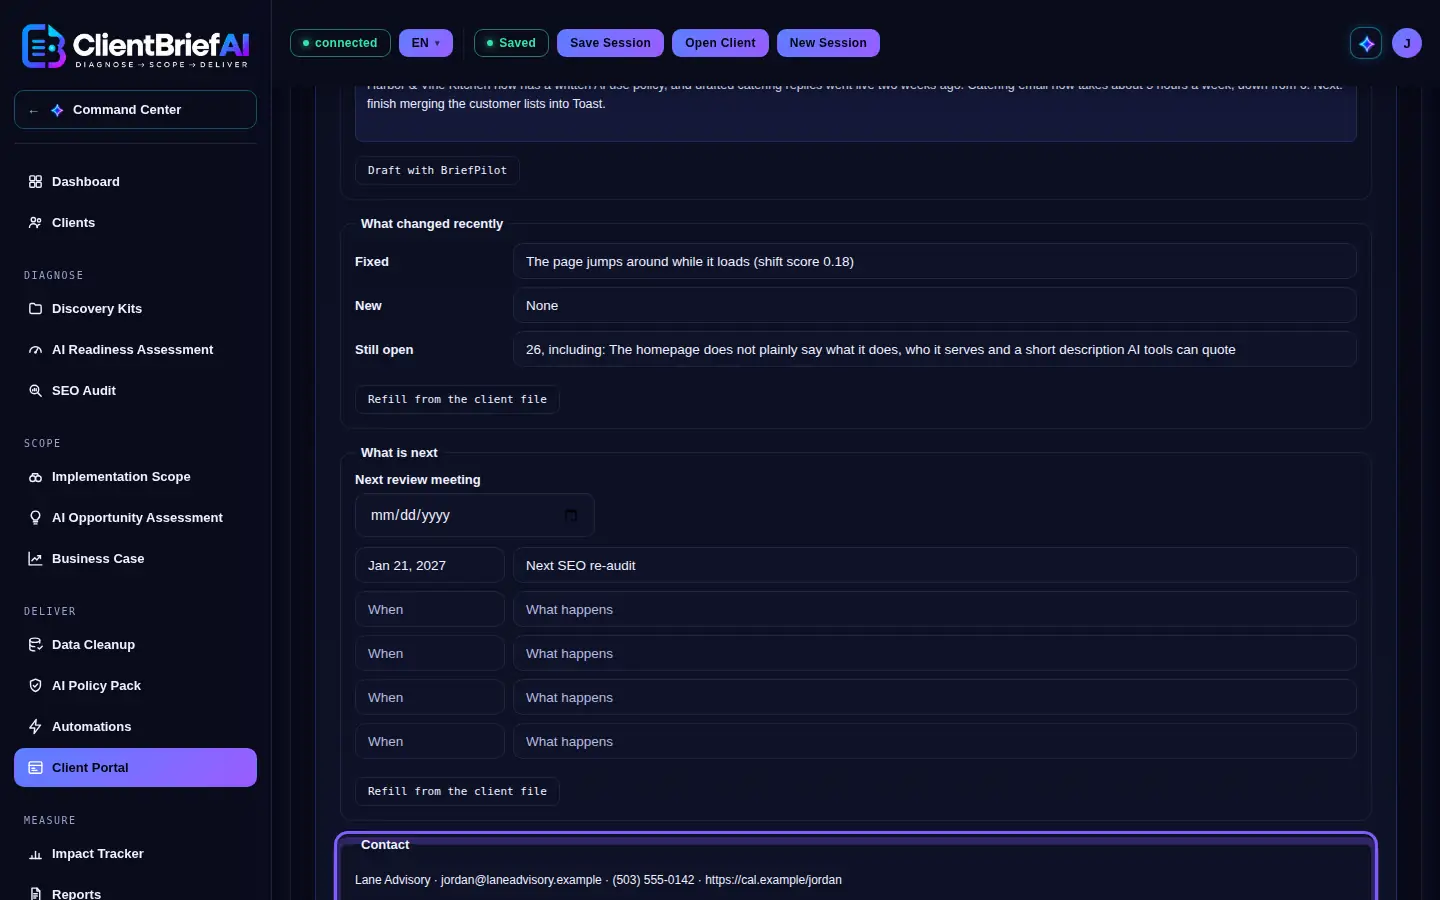
The contact details come from your profile. -
Choose how reports are included, and generate
Inside the portal file keeps everything in one file that works offline; Separate files next to the portal makes a smaller portal file and saves the reports beside it in a folder you choose. Click Generate Portal, then Download HTML. Each portal is kept, dated, in the client file.
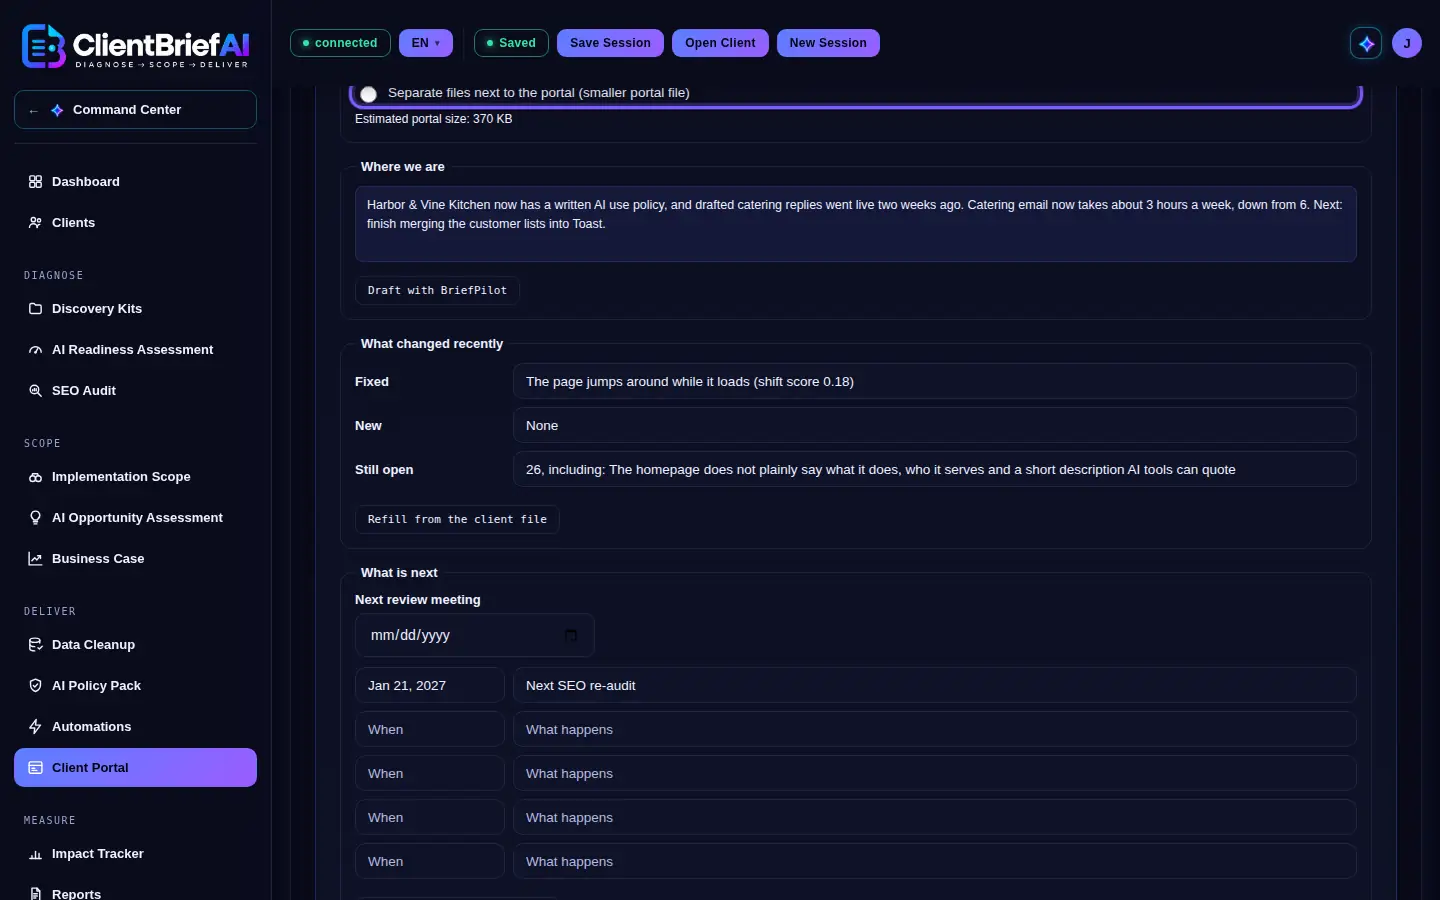
One file works offline; share it the way you share files.
Good to know
- How to share: email the file as an attachment, put it in your own Google Drive or Dropbox and share the link, or add it to your own website. Previews in email, Drive and Dropbox do not run the buttons, so the client should download the file and open it in a browser.
- The portal does not update by itself. Regenerate it after each review; the Dashboard shows when each client's portal was last generated and turns the badge amber after 45 days.
- Show "Prepared with ClientBriefAI" in the footer is optional.
Measure
Impact Tracker
Impact Tracker is part of the Full Plus plan. It is not shown on other plans or during the trial. It tracks the opportunities from this client's AI Opportunity Assessment. On Full Plus, a row can show Projected, the monthly benefit and hours per week set from the Business Case. It is read only, and Before and After are never changed by it. Once you enter an After value in Dollars / month or Hours / week, the row shows the Variance: After minus Projected. The Impact Report adds a Projected vs actual line with the totals.
-
Open Impact Tracker
Click Impact Tracker under Measure. If you see Generate an AI Opportunity Assessment first, create the assessment or open the client with Open Client.
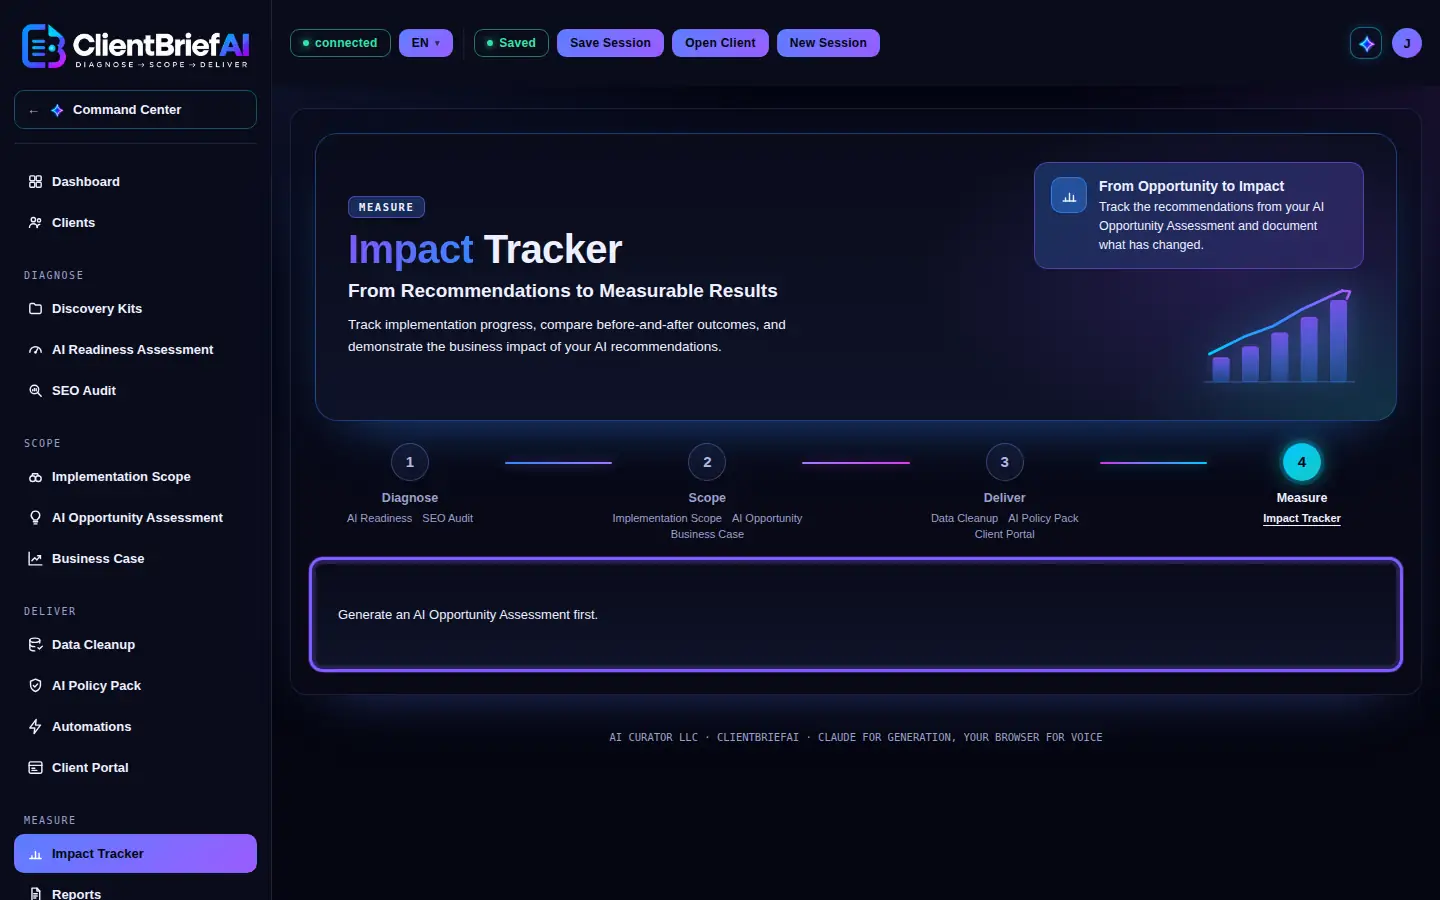
Impact Tracker follows the assessment's opportunities. -
Record status and before and after numbers
Under Tracked Opportunities, set each one to Not started, In progress or Done, and enter Before and After values with a unit: Hours / week, Dollars / month, Days or Count. An opportunity counts as Measured once both values are in.
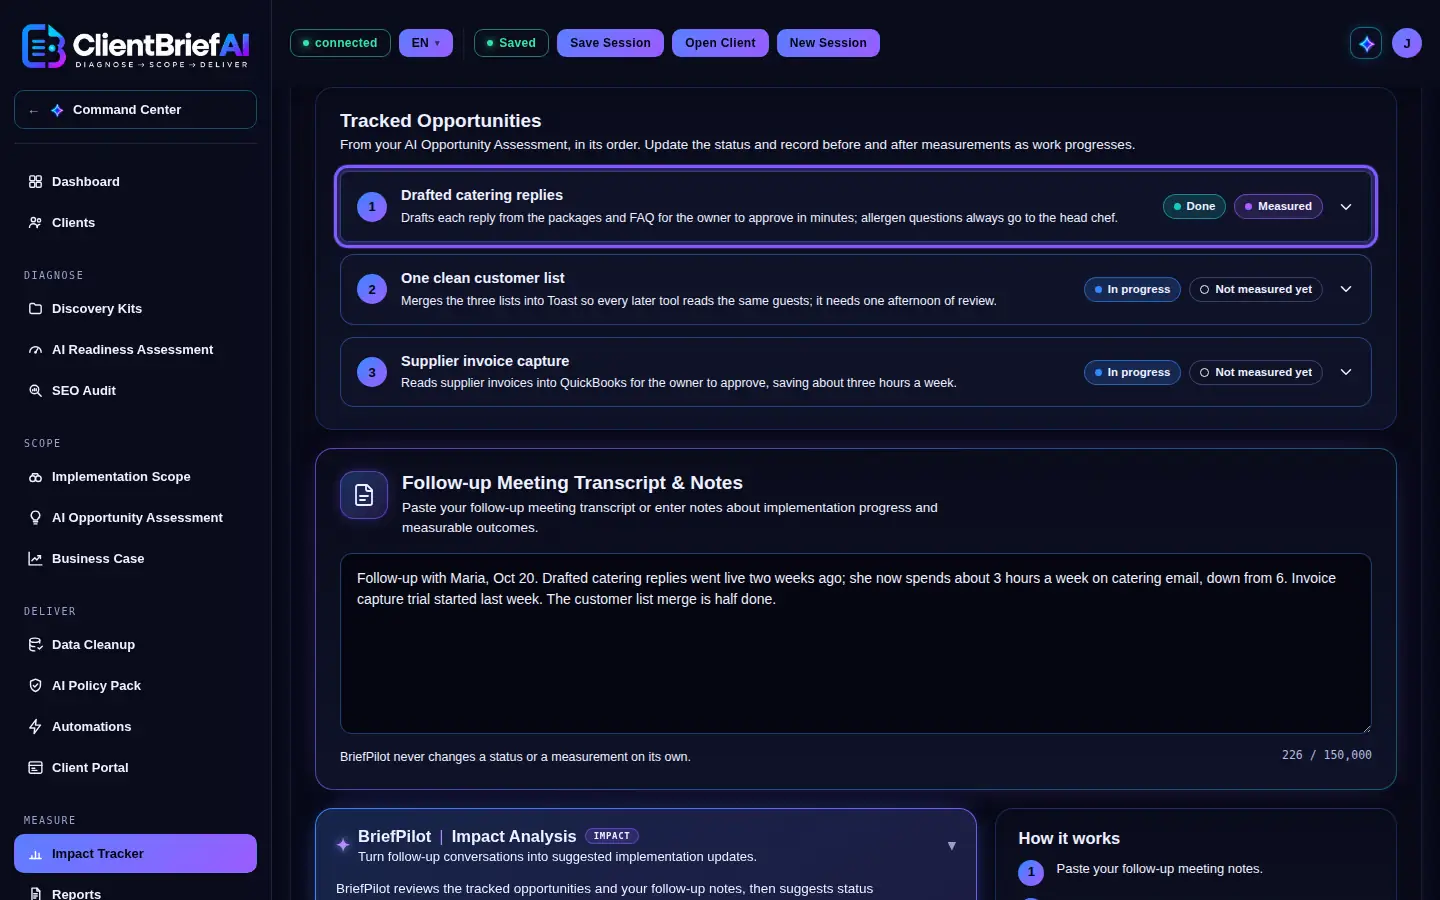
Record a status and before and after numbers for each. -
Add the follow-up notes and let BriefPilot suggest updates
Paste the follow-up call in Follow-up Meeting Transcript & Notes and click Analyze Follow-up Notes. BriefPilot suggests status changes and measurements, each with Accept or Dismiss. BriefPilot never changes a status or a measurement on its own.
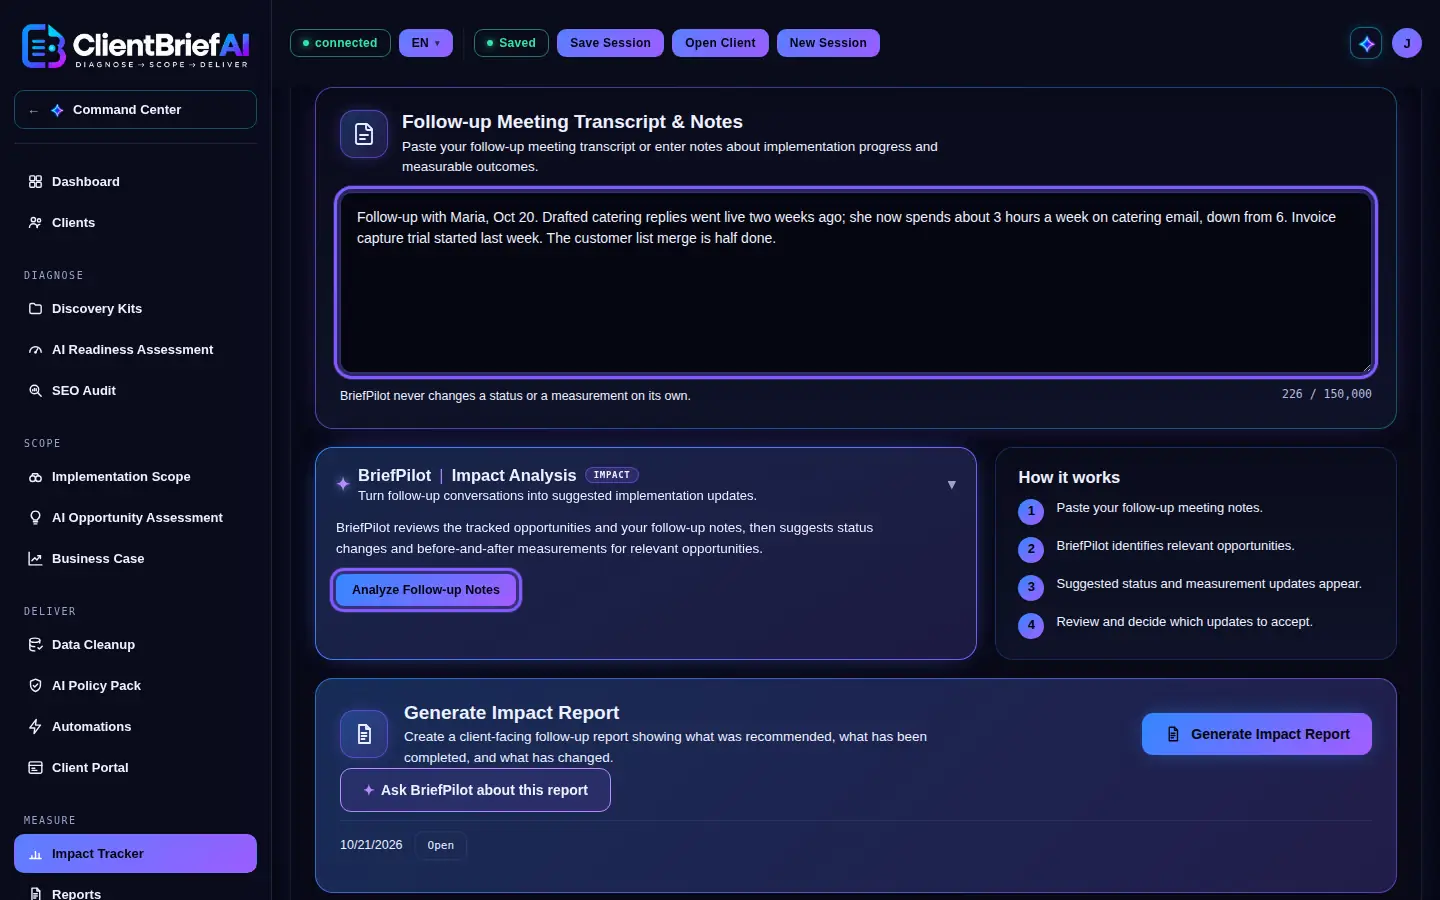
BriefPilot suggests updates; it never changes them on its own. -
Generate the Impact Report
Click Generate Impact Report. It shows what was recommended, what is done and what changed. Each report is saved in the session and listed with Open.
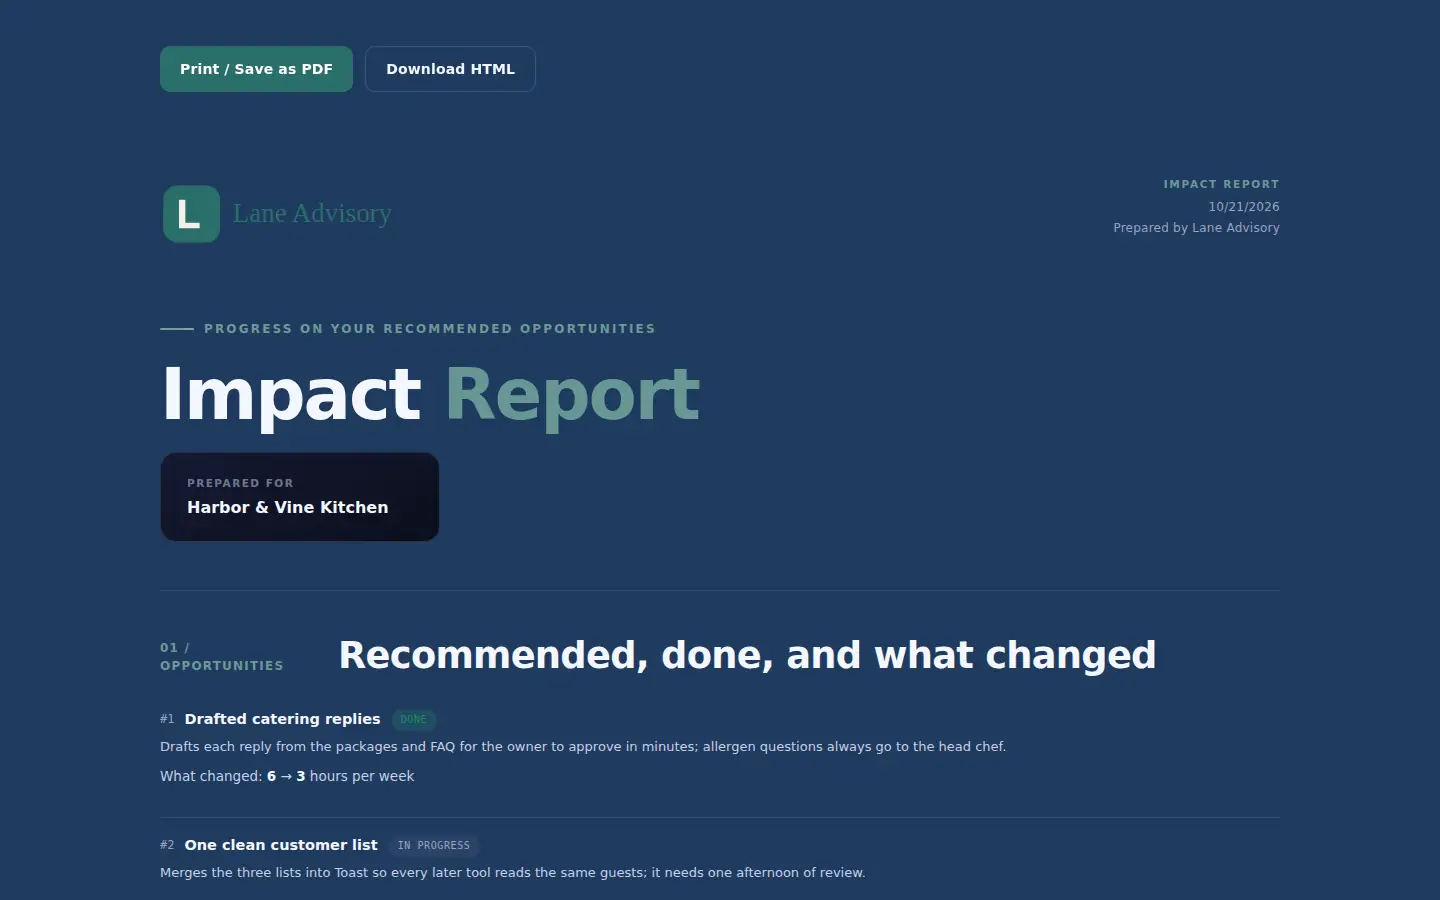
The report shows what was recommended, done and changed.
Good to know
- Save the session after each check-in so the numbers and past reports are kept.
Measure
Reports
Client Reports lists the HTML reports you saved with Download HTML: AI Readiness, SEO Audit, What Changed, Data Cleanup Playbook, AI Opportunity, AI Policy Pack, Client Portal, Impact Report and Proposal, grouped by client. Nothing is uploaded. Business Case reports are listed too.
-
Choose your reports folder
Under Your Reports Folder, click Select Folder, or Select Files to pick single files. Search the library, filter by client, report type or date, sort, and click Open Report to view a report in a new tab.
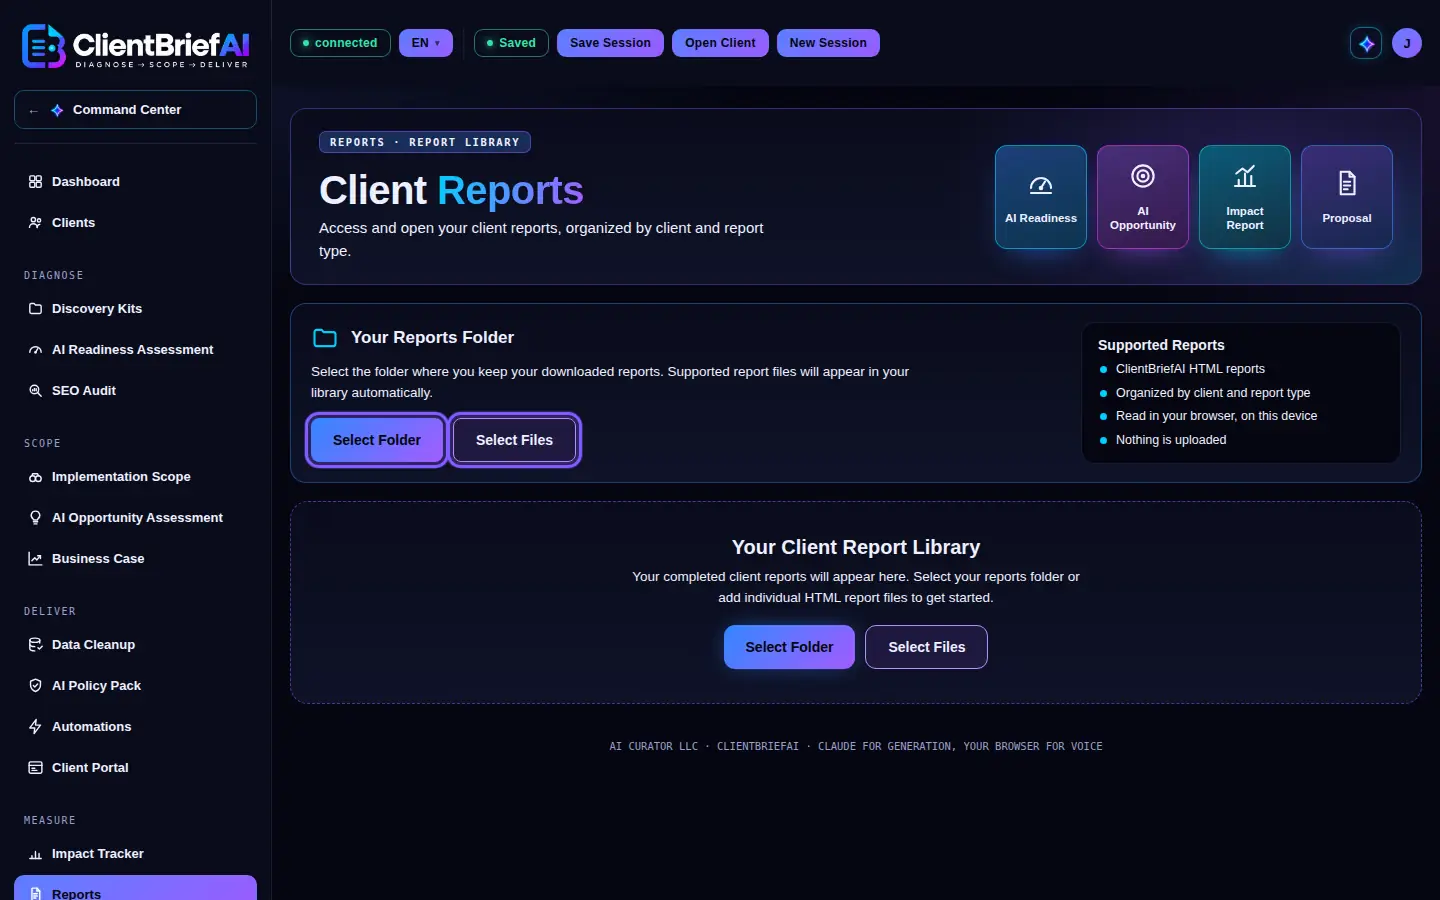
Point it at the folder where you keep the reports.
Resources
AI Tool Library
The AI Tool Library is a curated list of vetted AI tools, organized by industry and use case. The reports suggest platforms from it.
-
Search and filter
Search by tool name, pick an industry, and choose a tool type: Assistant (human reviews before use) or Agent (acts on its own). Under Explore Tools by Category, open a category to see its tools.
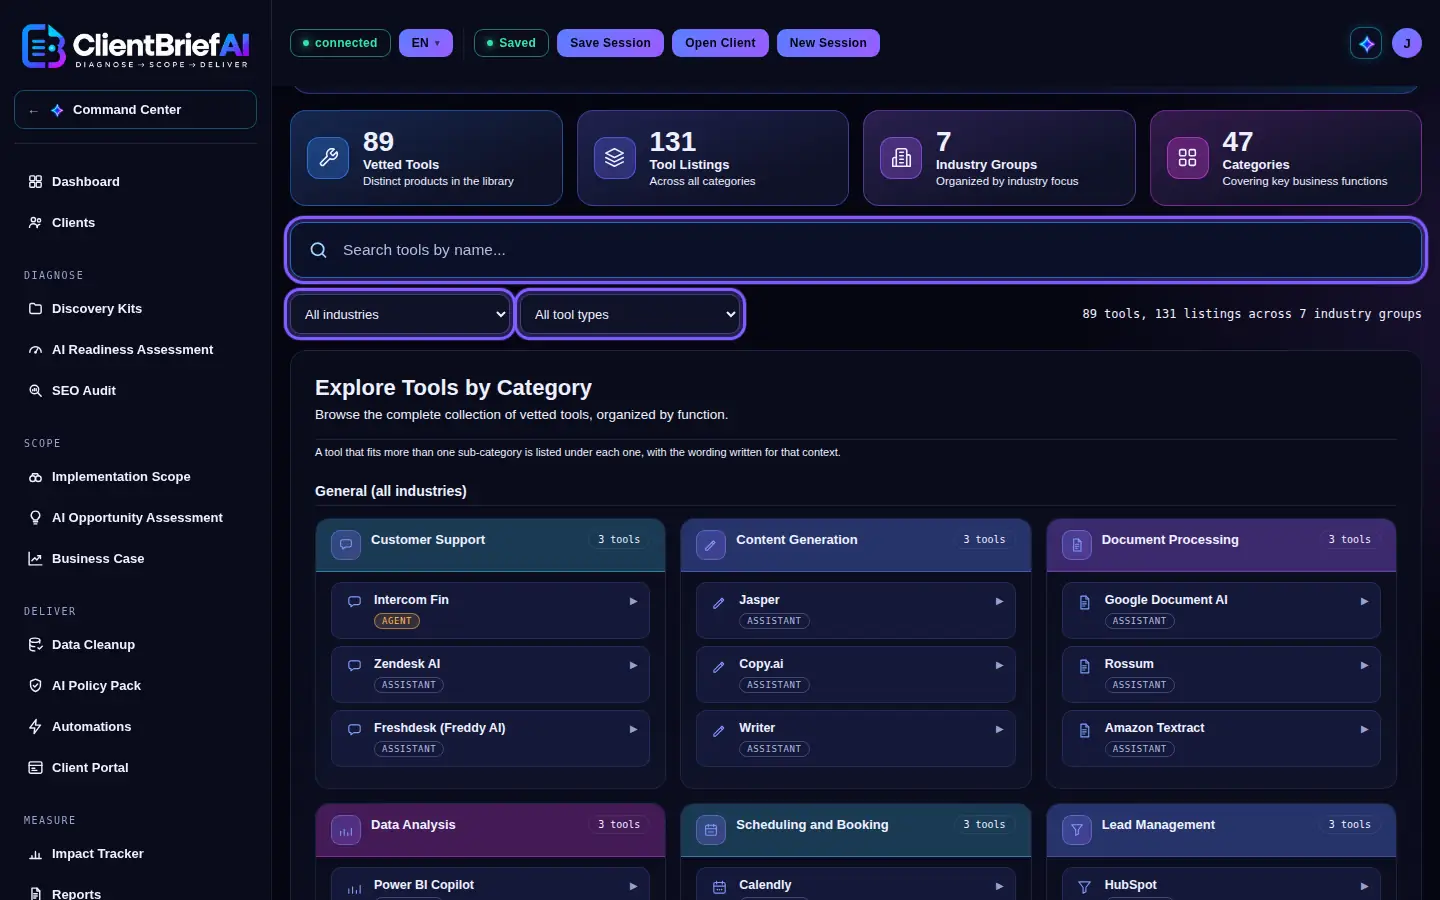
Filter by industry and by Assistant or Agent.
Support
Privacy Notice, Help & Guide and Send Feedback
Help & Guide is under Resources; Privacy Notice and Send Feedback are under Support. All three open outside the app.
-
Open them from the sidebar
Privacy Notice opens AI Curator's privacy notice in a new tab. Help & Guide opens this guide. Send Feedback starts an email to us.
Help, privacy and feedback are near the foot of the sidebar.
Good to know
- Client work is never stored on our servers. Your sessions, Discovery Kits and client roster stay on your own device.
BriefPilot
BriefPilot
BriefPilot is the assistant inside ClientBriefAI. It reads your notes and suggests. It never fills in an answer, score, status or field until you accept the suggestion.
-
Find it on every working page
BriefPilot has a panel on Client Context (suggests the empty background fields), AI Readiness Assessment (scoring suggestions), Implementation Scope (dimension scores), AI Opportunity Assessment (gaps and follow-up questions) and Impact Tracker (status and measurement updates).
Background only: it shapes the reports, never the scores. -
Accept only what you agree with
Each suggestion has Accept and Dismiss, and most have Edit. Answering a question yourself clears its suggestion. When the notes say nothing about something, BriefPilot says so instead of guessing.
Accept fills the answer; Dismiss leaves the question as it is. -
Ask BriefPilot about a report
Under a generated report, click Ask BriefPilot about this report and ask a question. It answers only from this client's scored data for that report and is read only: it never edits any score, note or report.
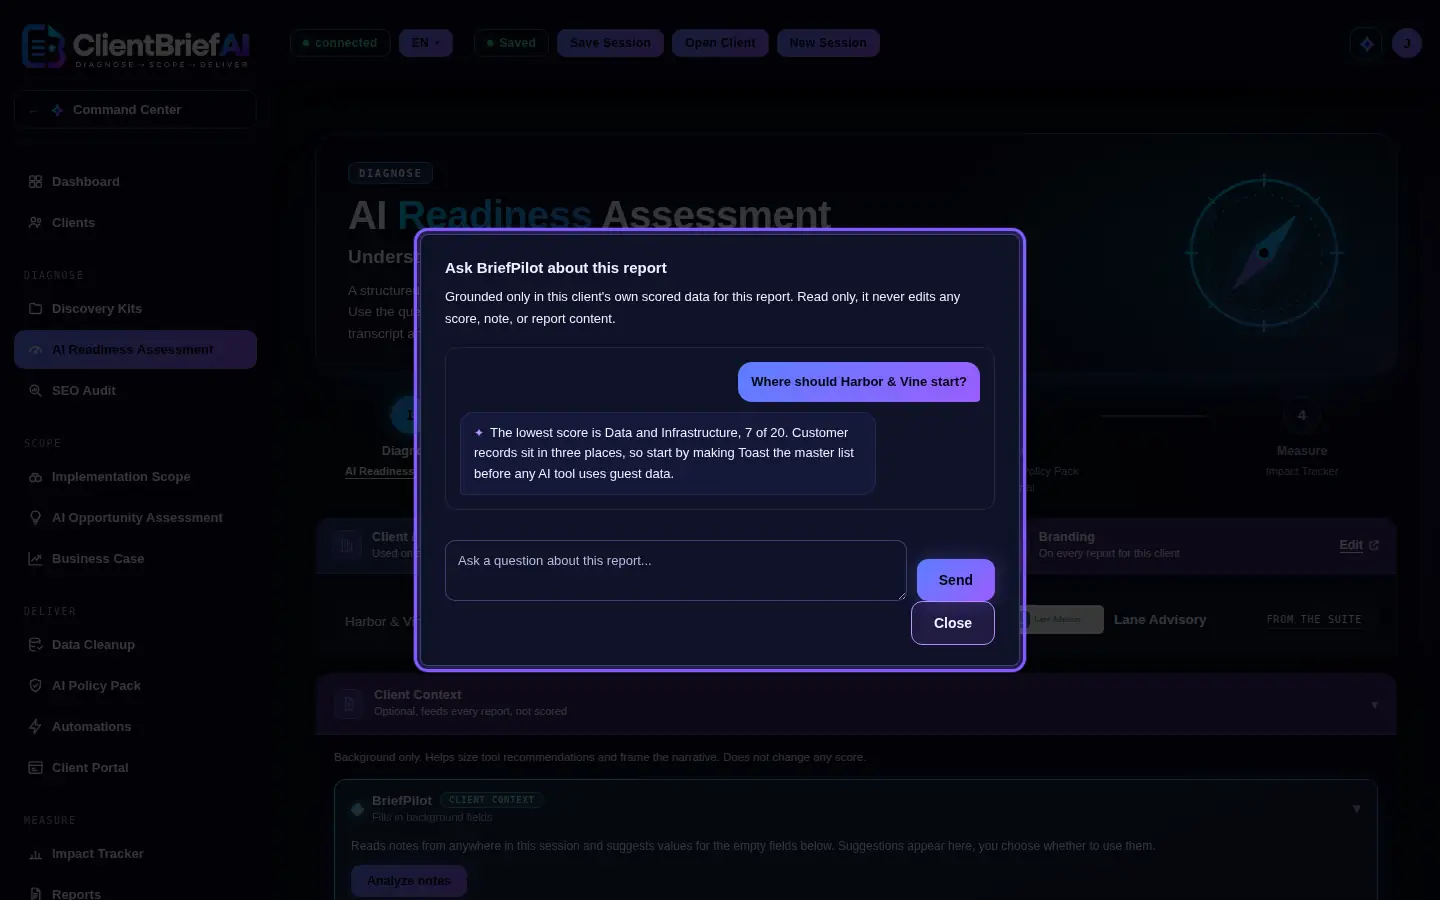
BriefPilot answers only from this client's scored data. -
Summarize the session for next time
At the foot of AI Readiness Assessment, Implementation Scope and AI Opportunity Assessment, Session Recap Summary turns the session into 3 to 5 short bullets: what was covered, what is still unscored and notable specifics. Click Summarize this session. It is internal only, never shown to the client, and saved in the session file.
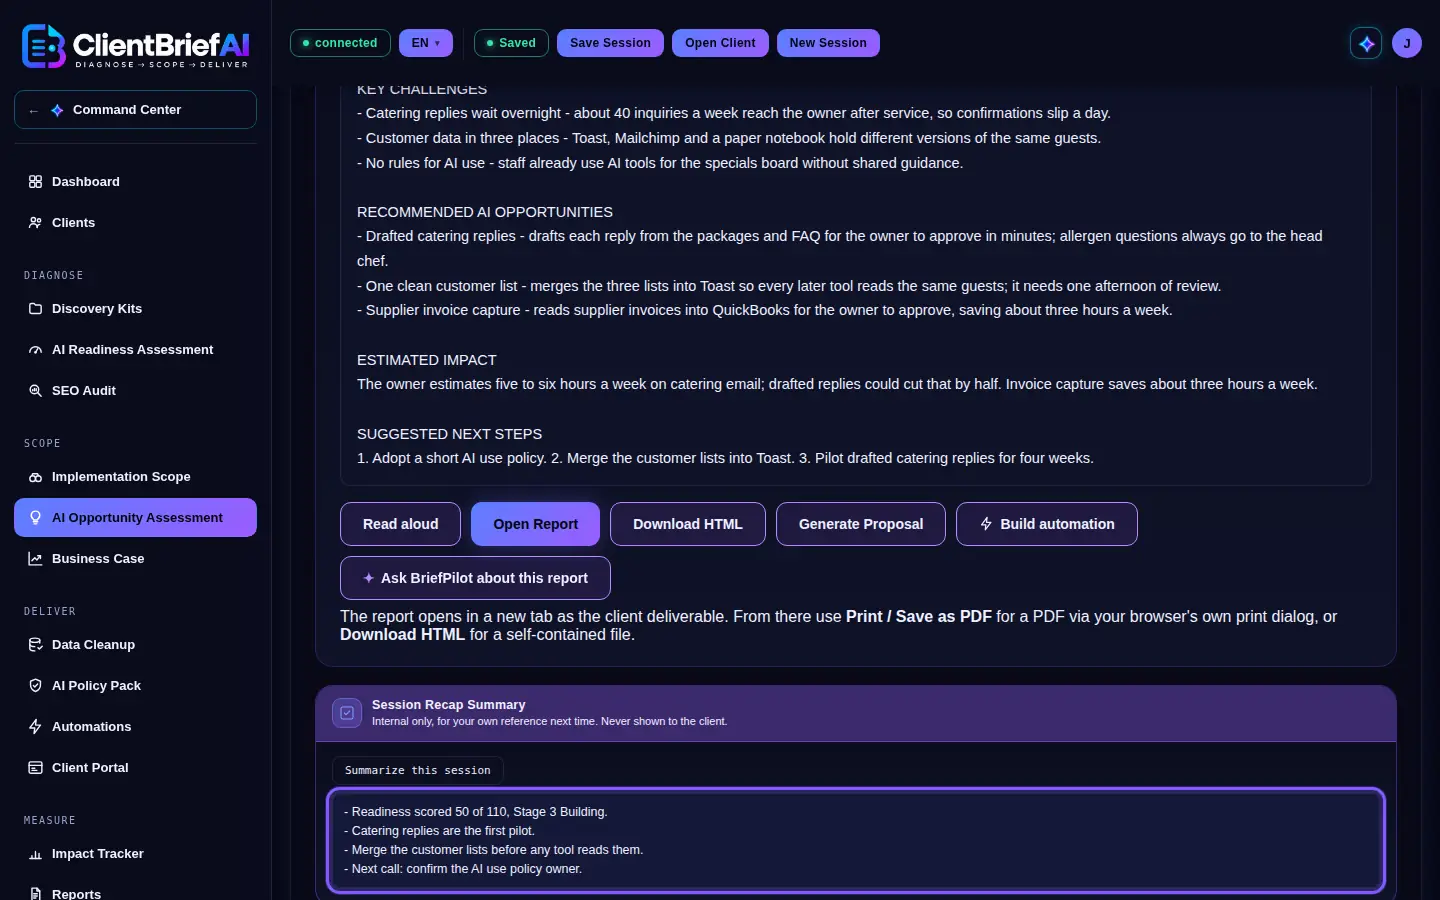
A private note for you, never part of a client report.
Good to know
- BriefPilot is included in the Free Trial, Full Practice and Full Plus. It is not part of Starter.
- Session Recap Summary is not labelled BriefPilot in the app and is on every plan.
- Meetings with the client kept by the suite (Teams or Zoom, with Microsoft 365 connected there) are read by BriefPilot when you open the client: its suggestions show at their questions, marked "From your Oct 24 meeting", and wait until you accept or dismiss them.
Sessions
Save, open and start clients
ClientBriefAI does not keep your client's work on our servers. Everything for one client is one client file in a folder you choose on your own computer, your clients folder. AdoptBriefAI, ConsultCastAI and the Command Center use the same file, so a client set up here is already there in the other apps.
-
Watch the Saved indicator
The header says Unsaved when you have changes that are not in the client file yet, and Saved when everything is. Click Save Session.
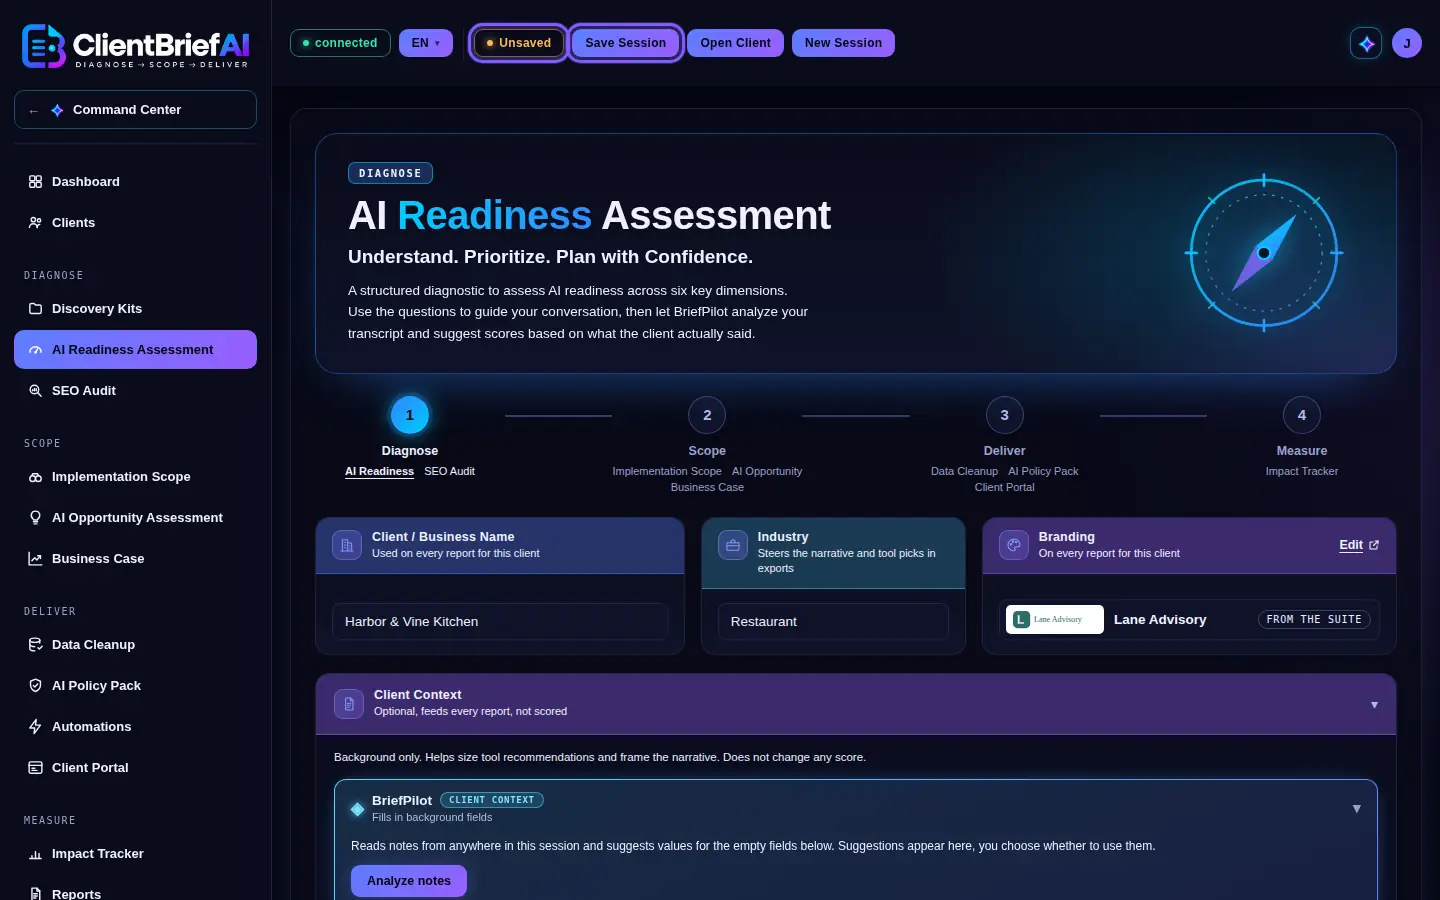
Unsaved means there are changes not in the file yet. -
Read the reminder the first time
The first save explains that the file is the only copy. Click Got it, continue.
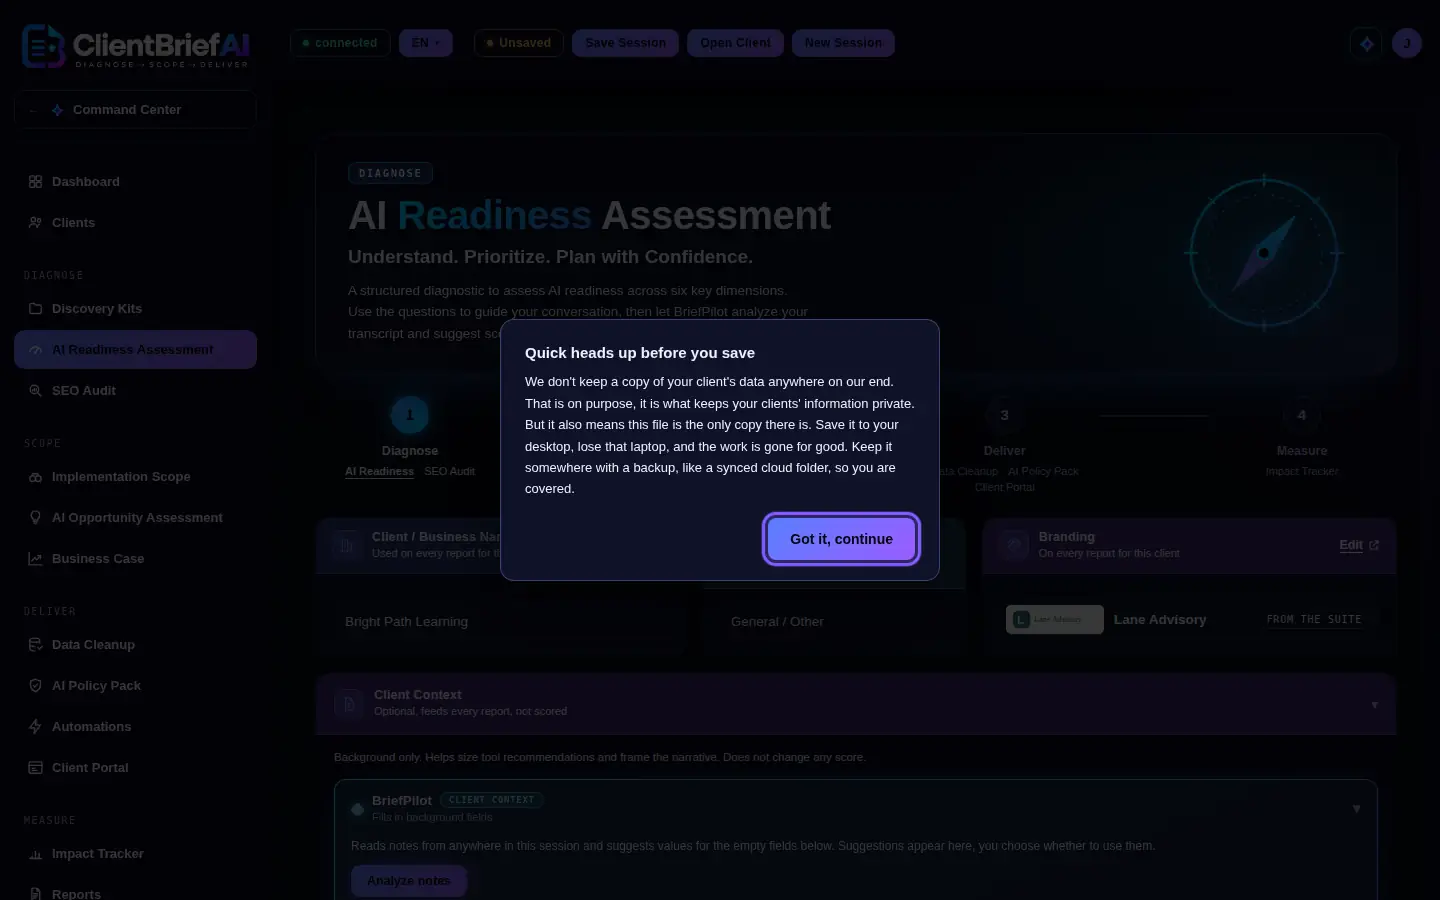
Keep the clients folder in a synced cloud folder. -
Choose your clients folder once
The first time, your browser asks for your clients folder. Choose the folder where you keep your client files, ideally a synced cloud folder, and allow access. Pick the same folder in every app of the suite. The client's file is created there, named after the client, for example harbor-and-vine-kitchen.client.json. The header then shows Saved.
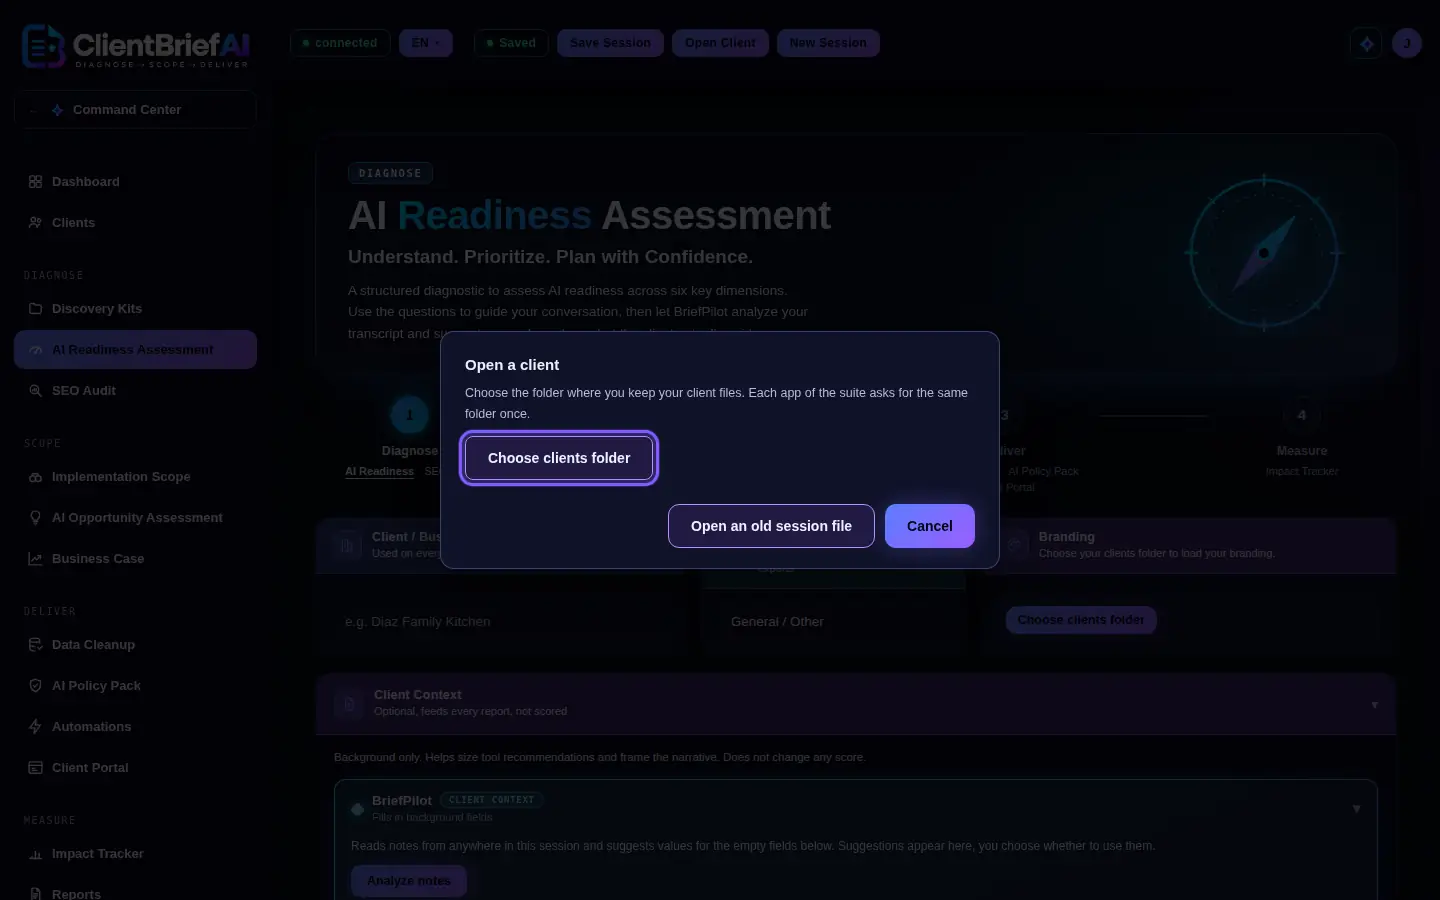
Choose the folder once; each app asks for the same one. -
It saves on its own
After that, Save Session writes to the file without asking, and ClientBriefAI also saves on its own when you change tab or after a minute without typing. If nothing changed, Save Session shows Already saved.
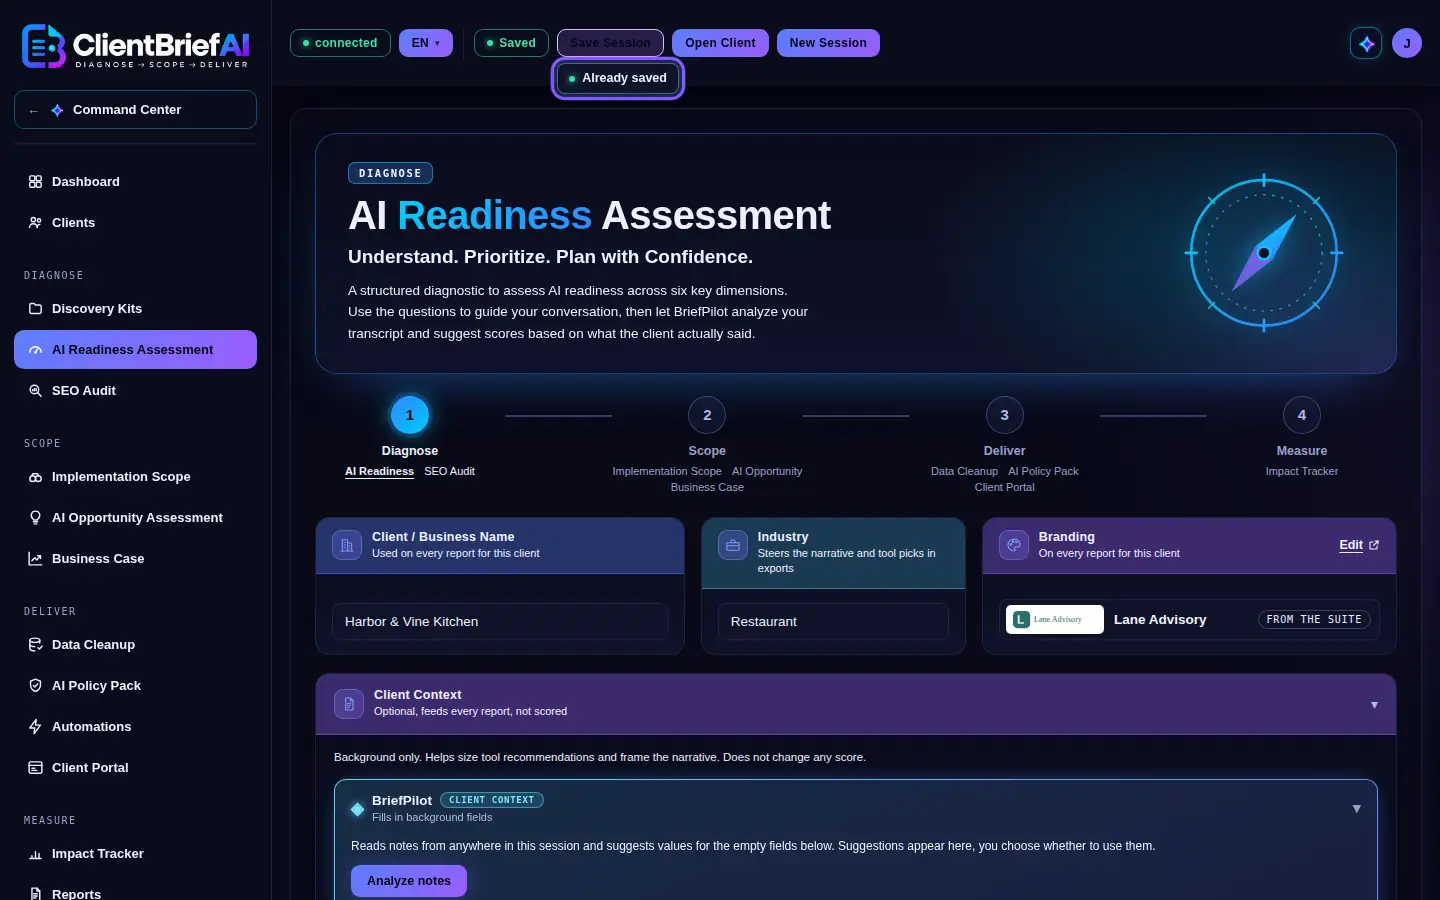
Save Session writes to the file without asking again. -
Open a client
Click Open Client. The clients in your folder are listed, newest first; search by name and click a client to open it. Everything comes back: the client details, answers, scores and reports, and anything the other apps added. Change folder picks another folder.
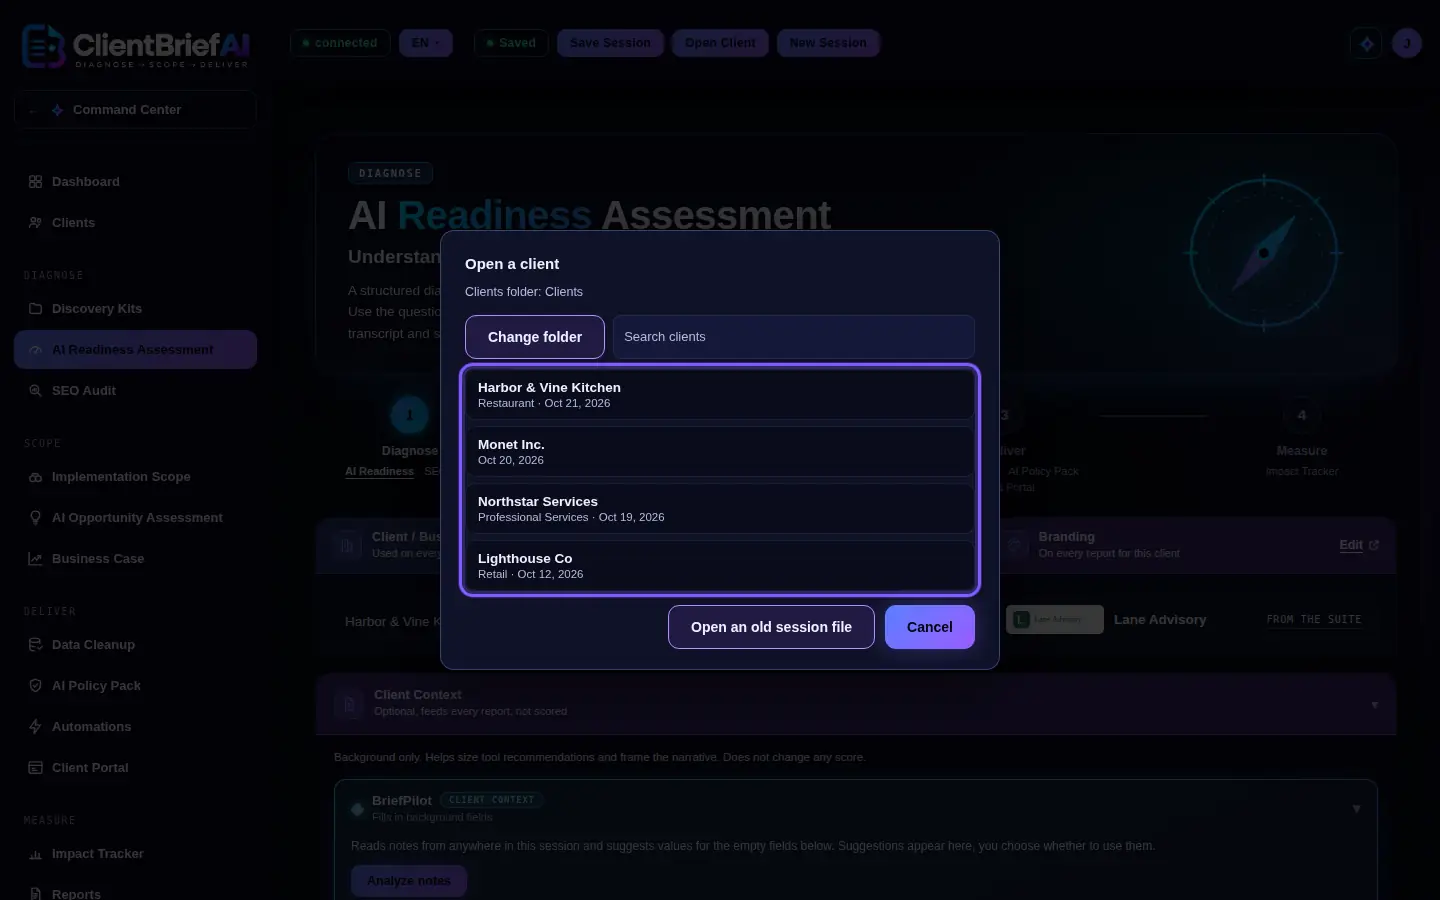
Click a client and everything comes back. -
Open an old session file
Session files saved before the clients folder still open: in Open Client, click Open an old session file. A line under the header asks you to merge it into your clients folder. Saving it creates its client file; the old file is left as it is. To bring many old files over at once, use Merge old session files on the Command Center's Clients page.
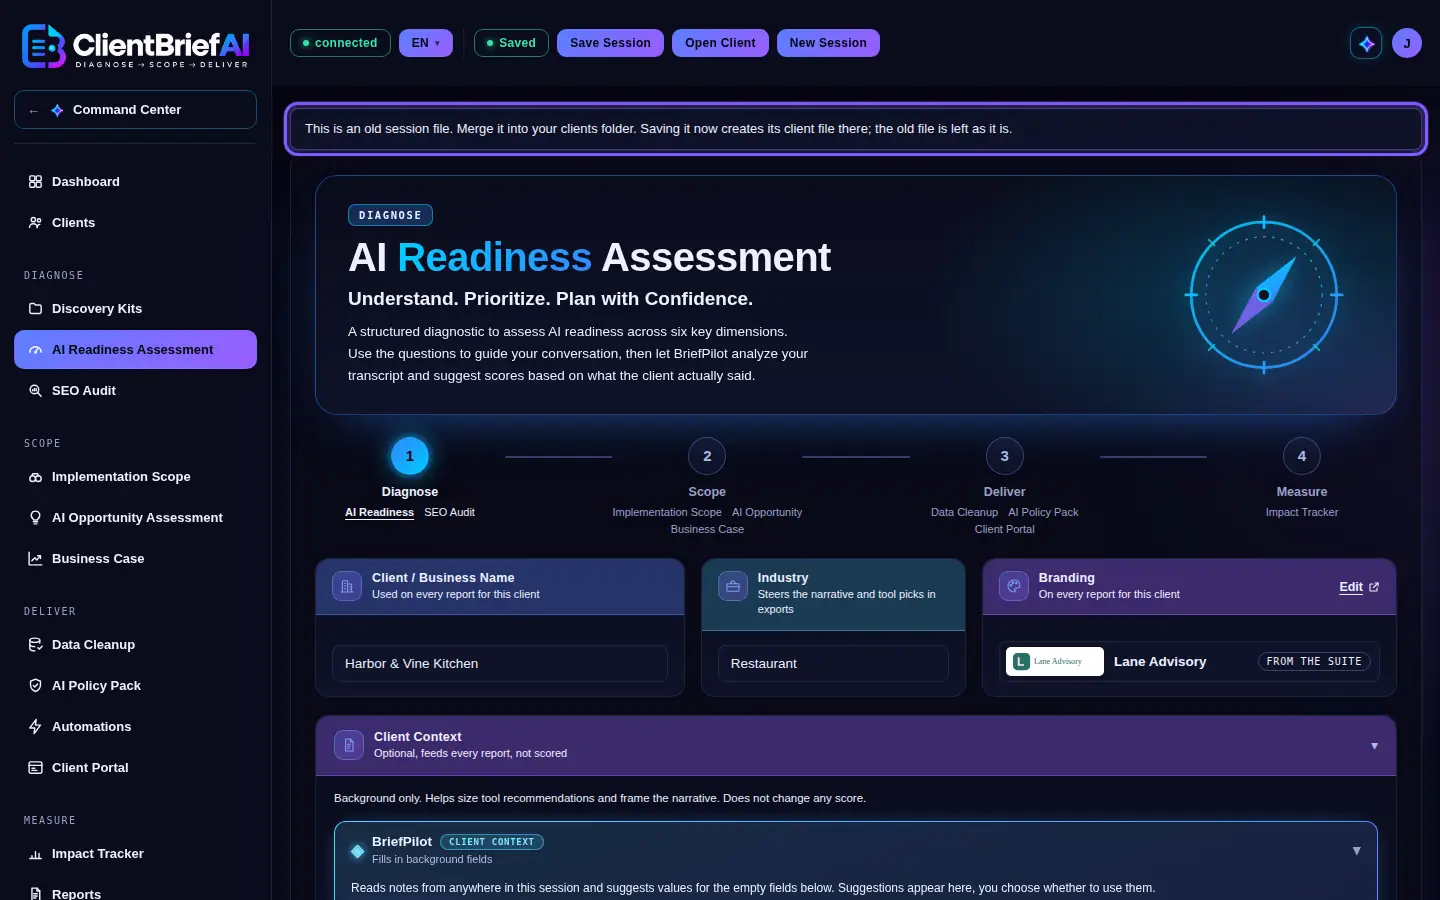
Saving an old session file creates its client file. -
Start a new client
Click New Session to clear every field for the next client, enter the name, and Save Session creates the client's file. If a client of that name is already in your folder, it asks to save into that client's file instead of making a second one. If you have unsaved changes, New Session asks first: Save, Don't save or Cancel.
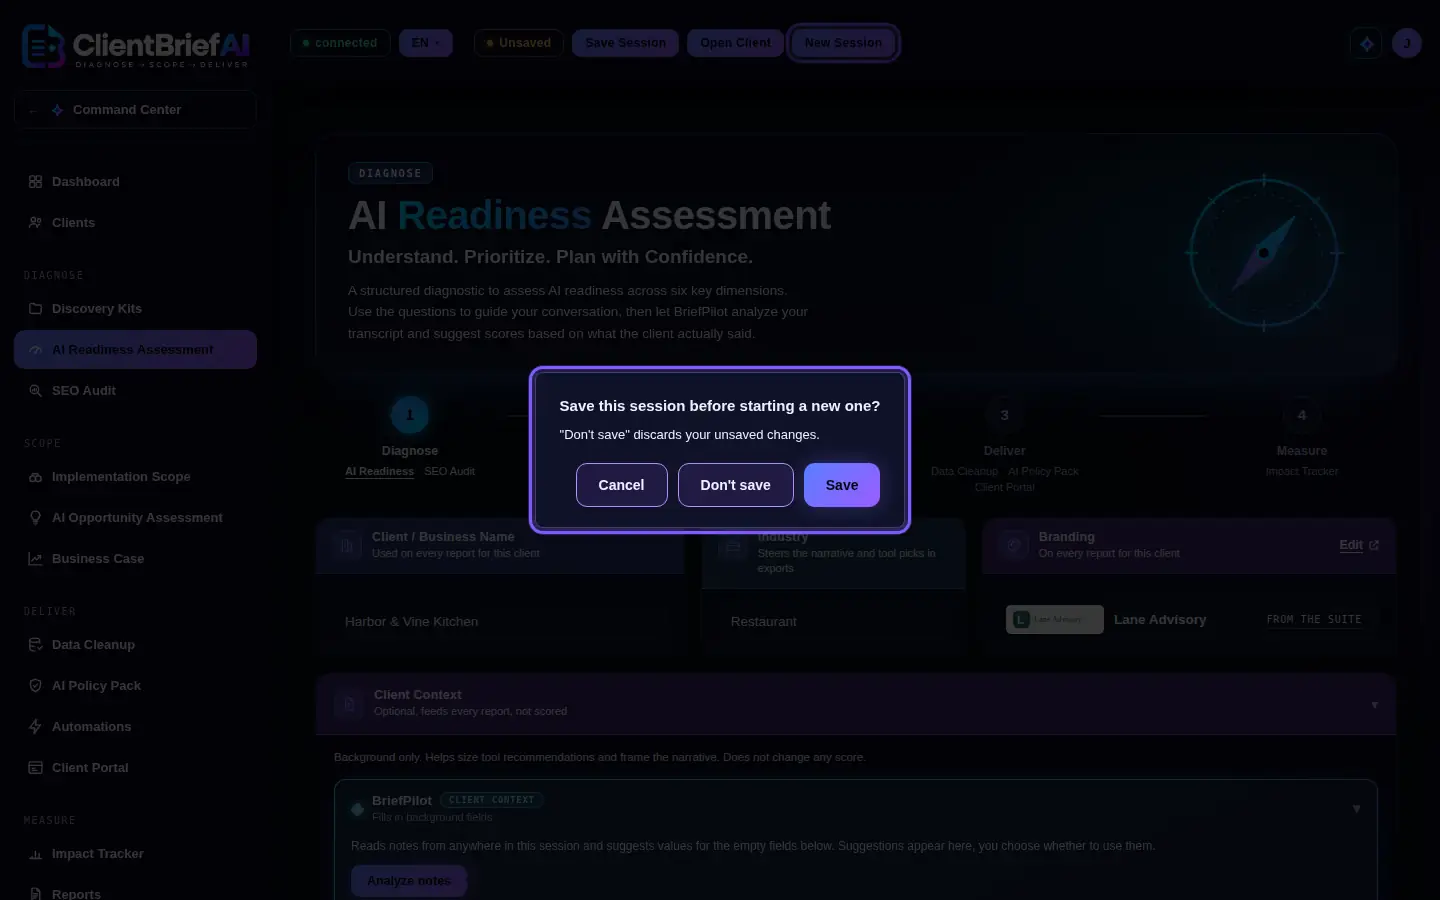
New Session clears the page for the next client.
Good to know
- Keep your clients folder in a cloud-synced folder that is backed up. The client file is the only copy: if it was only on a lost laptop, the work is gone.
- Firefox, Safari and phones cannot open a folder: there, Open Client opens one client file and Save Session downloads it.
- If you try to make a report before naming the client, the app asks Whose report is this? first.
- Every report you generate is kept in the client file, so the Command Center's Reports page can open it again.
- Old session files open as before until 21 January 2027, then read only. Merge them before then.
Integrations
HubSpot sync
ClientBriefAI can push a short summary of a client to your own HubSpot. It is one way and only when you ask: nothing is imported from HubSpot.
-
Connect HubSpot
In Profile, under HubSpot, click Connect HubSpot and approve access in the tab that opens. You can also connect from HubSpot CRM Integration on the Clients page.
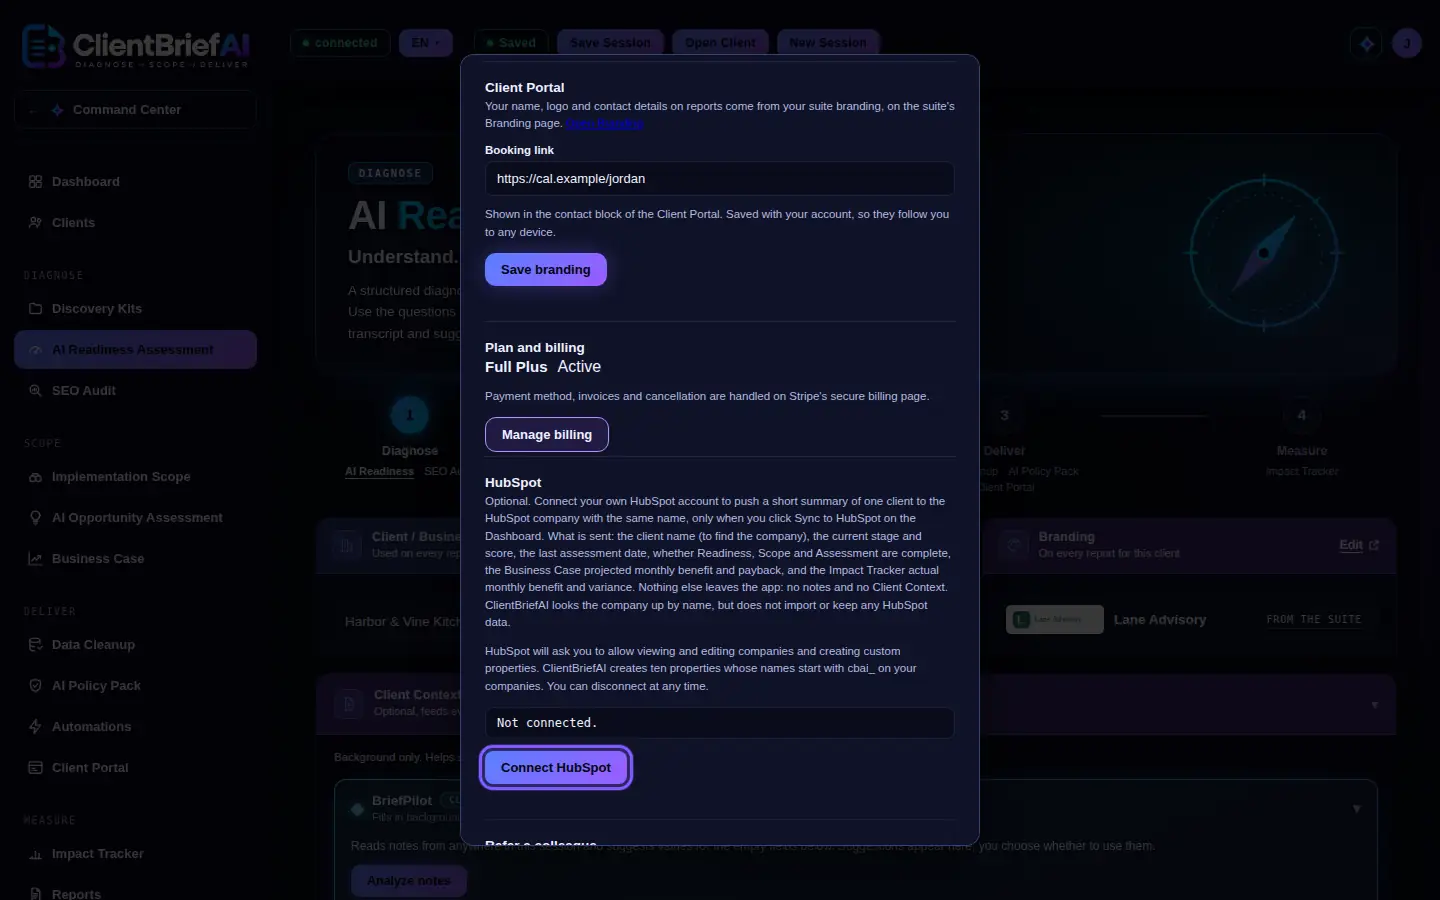
Connect once; you approve access in HubSpot's own tab. -
Sync one client
Click Sync to HubSpot on a client in the Dashboard or in Clients. The app shows exactly what will be sent before it sends it.
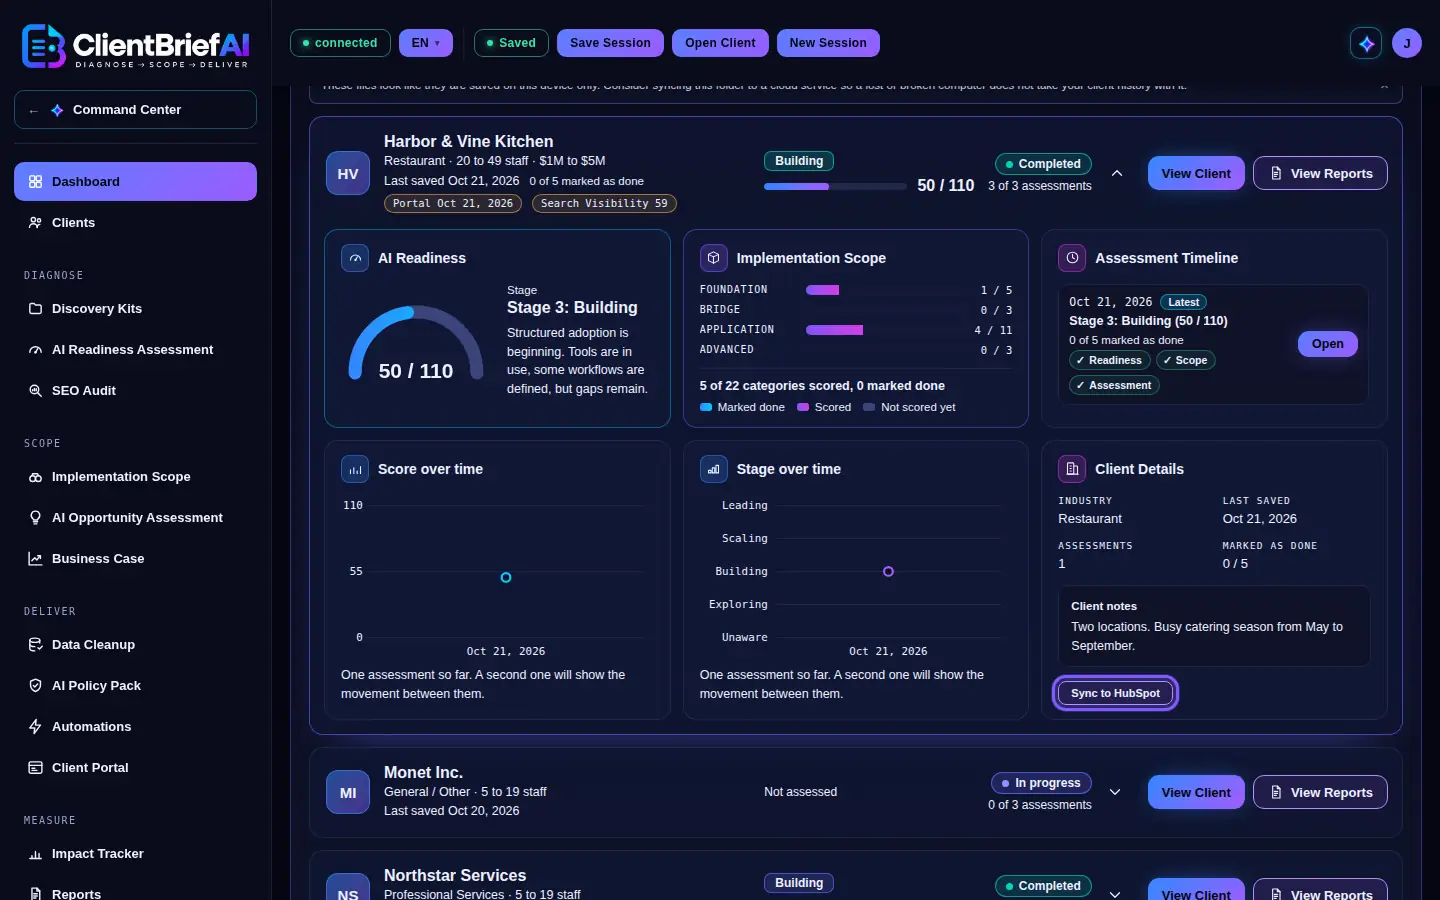
You see exactly what will be sent before it goes. -
Know what is matched and sent
The client is matched to the HubSpot company with the client file's id, saved on the company by an earlier sync, or else the same name, ignoring capitals. Sent: the stage, the score, the last assessment date and whether Readiness, Scope and Assessment are complete. No notes and no Client Context. If no company or more than one has that name, nothing is sent.
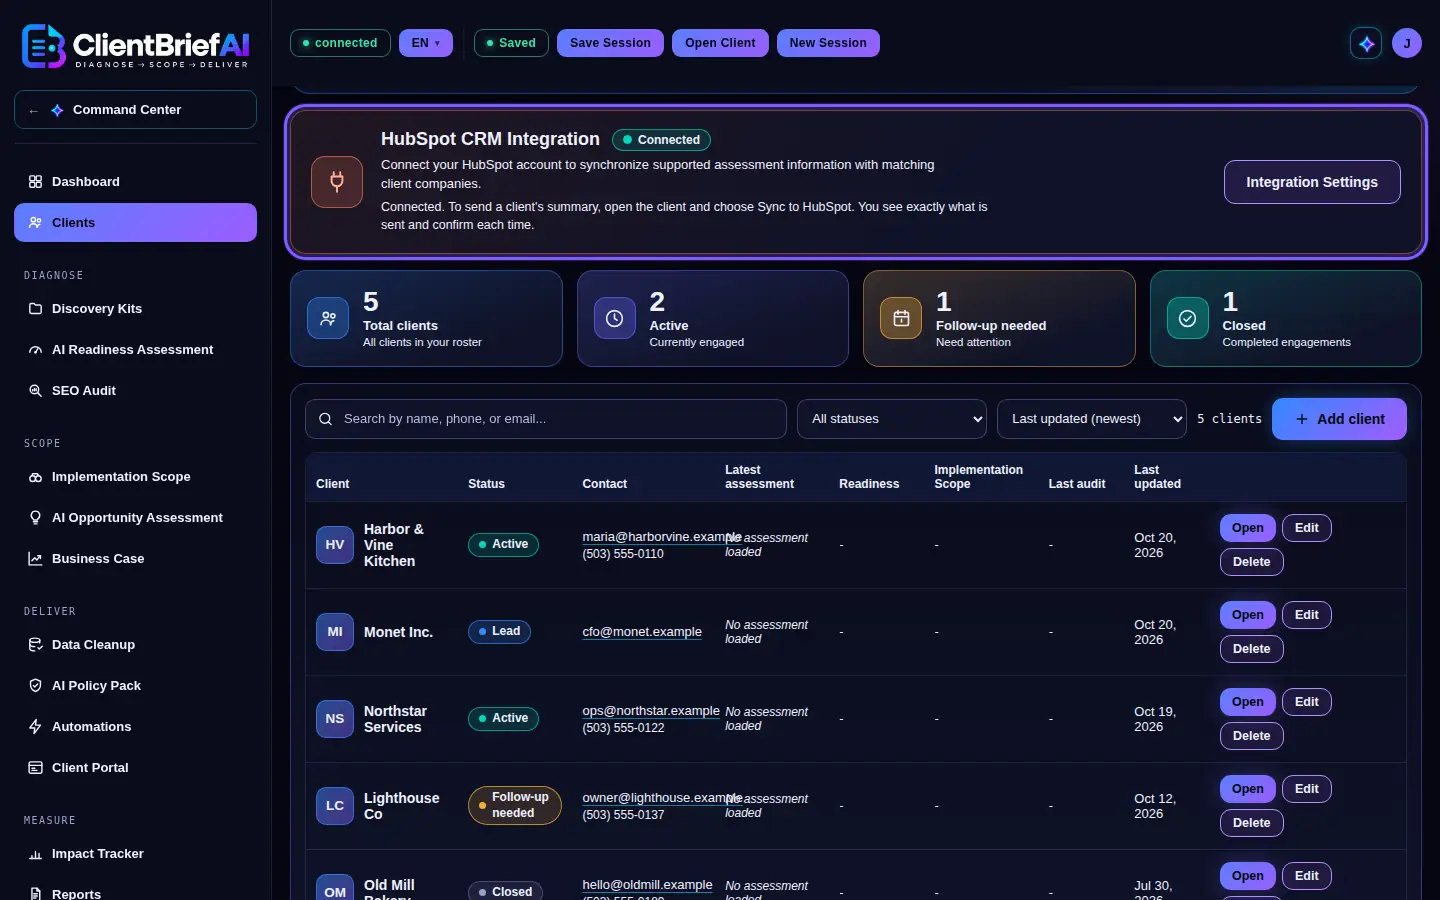
Only a short summary of the client is ever sent.
Good to know
- ClientBriefAI adds company properties whose names start with cbai_, including cbai_client_id, a random code with no client information that finds the company next time. It never creates a company. You can disconnect at any time.
Account
Plans, trial and your profile
Every new account starts with a 14-day trial with full access, except Impact Tracker. No credit card is needed.
-
Follow your trial
The sidebar shows the days left in your trial and a View plans link. When the trial ends, the app is locked, including viewing and downloading, until you choose a plan.
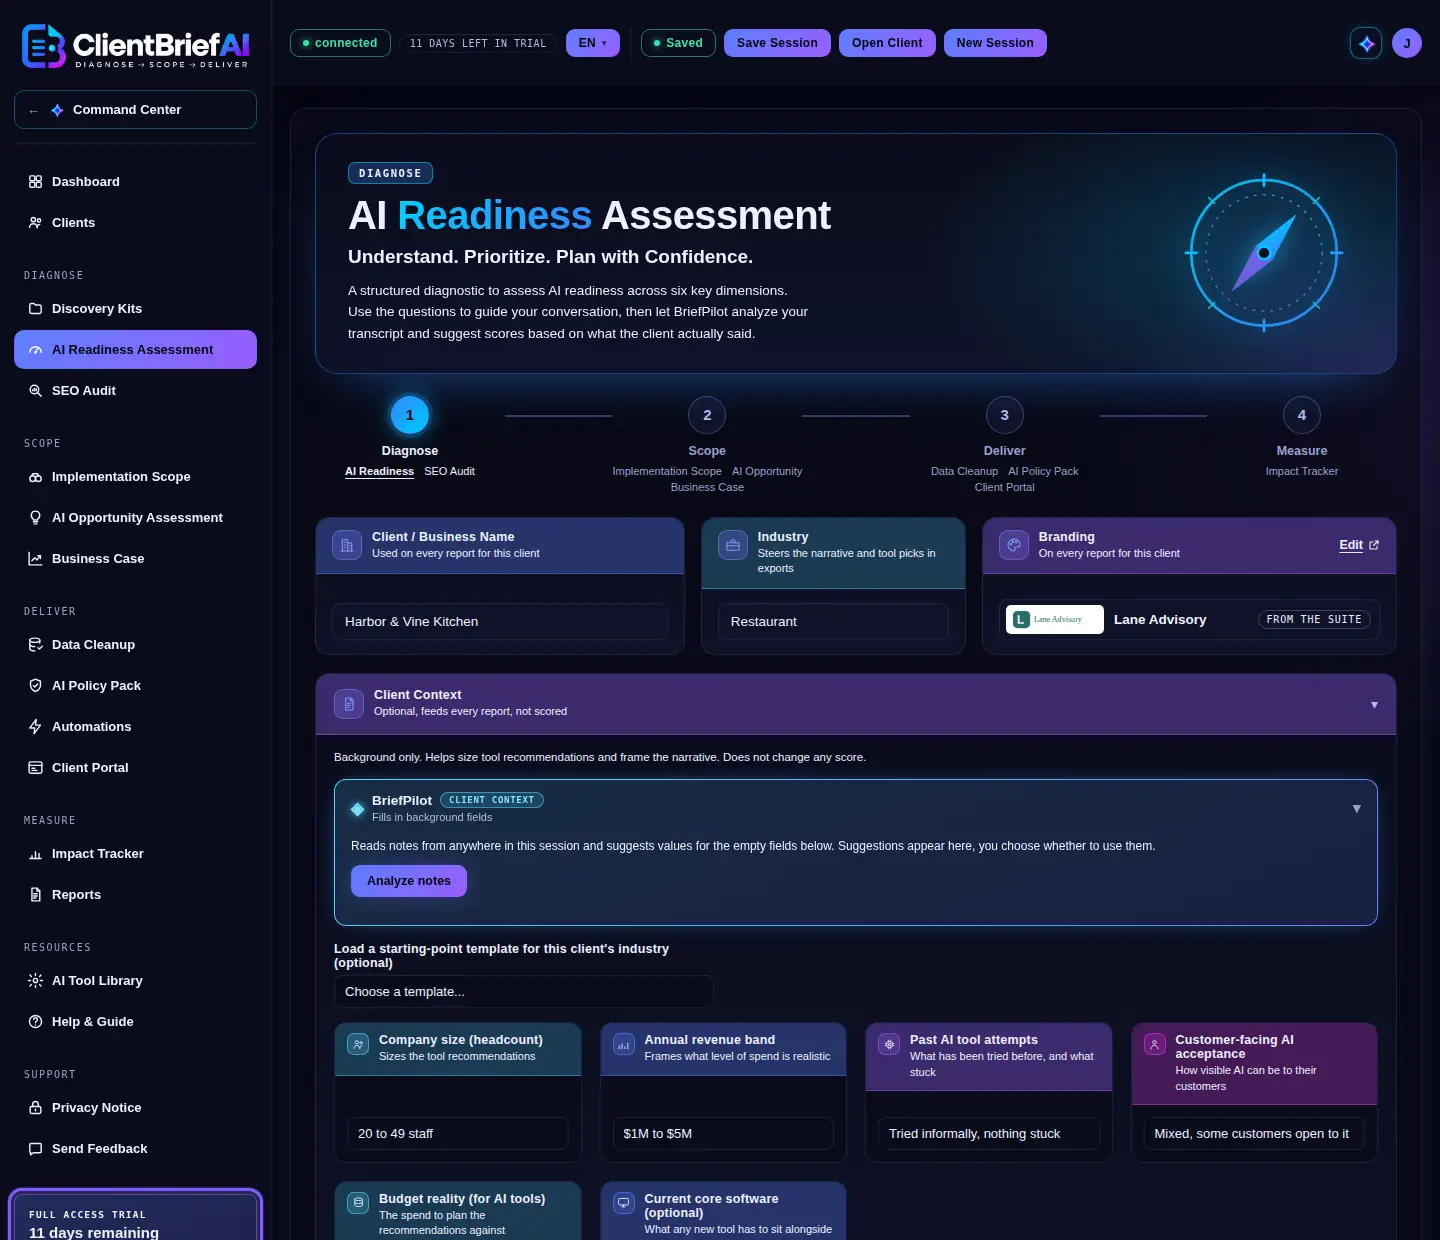
When the trial ends, the app is locked until you upgrade. -
Choose a plan
Open Upgrade plan from the account menu. Starter: the AI Readiness Assessment and its report download. Full Practice, $329 a month: everything in Starter plus the SEO Audit, Data Cleanup, Implementation Scope, the AI Opportunity Assessment, the Business Case, the AI Policy Pack, the Client Portal and Automations, with BriefPilot, and automatic SEO re-audits. Full Plus: everything in Full Practice plus Impact Tracker (with Business Case baselines) and the AI Governance Framework. The free trial includes everything in Full Practice except automatic re-audits, plus the AI Governance Framework. The price of each plan is shown on Stripe's secure checkout page before you pay.
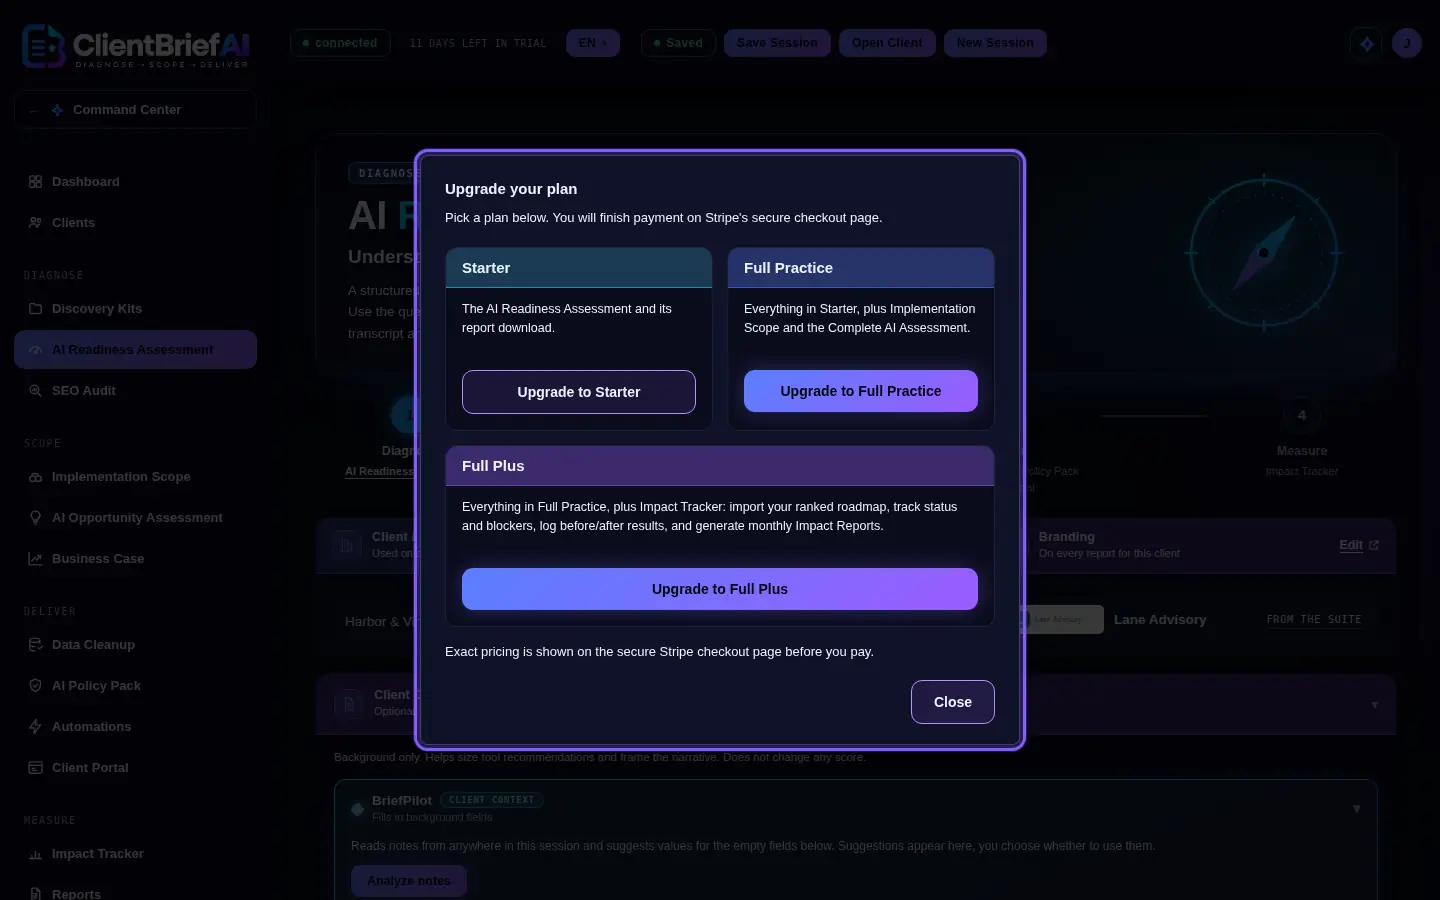
Payment is finished on Stripe's secure checkout page. -
Manage billing or cancel
Choose Manage billing in the account menu to change your payment method, see invoices or cancel on Stripe's secure billing page. When you cancel, you keep access until the end of the period you paid for.
Profile and billing live in the account menu. -
Check your Profile
Profile holds your email (with a confirmation link for a new address), your password, Report branding (company name and contact line on your reports, plus a Contact email for clients, Phone and Booking link shown in the contact block of the Client Portal), Plan and billing, HubSpot and Refer a colleague. Report branding is saved with your account, so it follows you to any device.
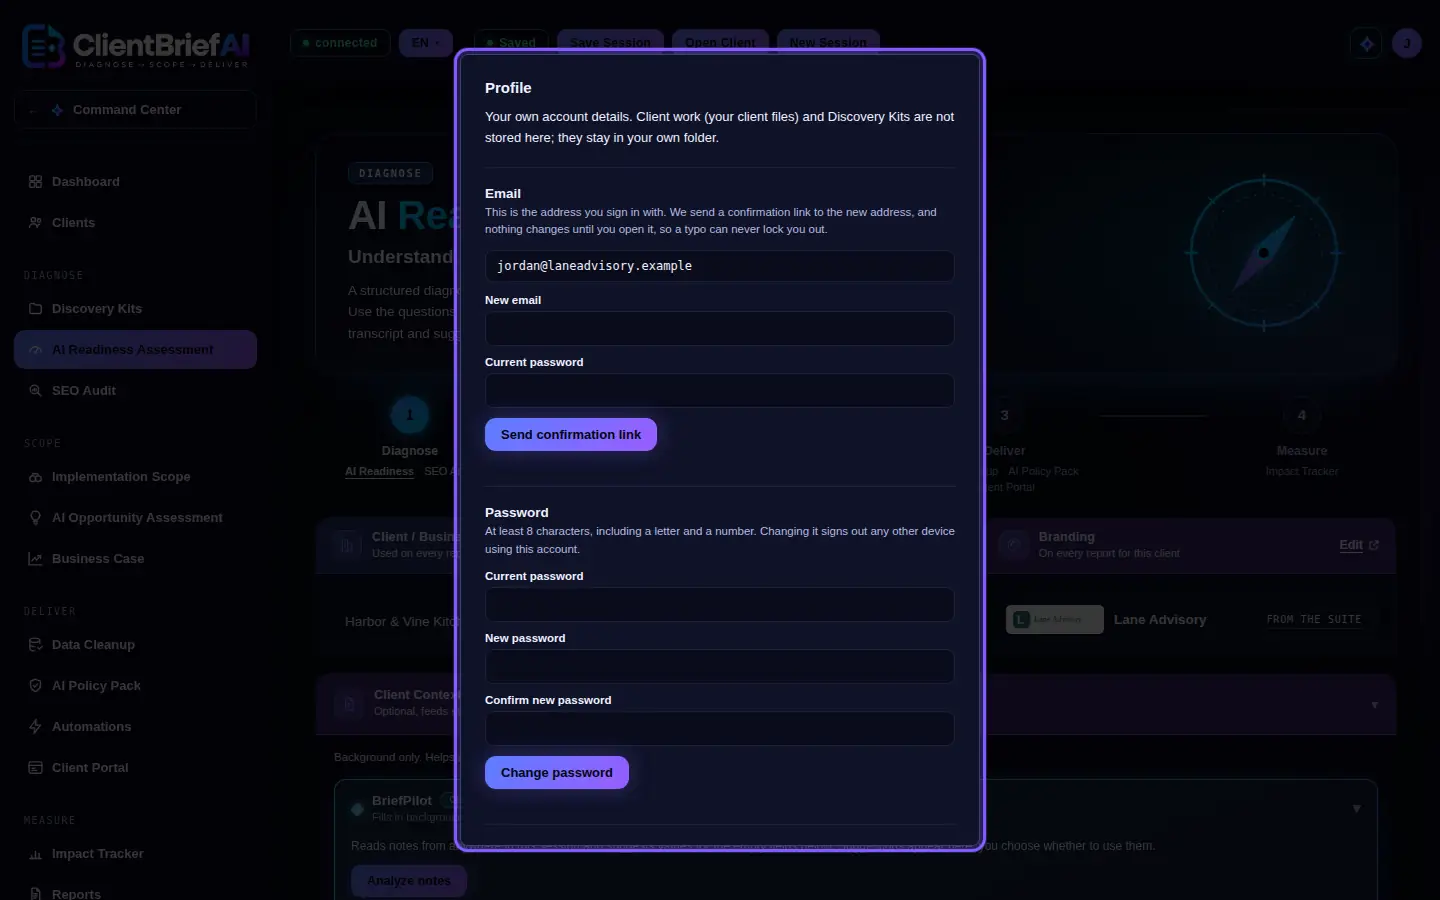
Profile holds your sign-in and what reports show about you.
Good to know
- If you hold the AI Curator Consulting Suite plan, ClientBriefAI gives you everything, including Impact Tracker.
- Your hourly rate is kept with your account from the proposal window, not in Profile.